125th Anniversary Display
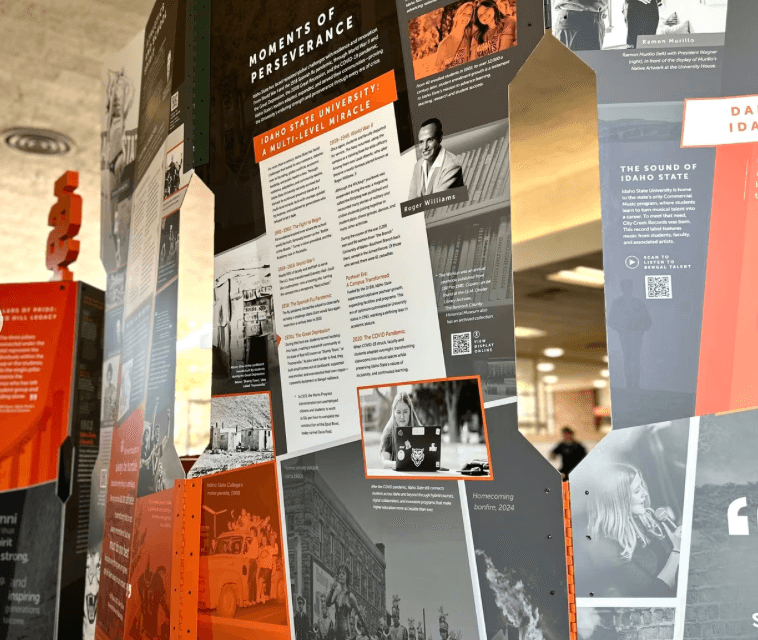
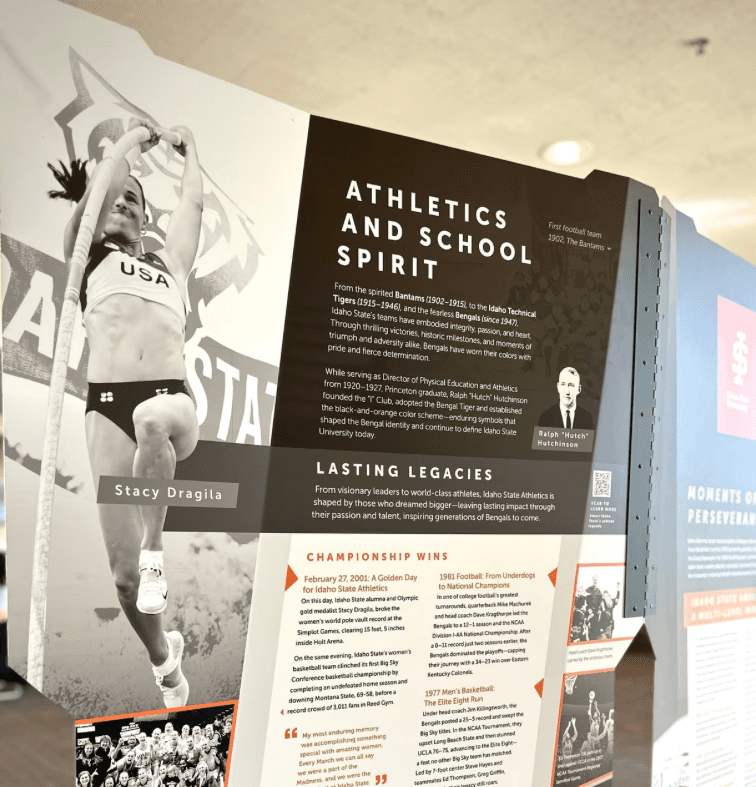
A formed aluminum custom displays wrapped in vinyl showcasing the amazing history of Idaho State University and it's 125th year in higher education.
Project Details
Project Breakdown
Inital Contact
Iris Evans, a Graphic Designer at the Office of Marketing and Communications at ISU, reached out with a request.
An email with a RFQ (Request for Quote) to fabricate a custom display highlighting the 125th year of Idaho State University.
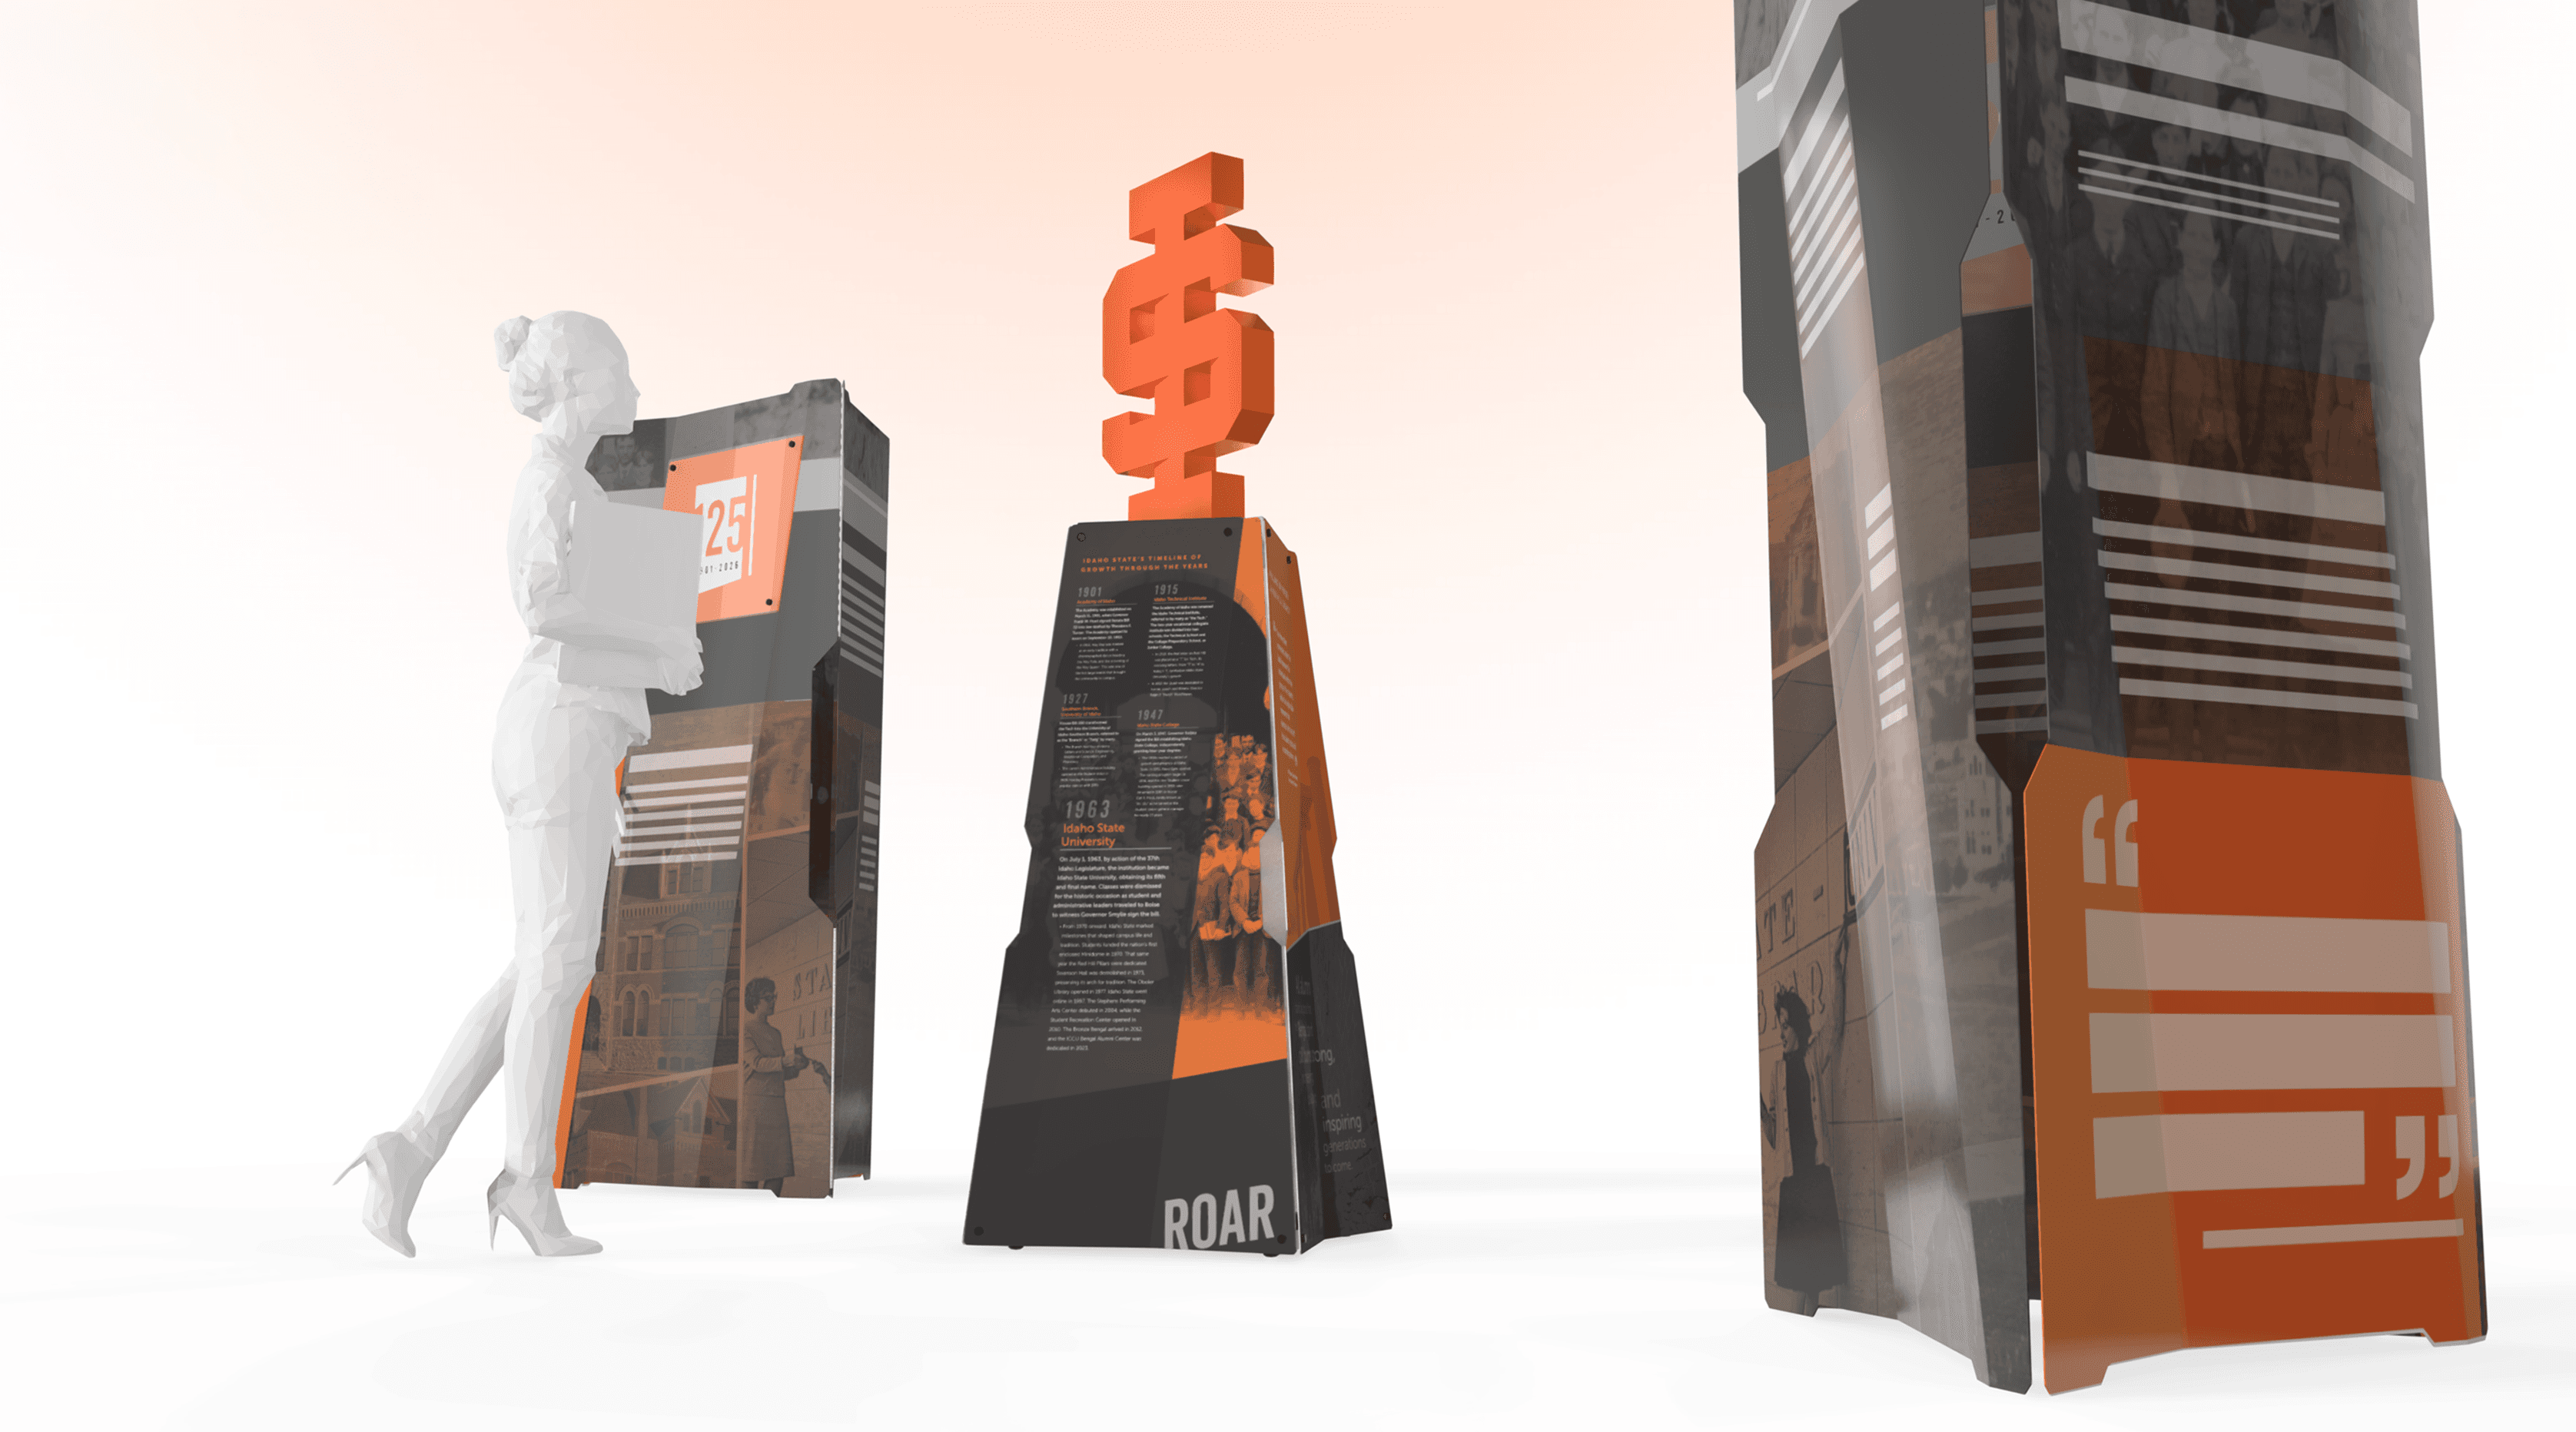
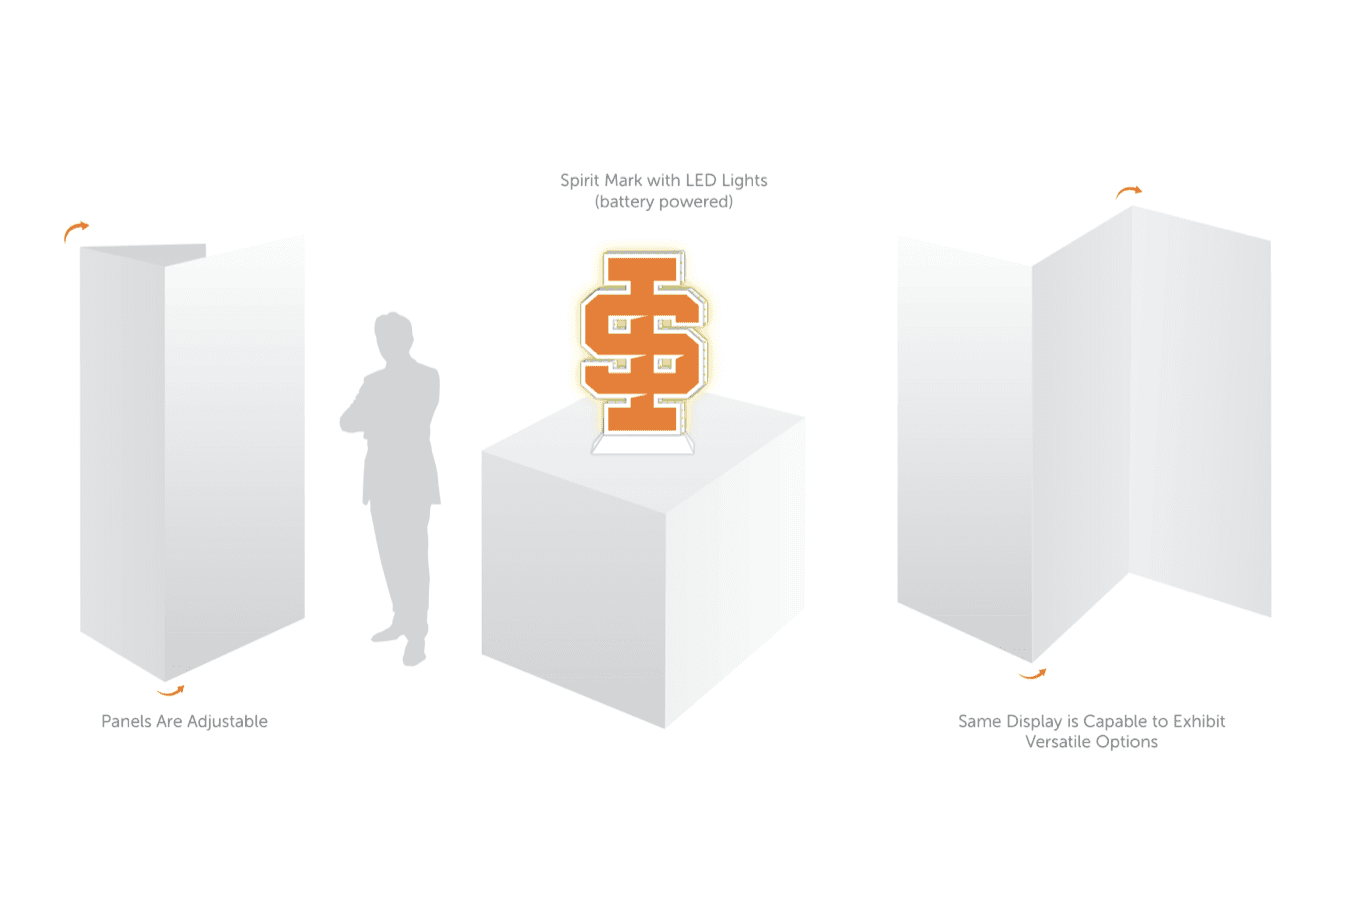
The concept features two 3 Panel Display that can be folded into a triangle or opened to create an accordion wall, and a Centerpiece Display proudly displaying ISU's Spirit Mark on a pedestal.
The Problem
With the provided concept there was no way to give her an accurate quote for fabrication...
In order to do, the concept needs to be fully finalized with scale, materials, hardware, production files, and assembly instructions all figured out for all elements of the build.
And before you're able to put all those together, we need to know what the design looks like.
So thats what I suggested.
To start with a Design and Development contract, to figure out what these displays looks like, and then develop the design for easy fabrication.
And thats what we did.
Design Criteria
Must be custom and unique.
Must be durable enough for many set up and tear down throughout the year.
Must be light weight for easy transport.
Must be easy to assemble.
Must fit in a standard van.
Must become a permanent installation at ISU once the campaign concludes.
Round 1 Design
My approach to this concept was simple. Formed .080 aluminum. So how do I make this unique.
My previous project with ISU, the Dubby Holt Display, featured a specific angle.
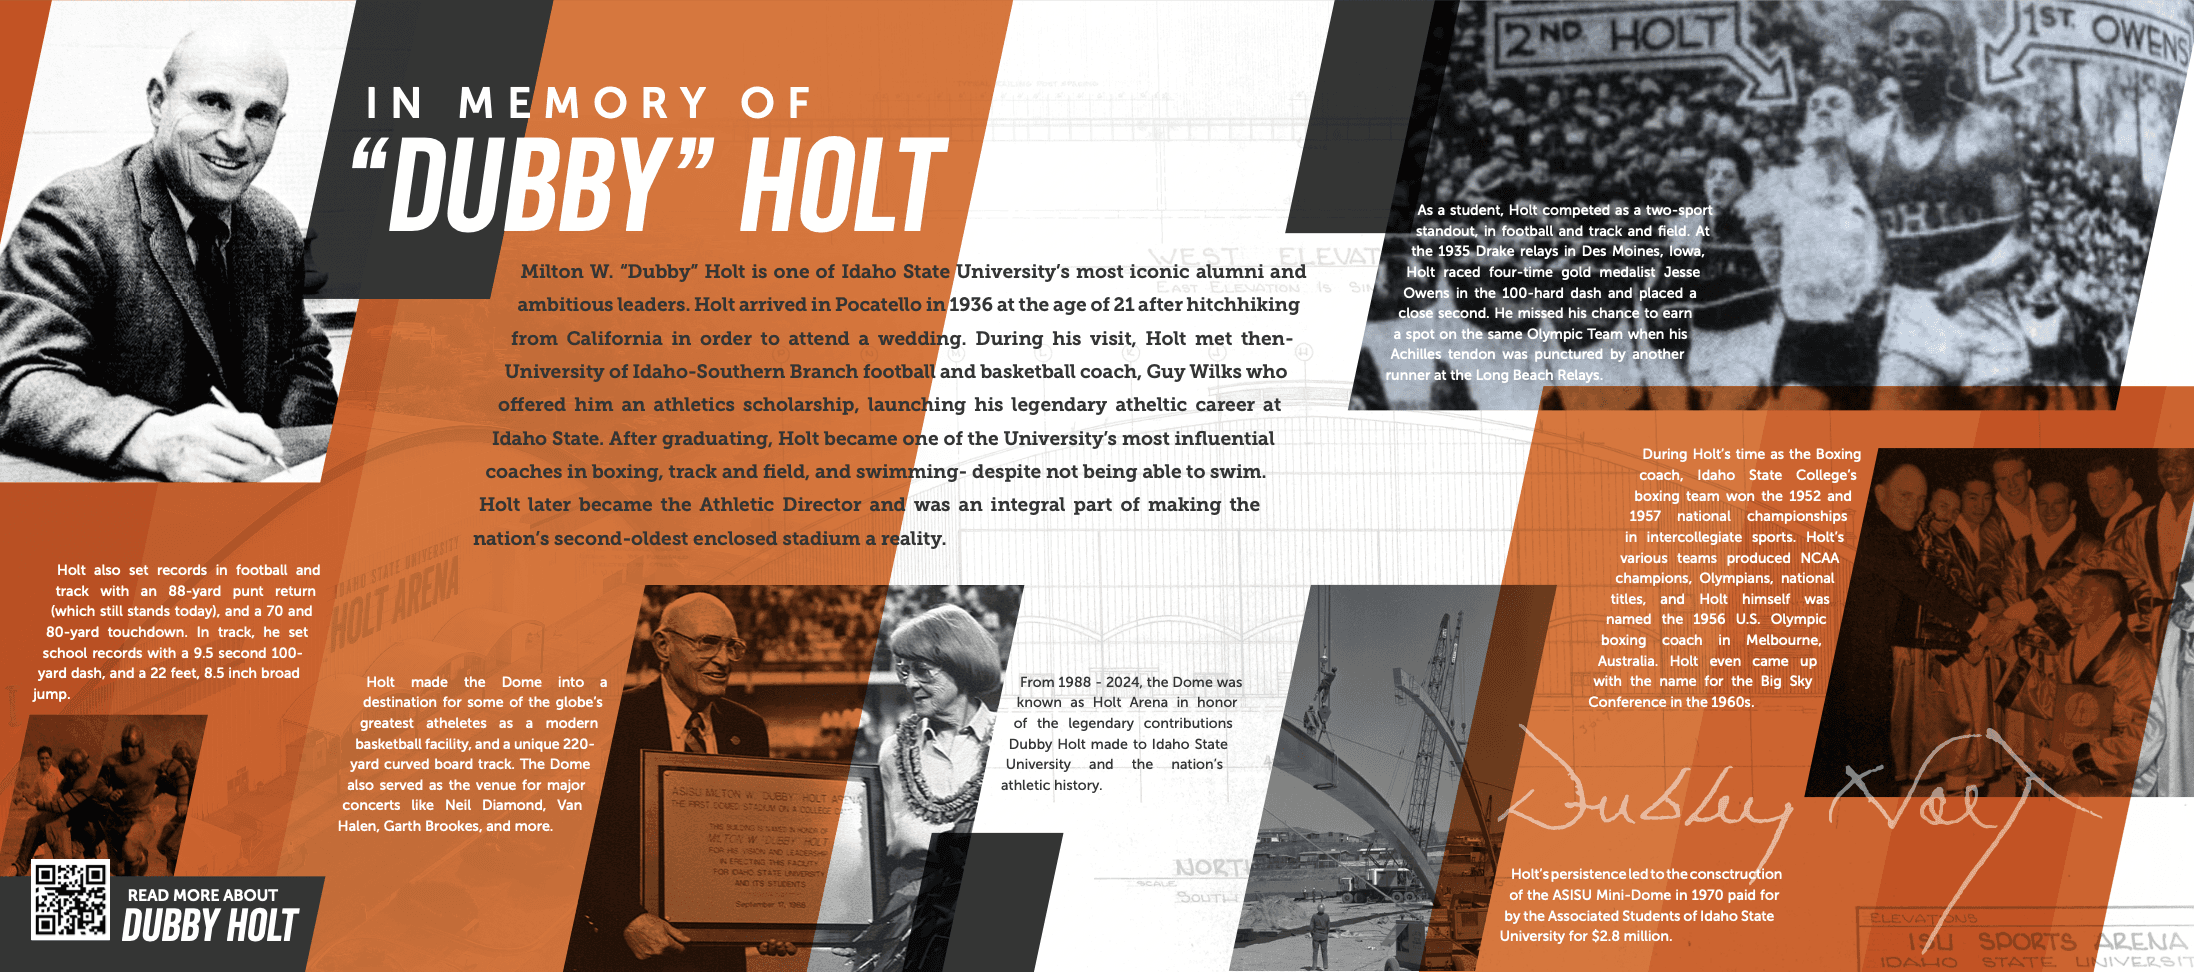
And so what if the panel was broke to match the angle and follow ISU's visual Identity?
So I modeled it.
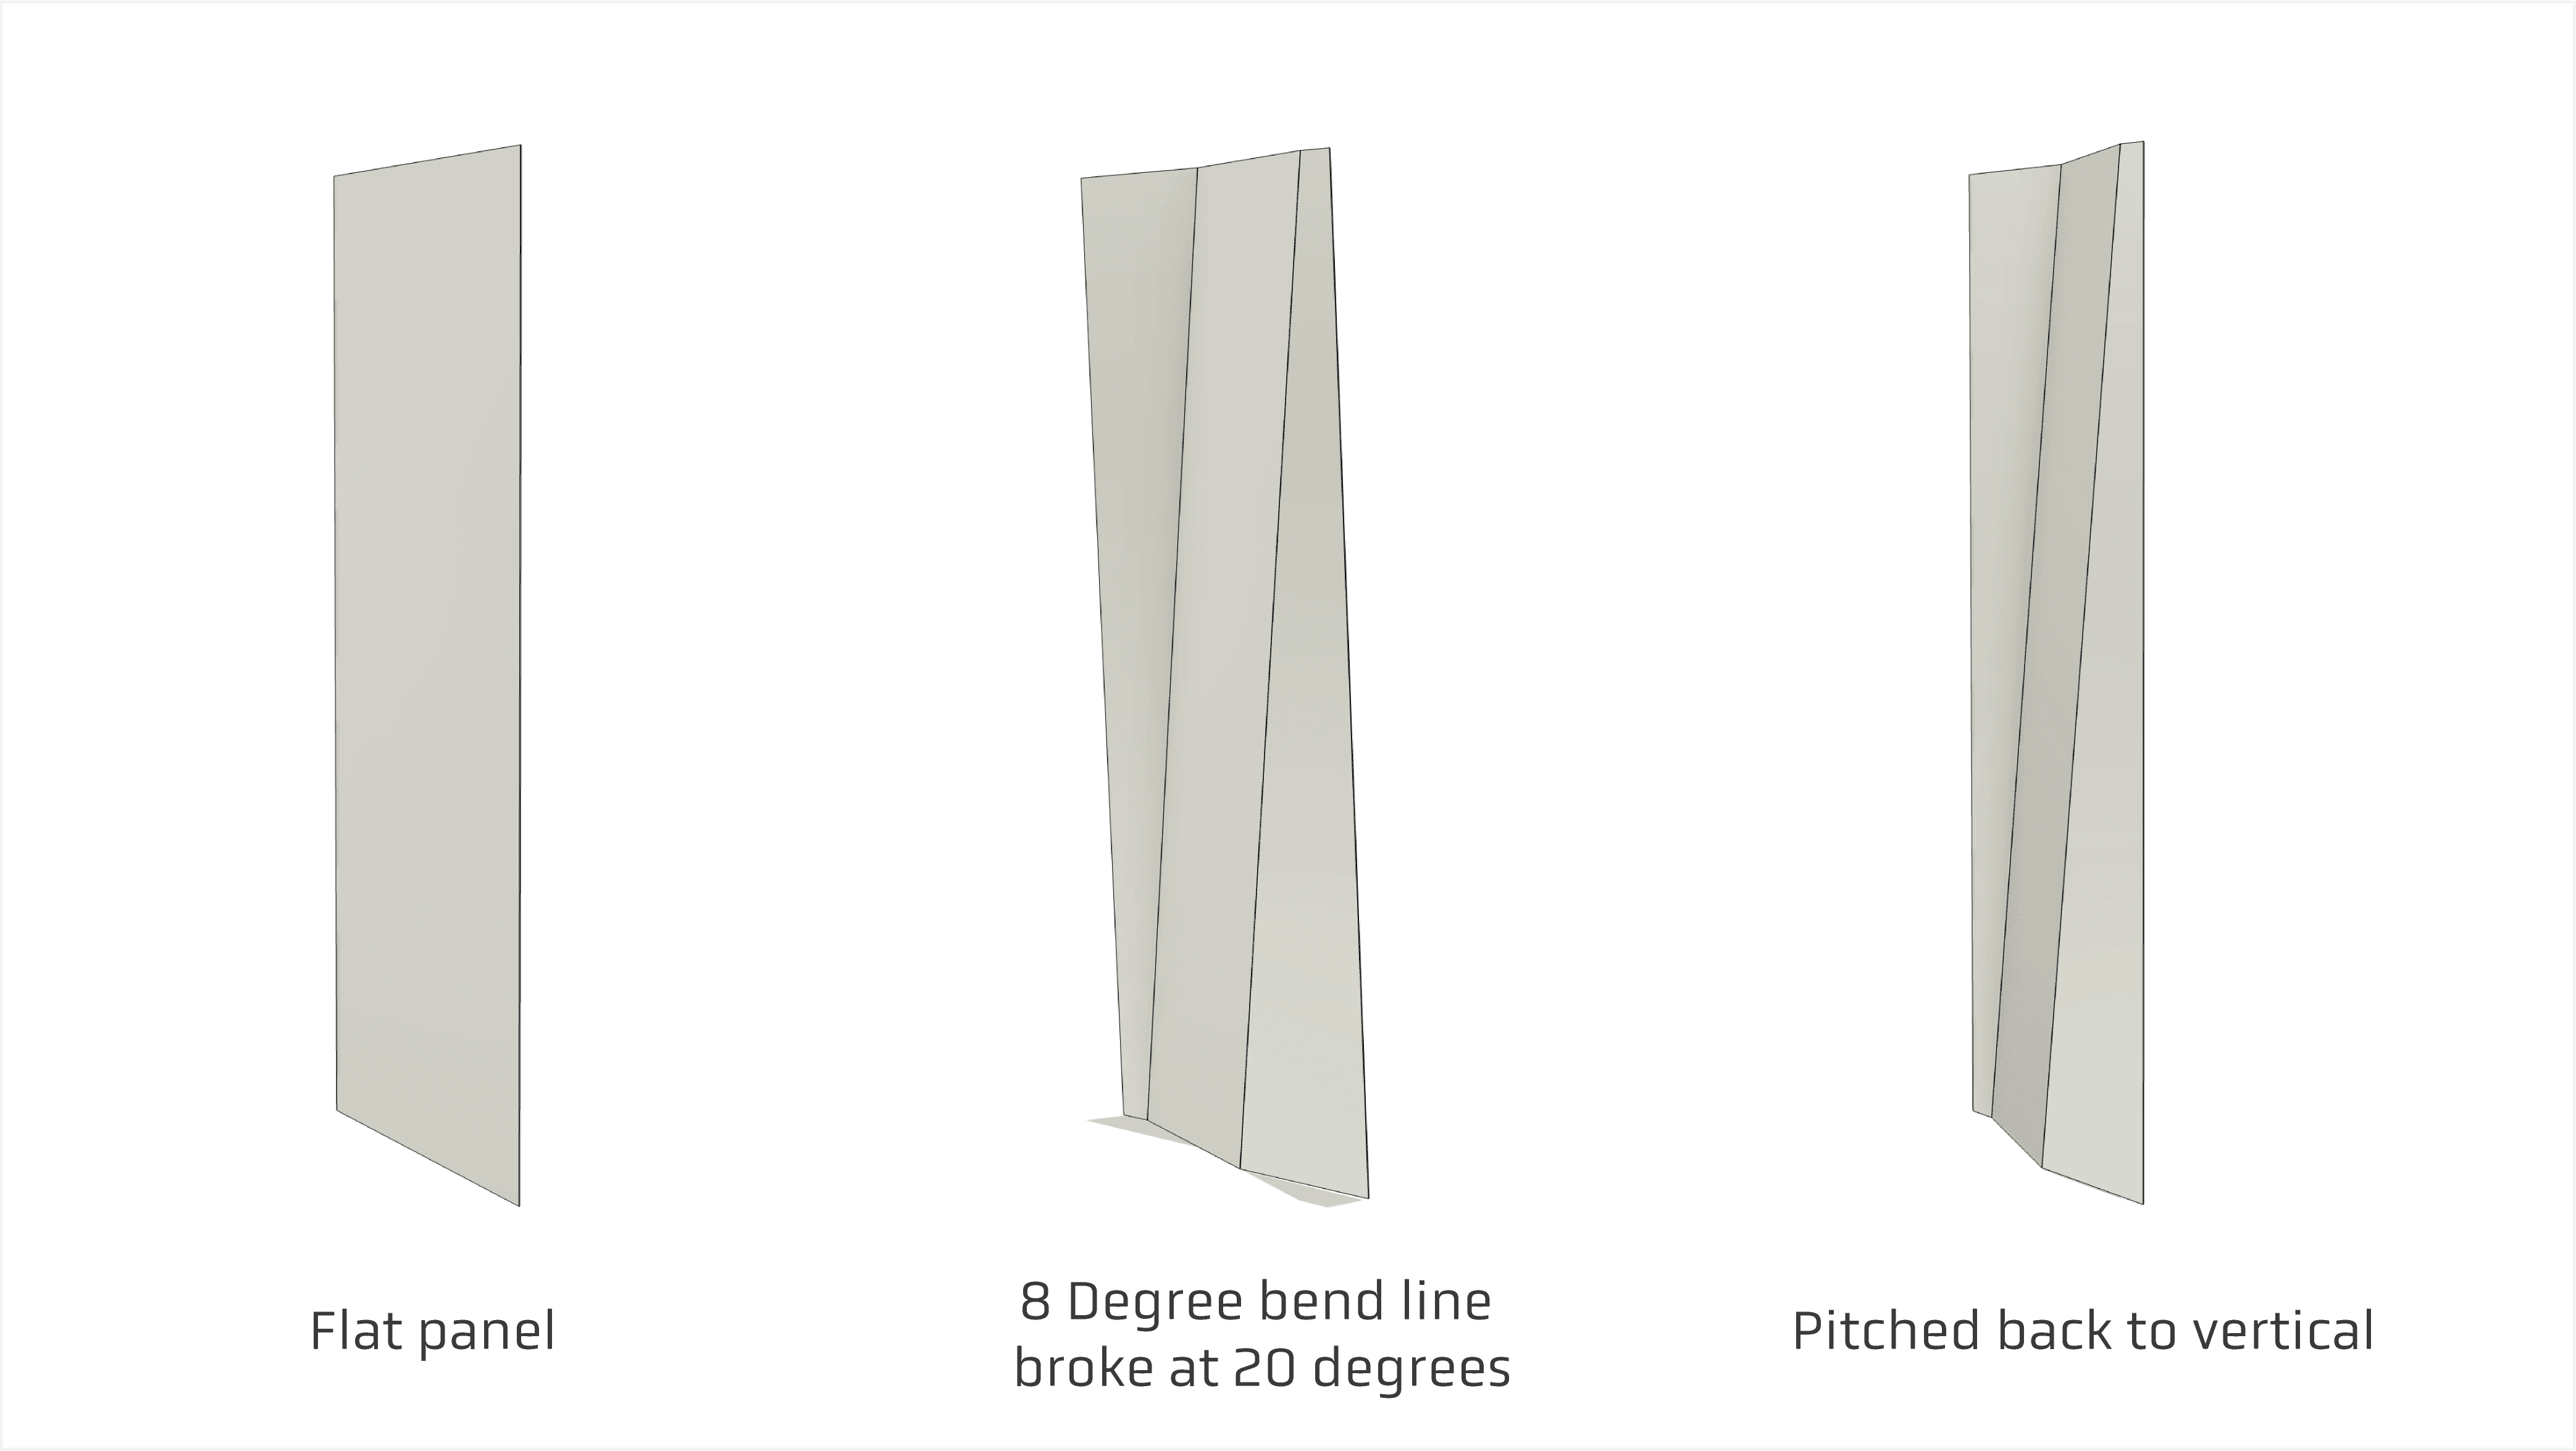
I started off with a flat sheet. Then introduced the bends. Then, extrude cut the top and bottom to straighten the edges.
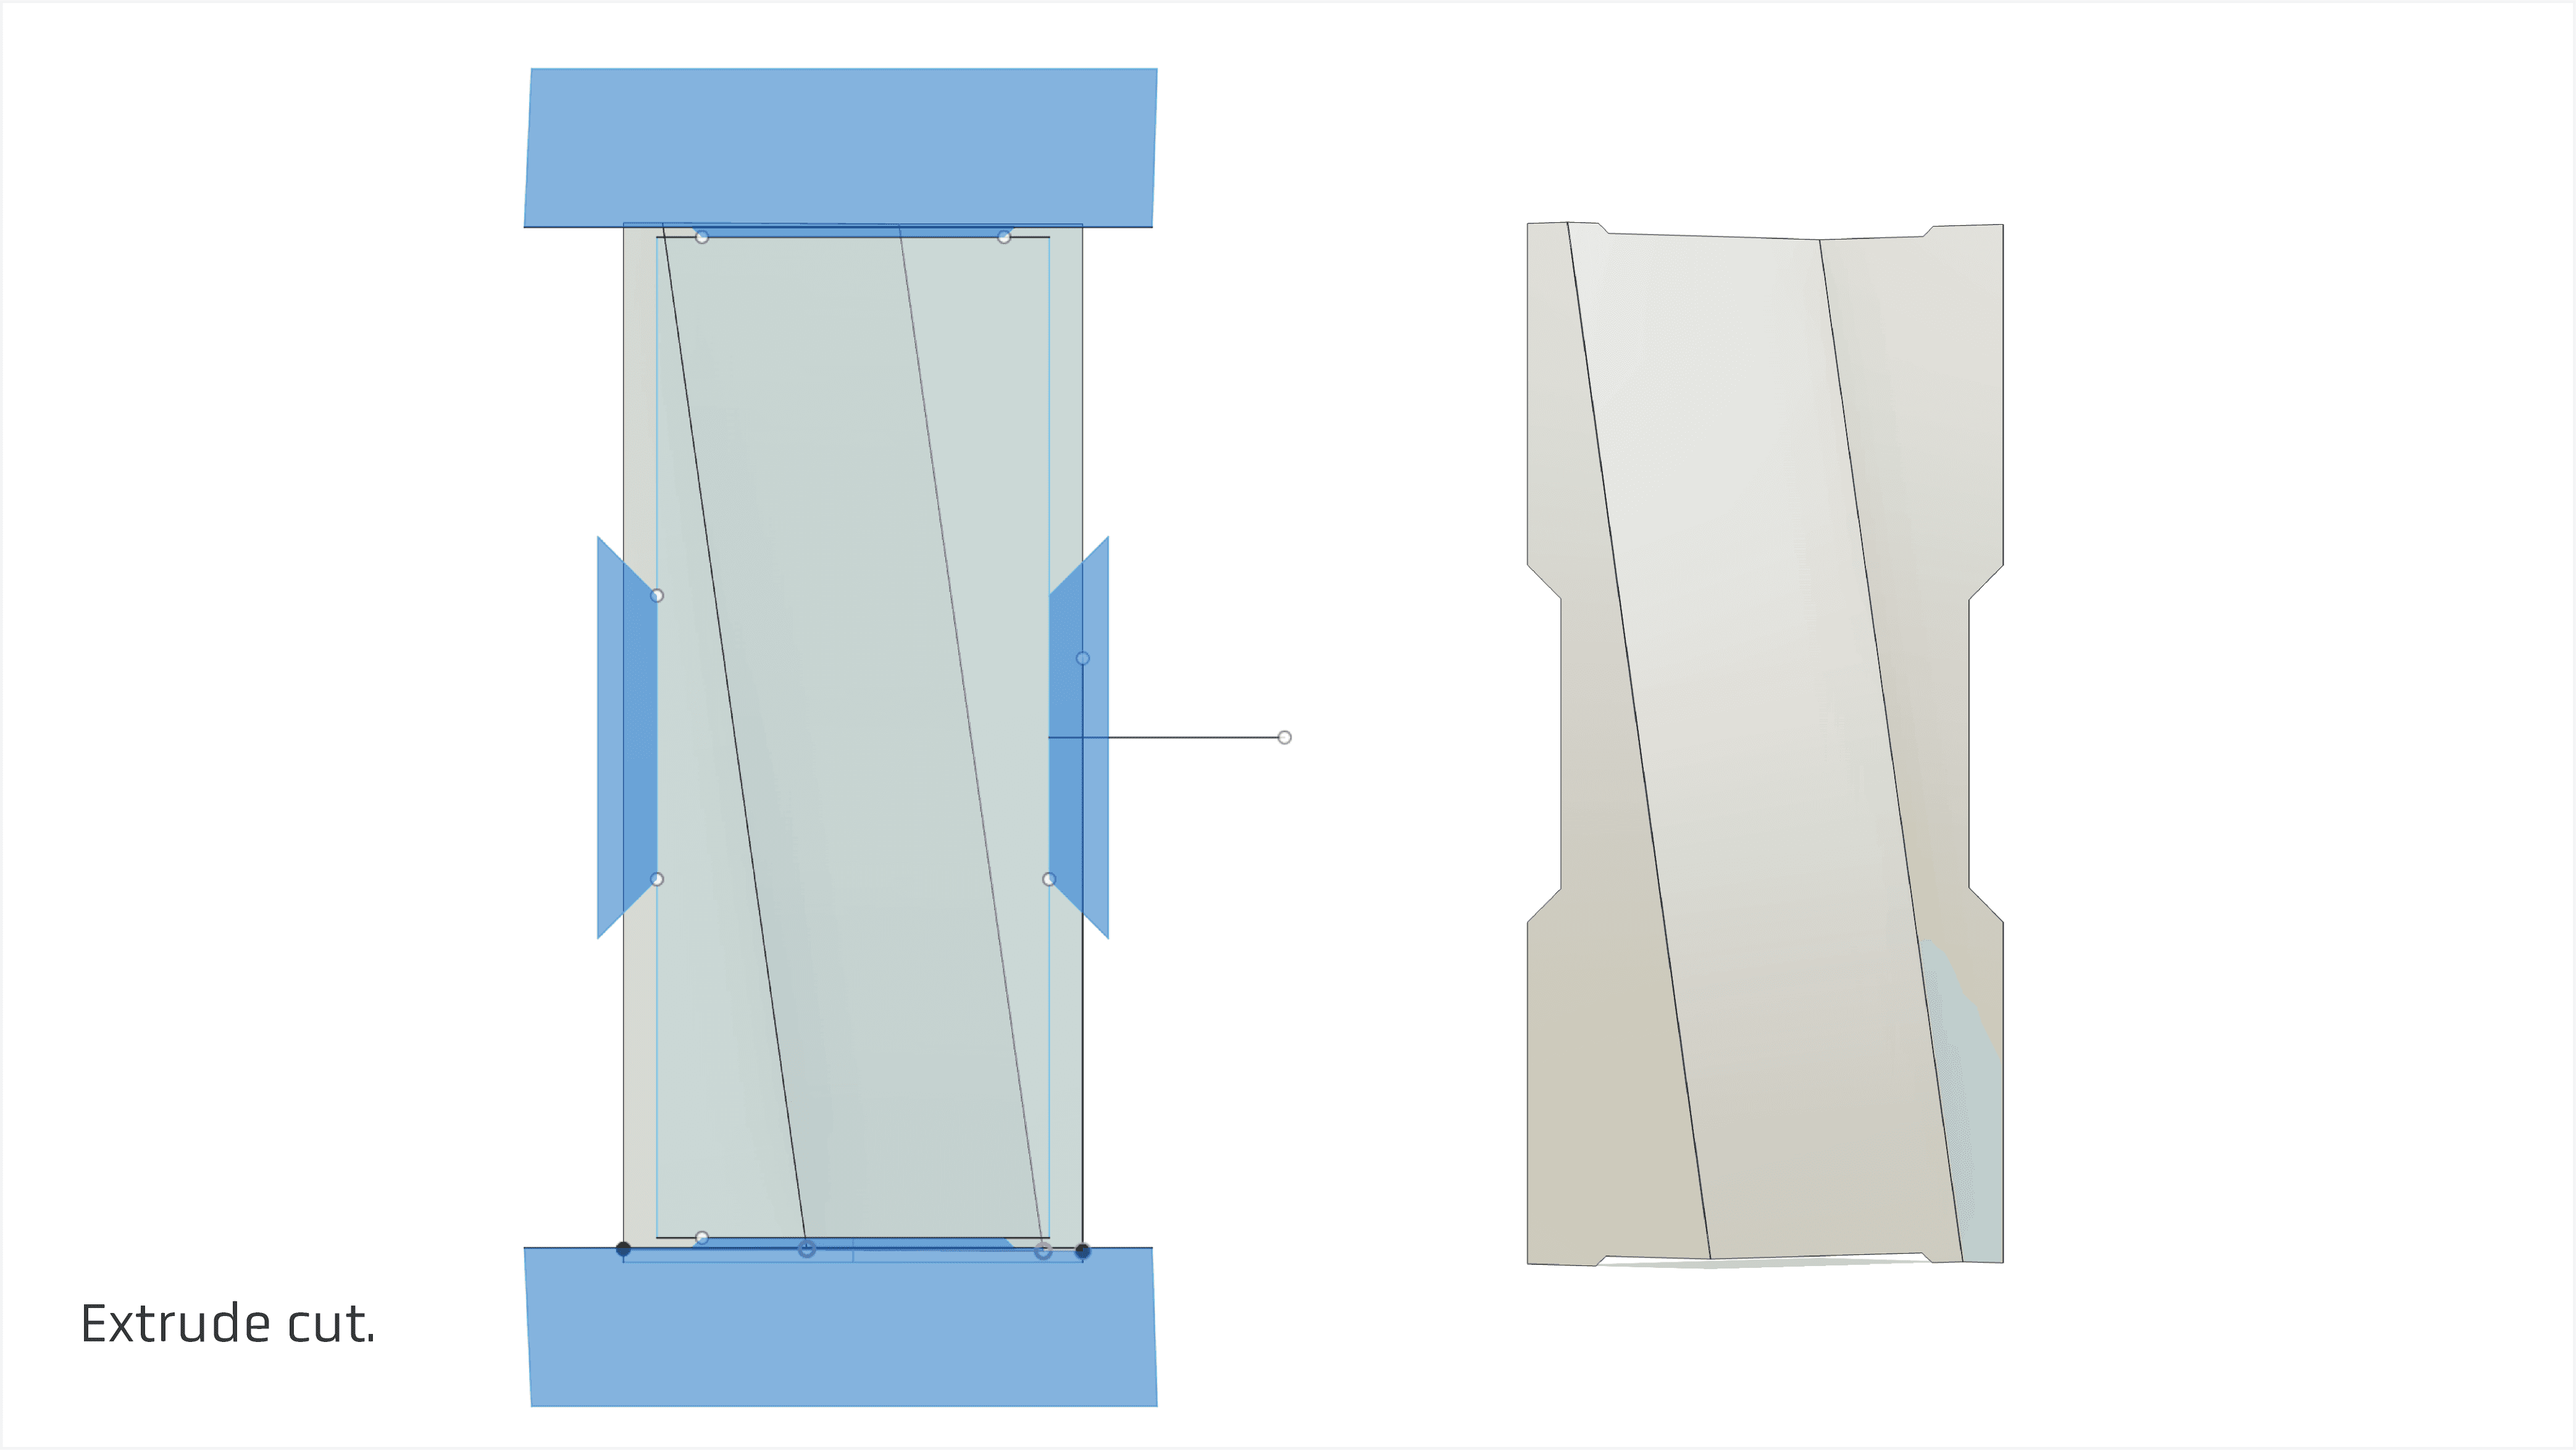
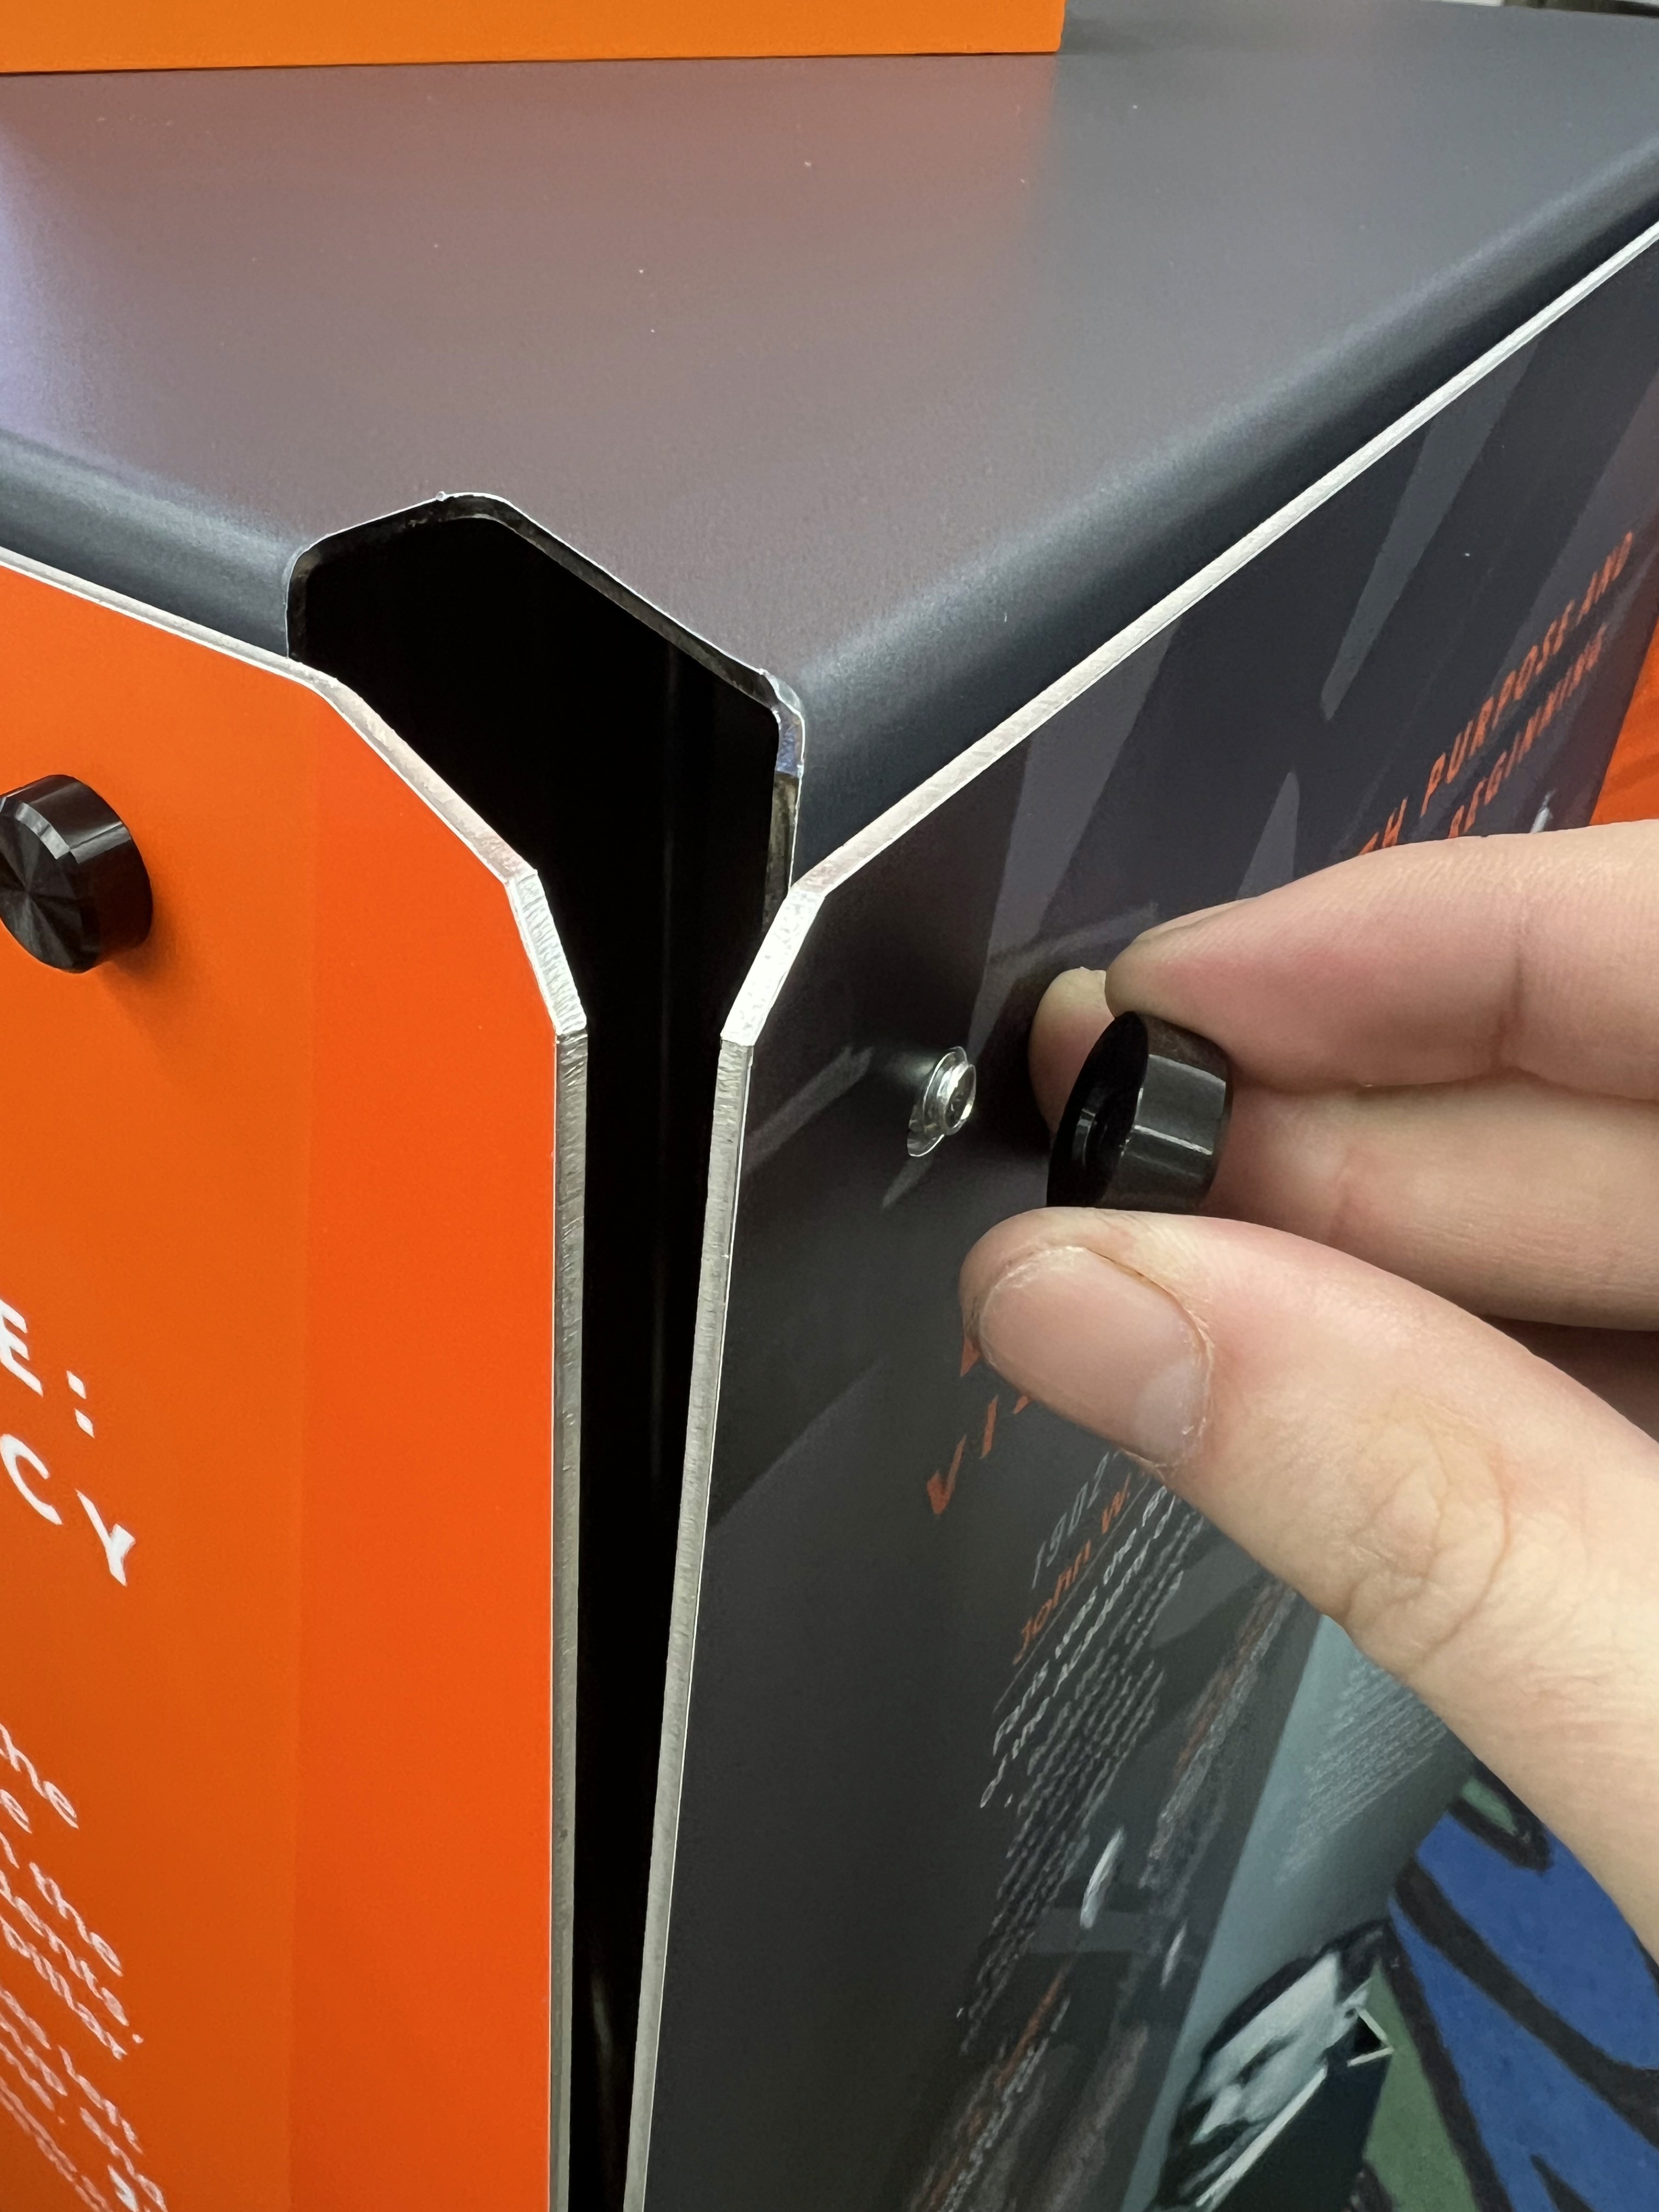
I also cut a notch on the sides to aesthetically hint at the letter "I" of the ISU logo and on a practical note this notch provides two things. The ability to grab and adjust each panel separately when displaying, and for secure strapping when stowed for travel.
As an extra element and mimicking the aesthetics of the Dubby Holt Display, I played with mounting colored acrylic panels to the face of the display giving it dimension.
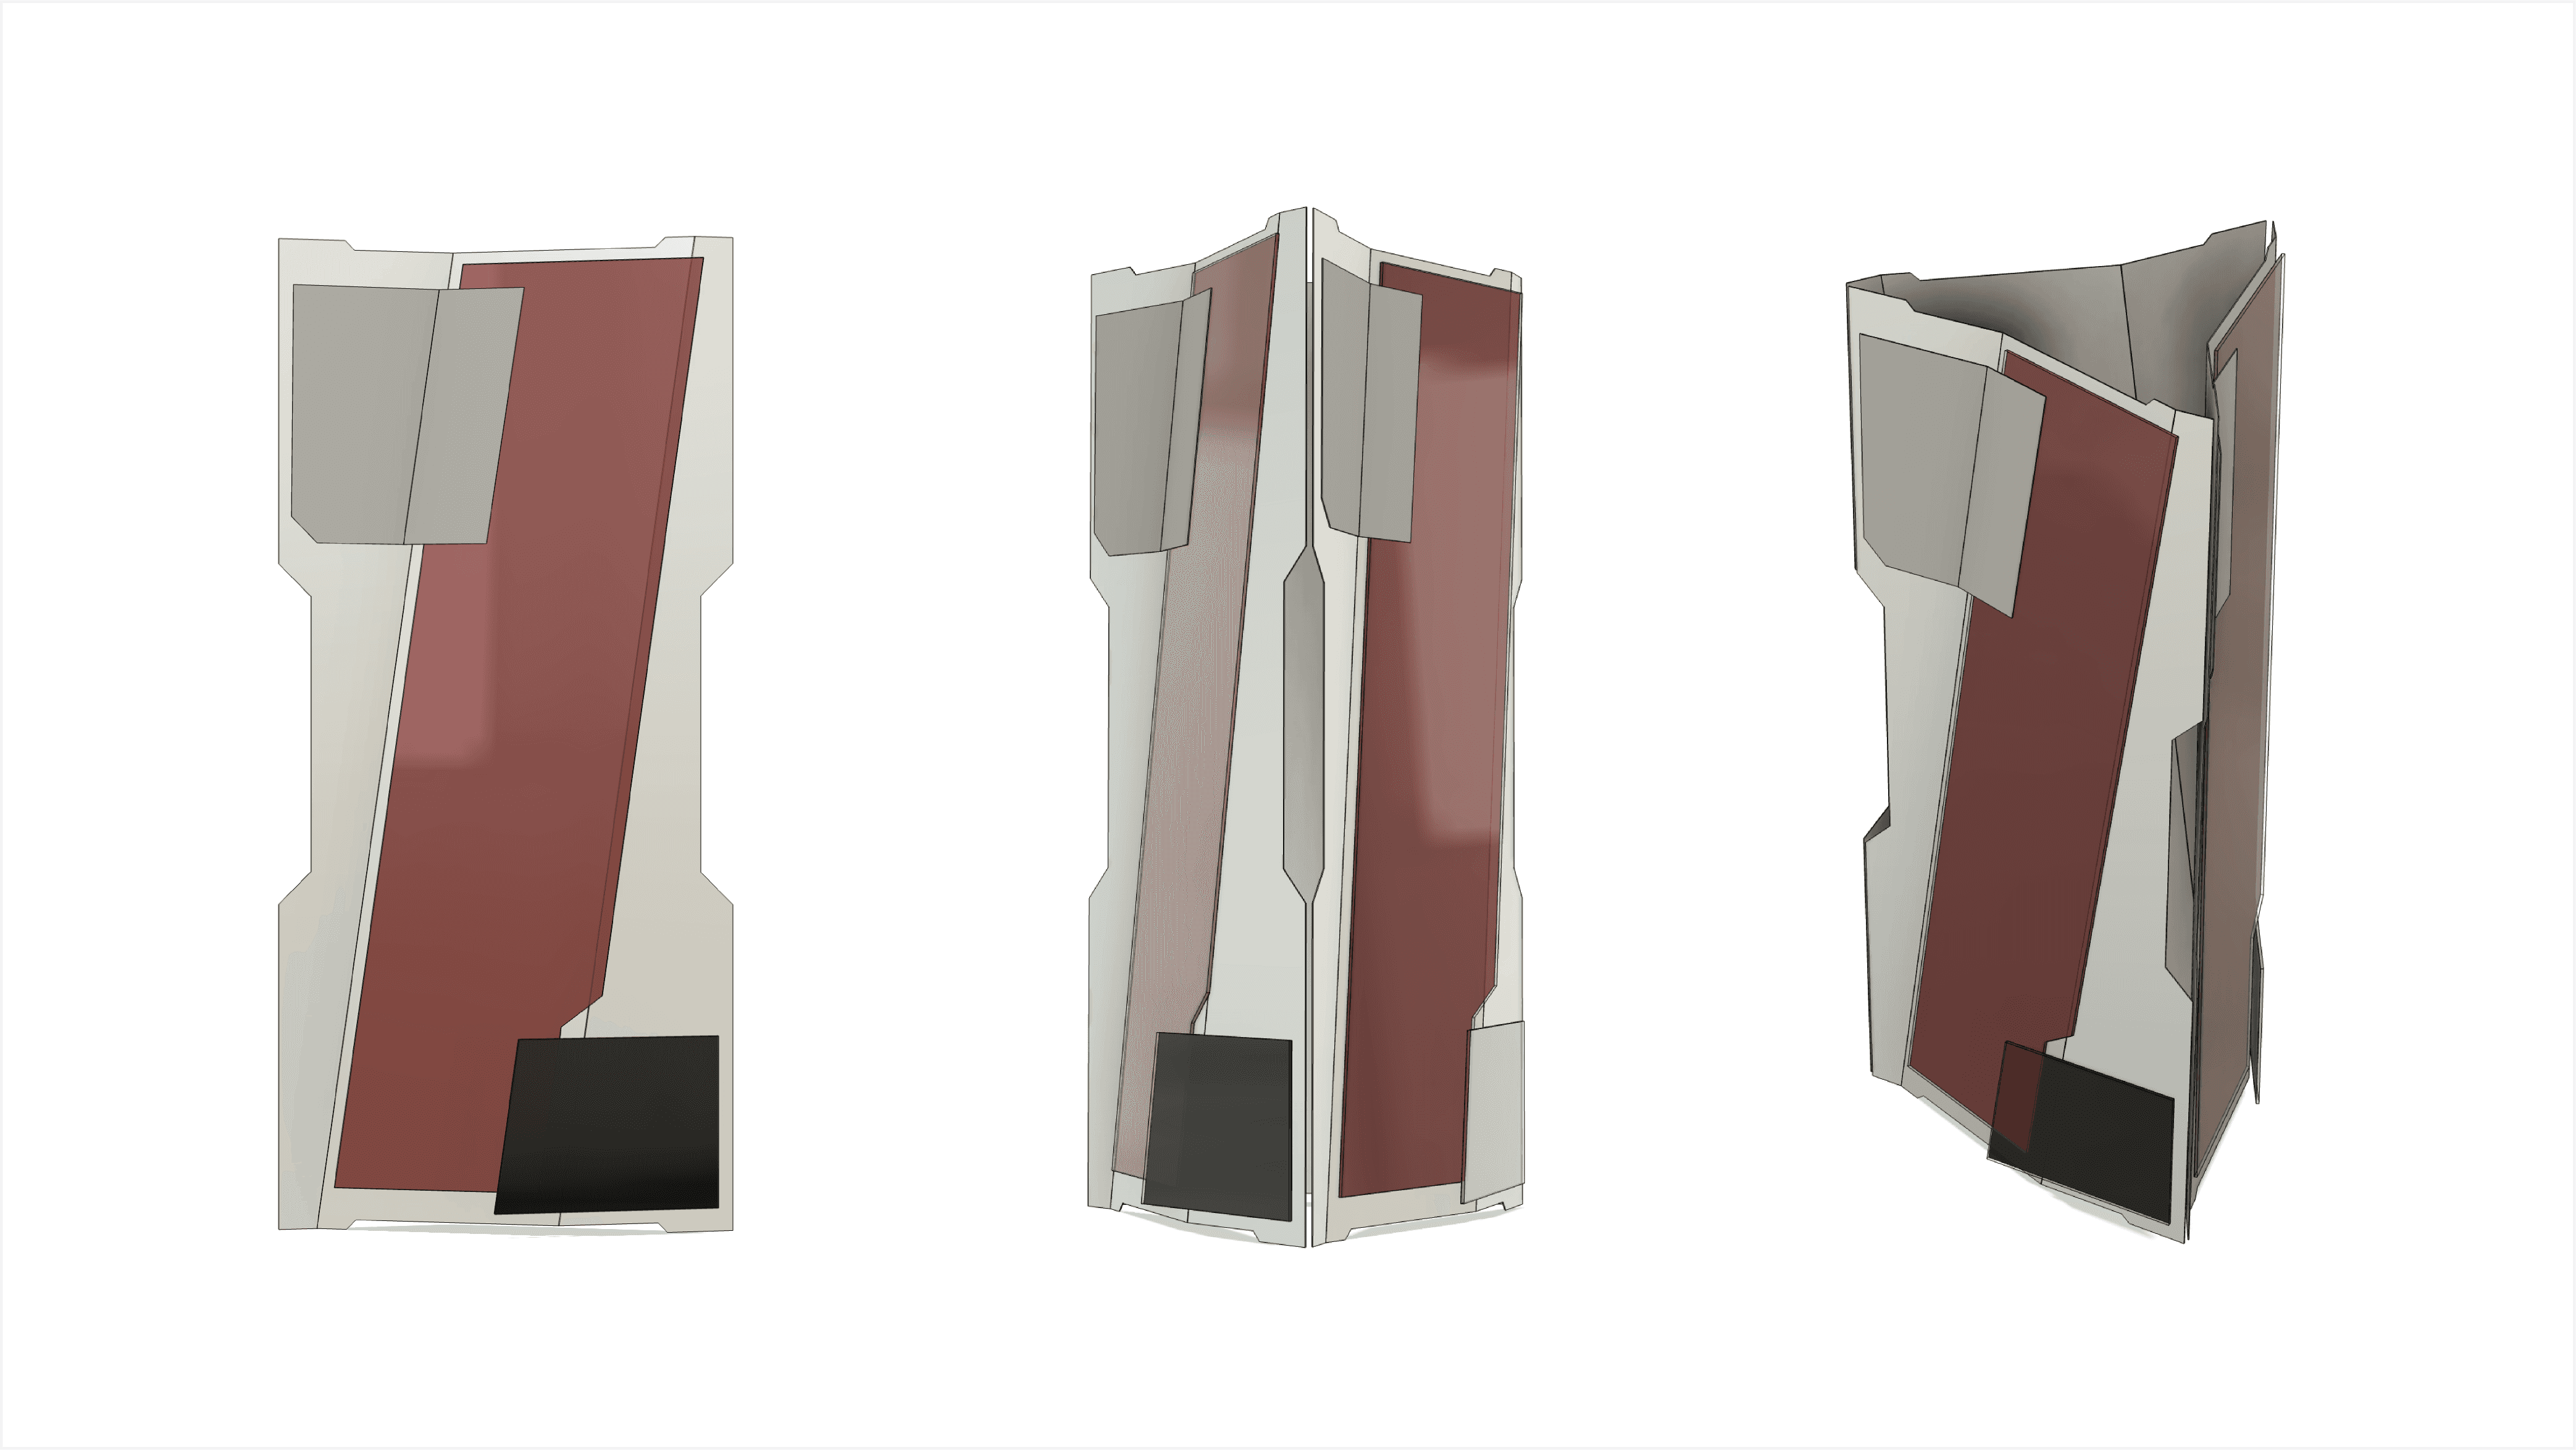
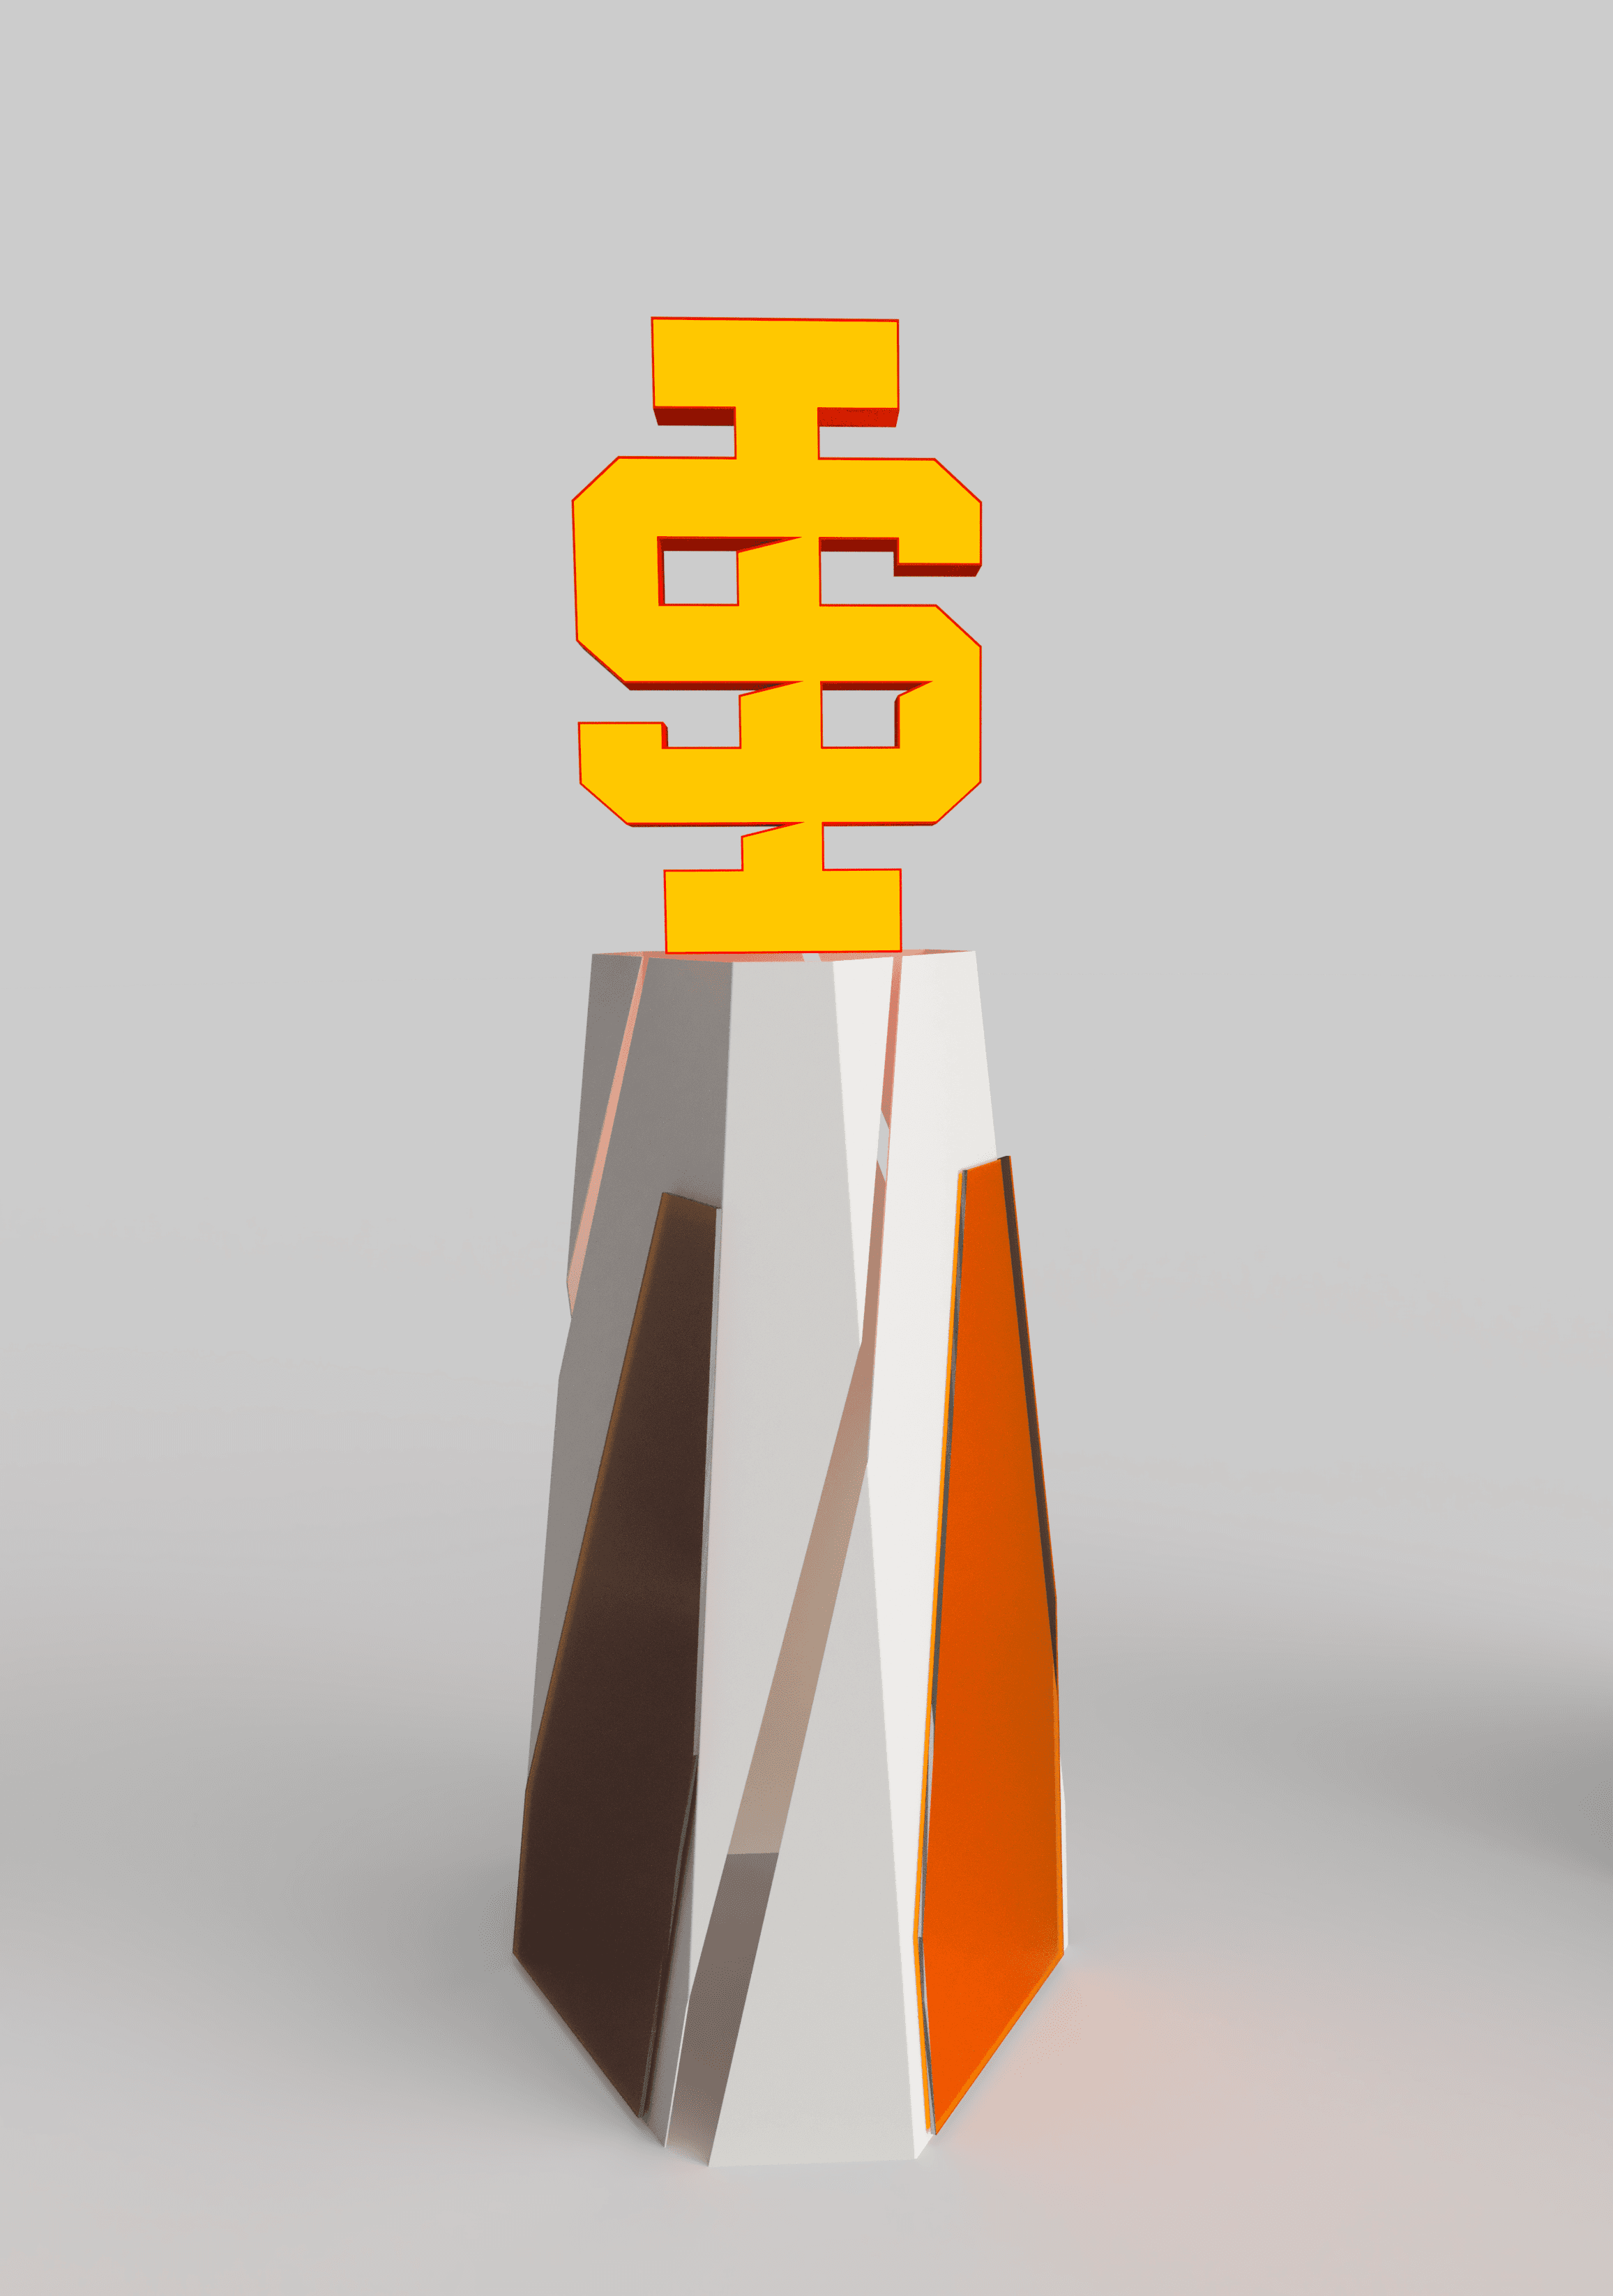
For the Centerpiece I explored following the triangle form with a unique twist.
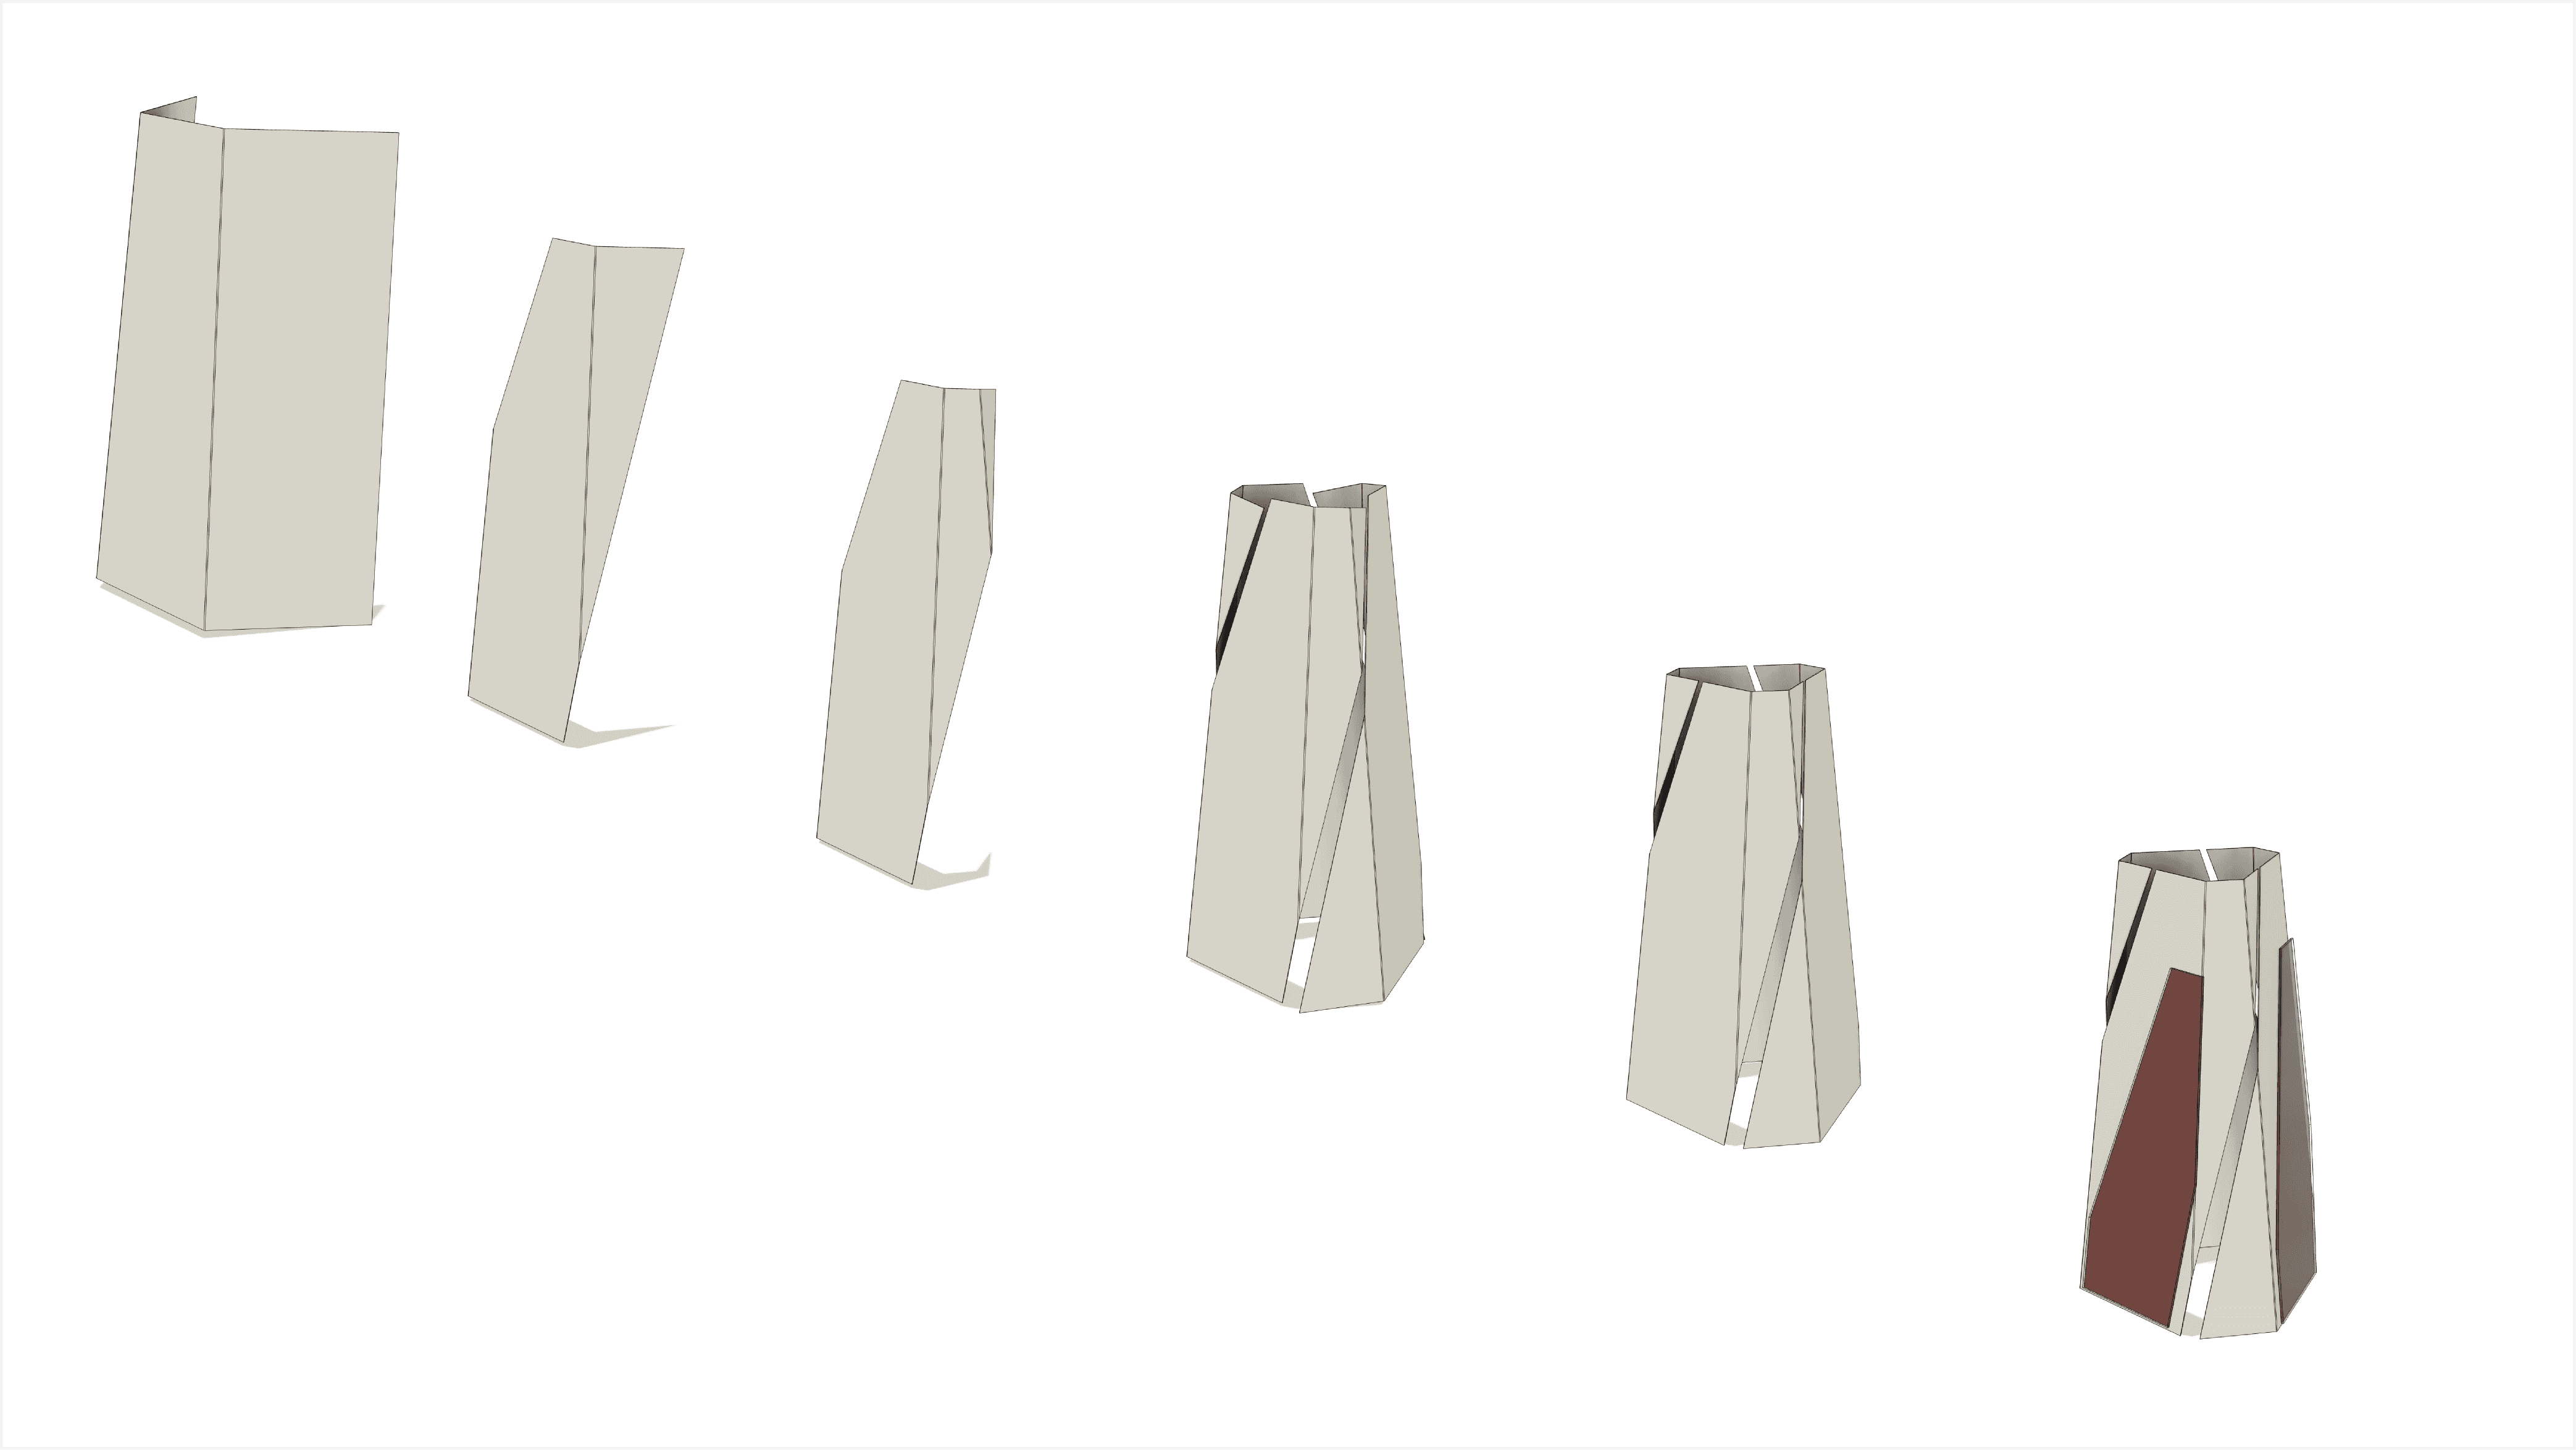
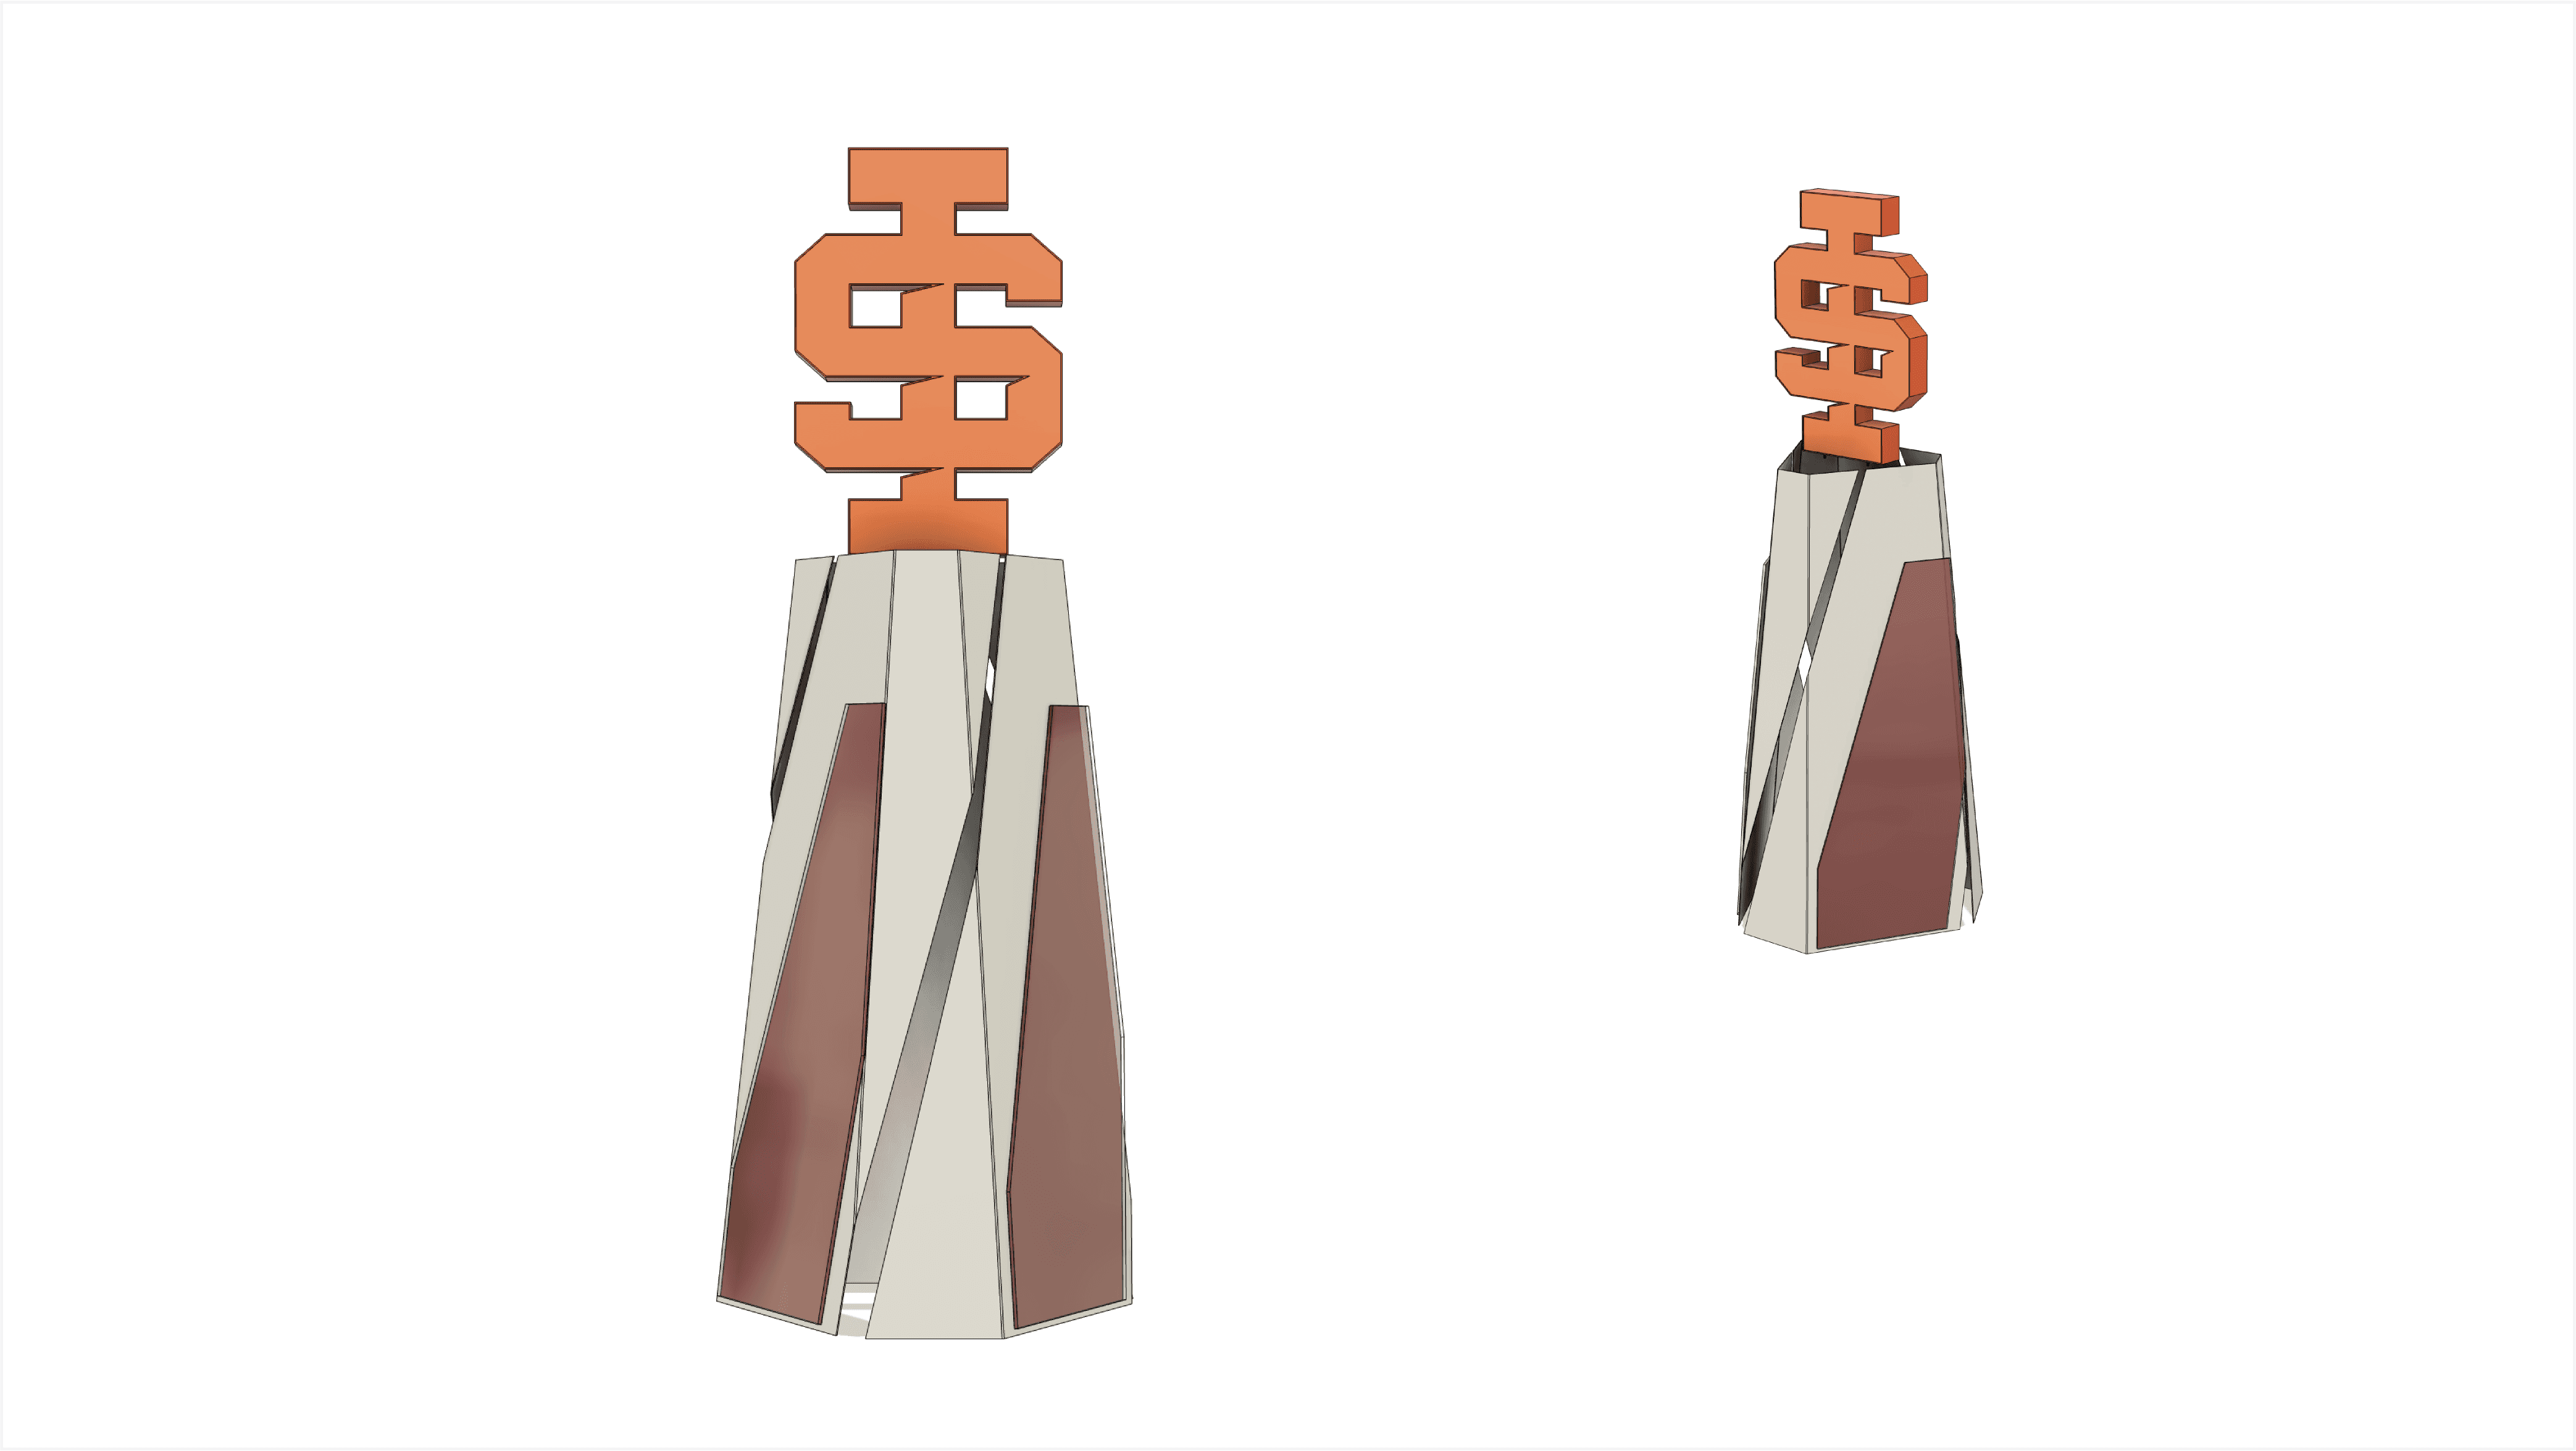
Here it is rendered together as a set.
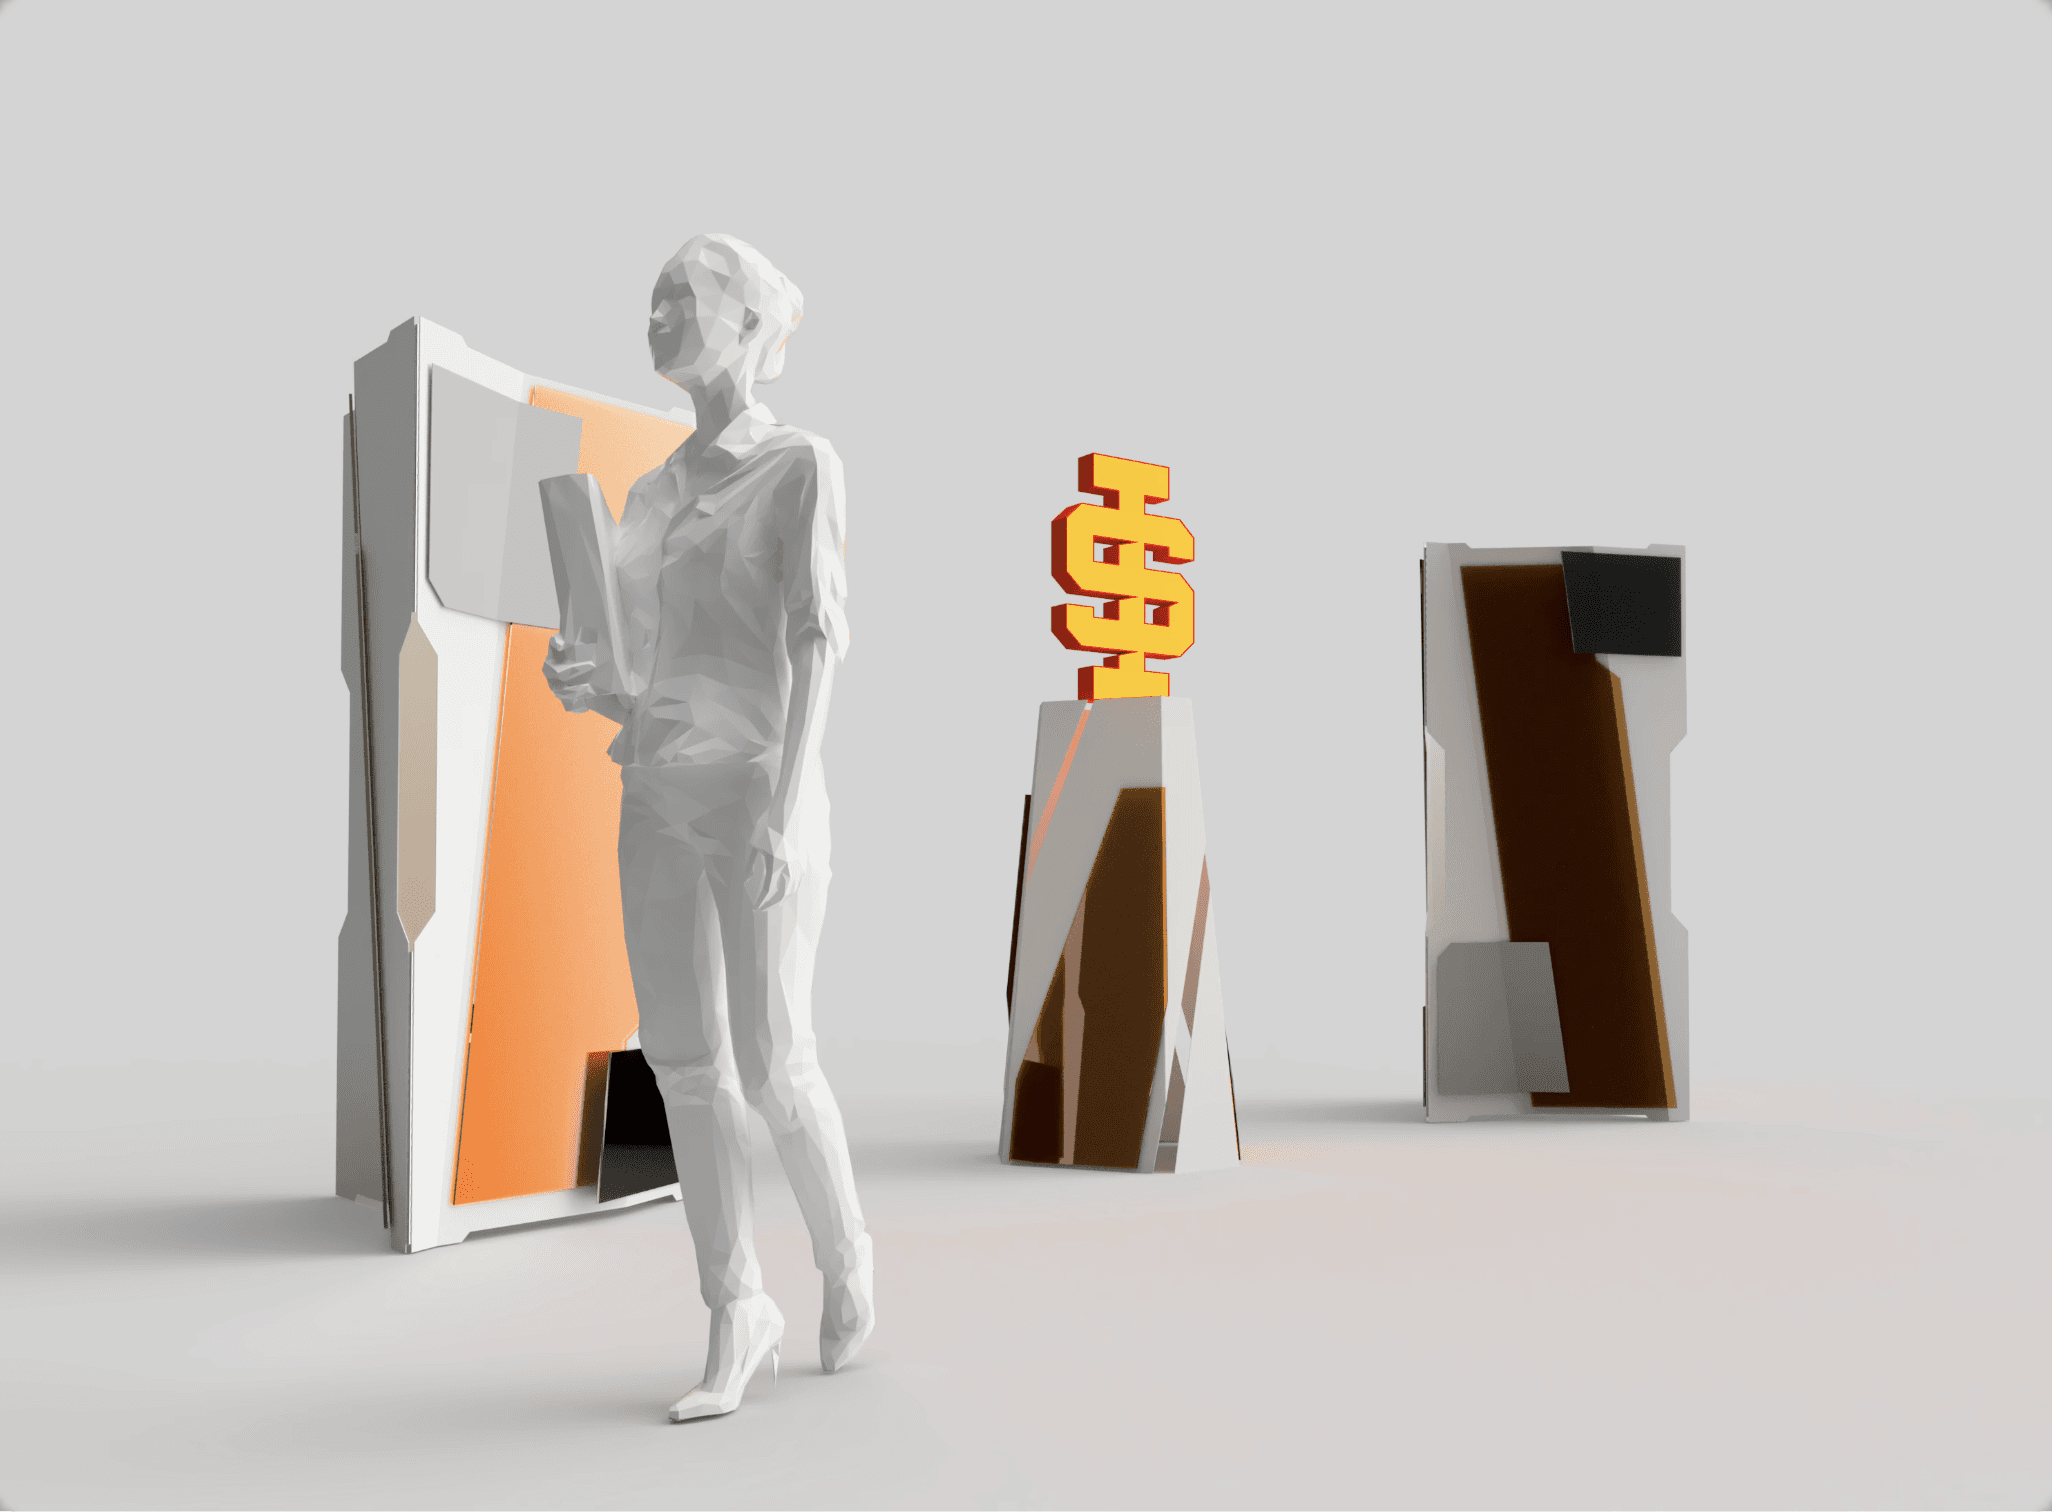
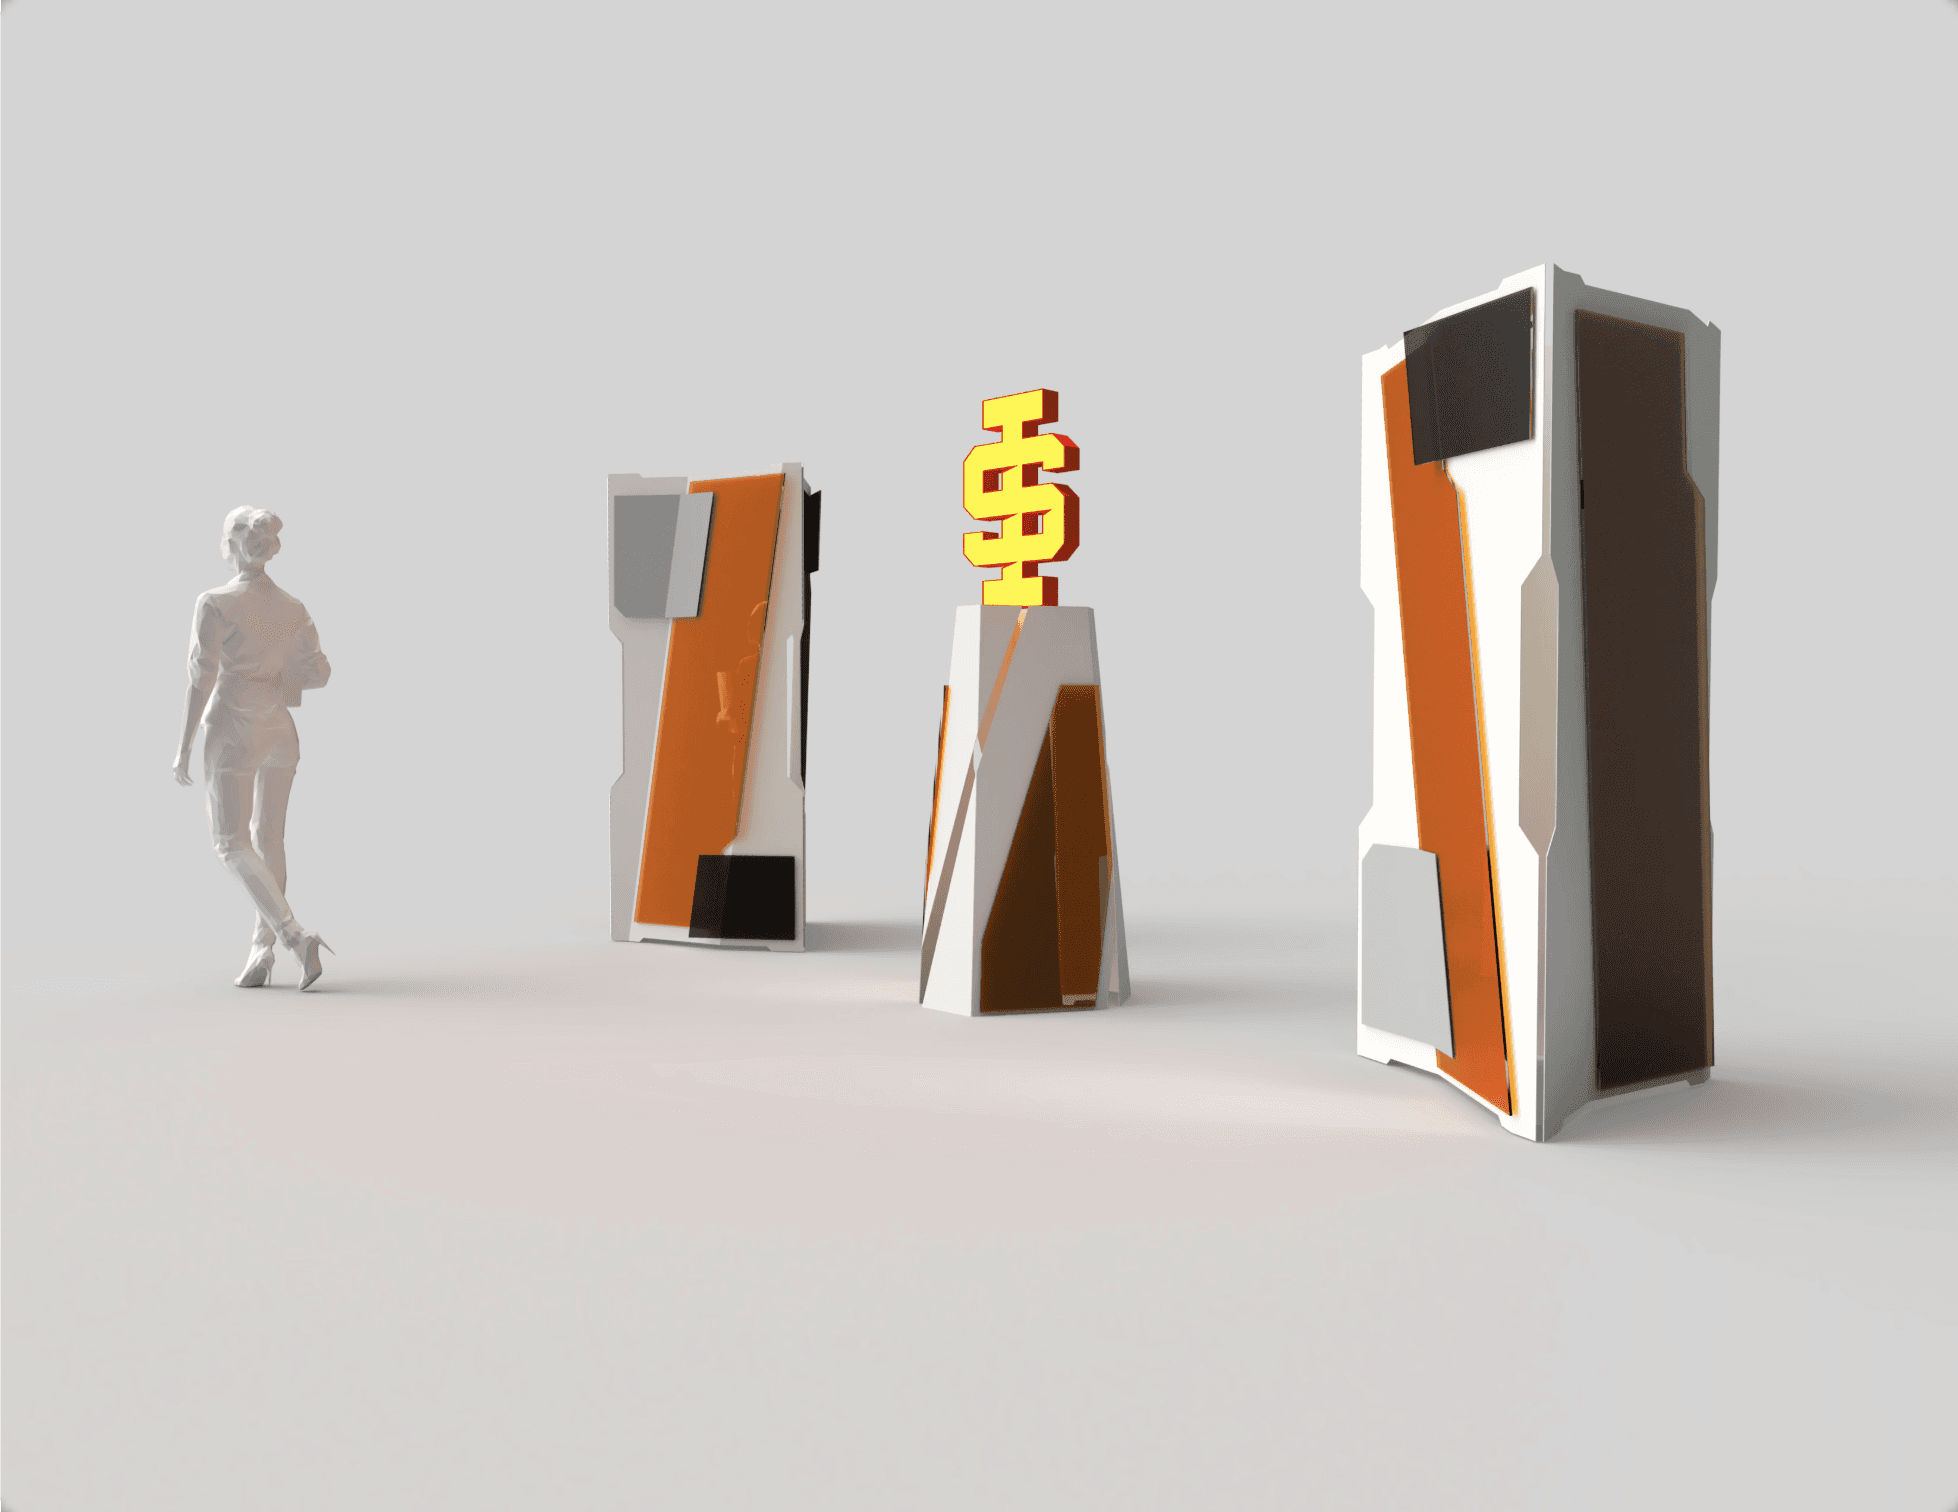
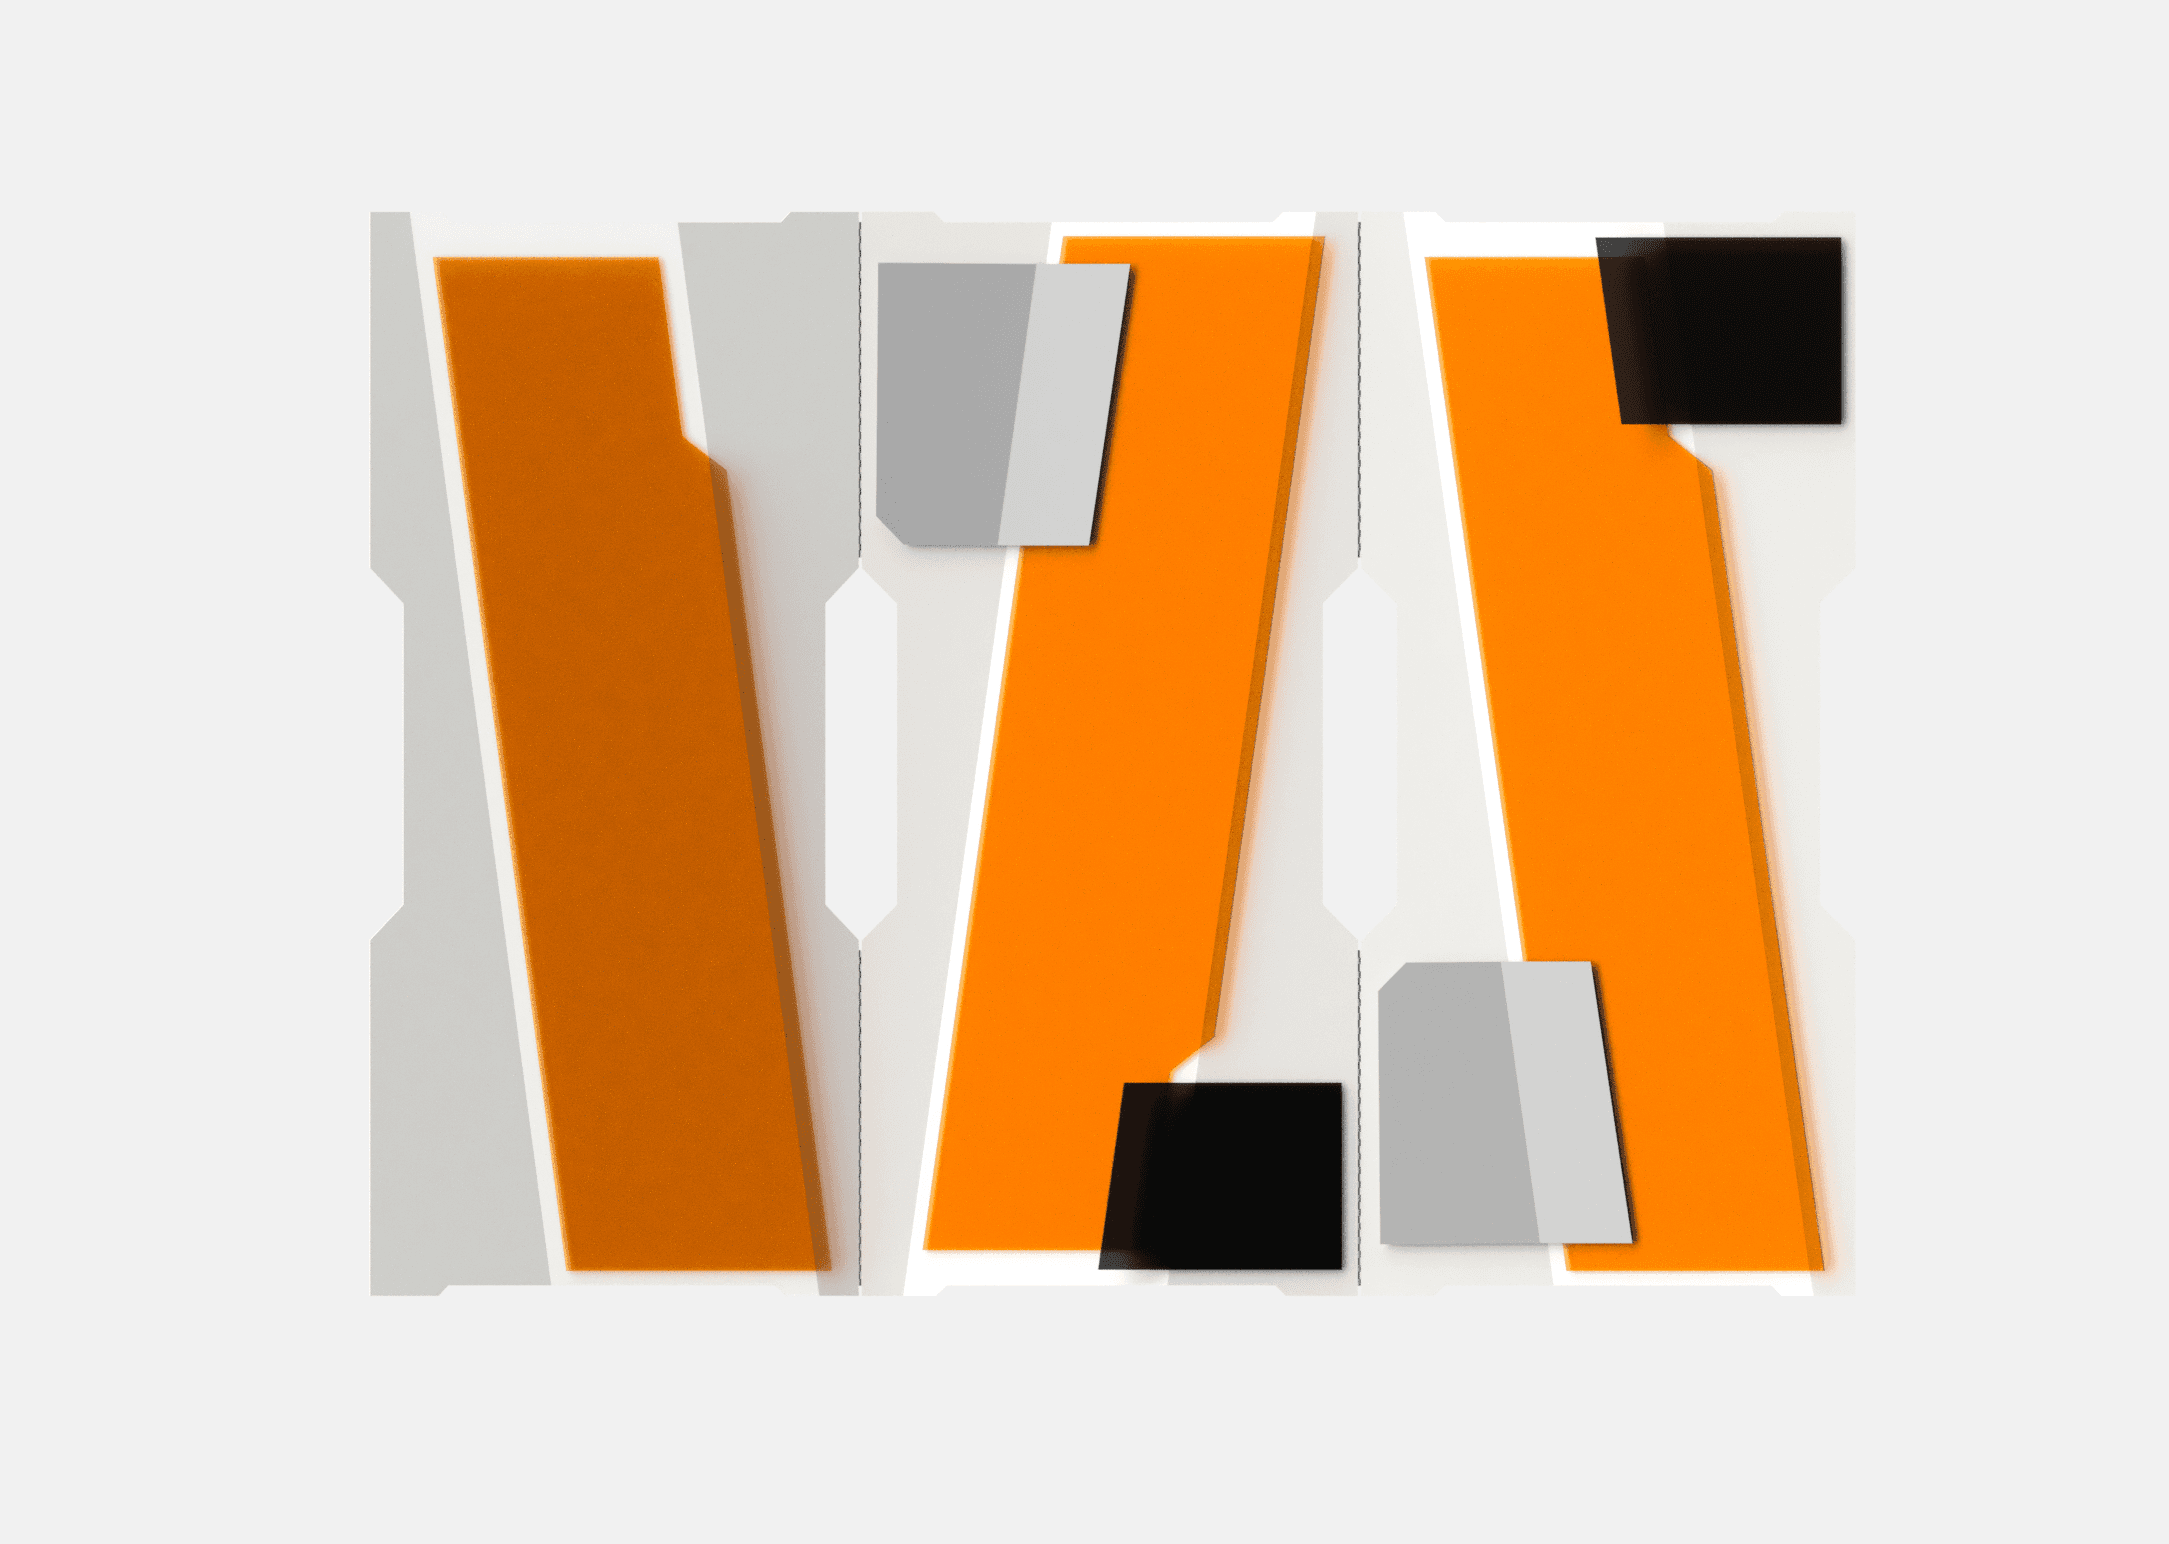
When open fully it abstractly forms the numbers 125.
Round 1 Reveiw
After presenting this concept. The Clients had this to say.
"We love the 3 panel display form, but we can get rid of the acrylic panels. It might be too much. Maybe just one plaque for the title in the middle.
We also want the centerpiece to have 4 sides, not 3. We want to have good amount of space for the graphics to tell the story of ISU as people walk around."
"Oh, and our hard budget is $10,000 for the whole thing."
On the Design, valid feedback. Lets keep it simple.
As for the budge. That was going to be a tough one…
Given the Des/Dev contract was $3,200, that only leaves $6,800 for the build…
For a custom display with two 3 panel displays and a centerpiece with a dimensional spirit mark, that is strong enough to last a full year of travel and then for it to become a permanent display… That was very tight.
I suggested maybe exploring a more affordable yet less durable alternative, that is not meant to become a permanent display, but they really liked the design, and wanted me to keep going this direction.
Maybe they have a little bit of wiggle in the budget..?
Lets simplify and refine, and see what we get.
Round 2 Design
The 3 Panel Display was straight forward.
Bring it back to just the aluminum structure and vinyl wrap the graphics. Maybe a clear acrylic title plaque on the center plane. Remove it if the budget doesn't allow it.
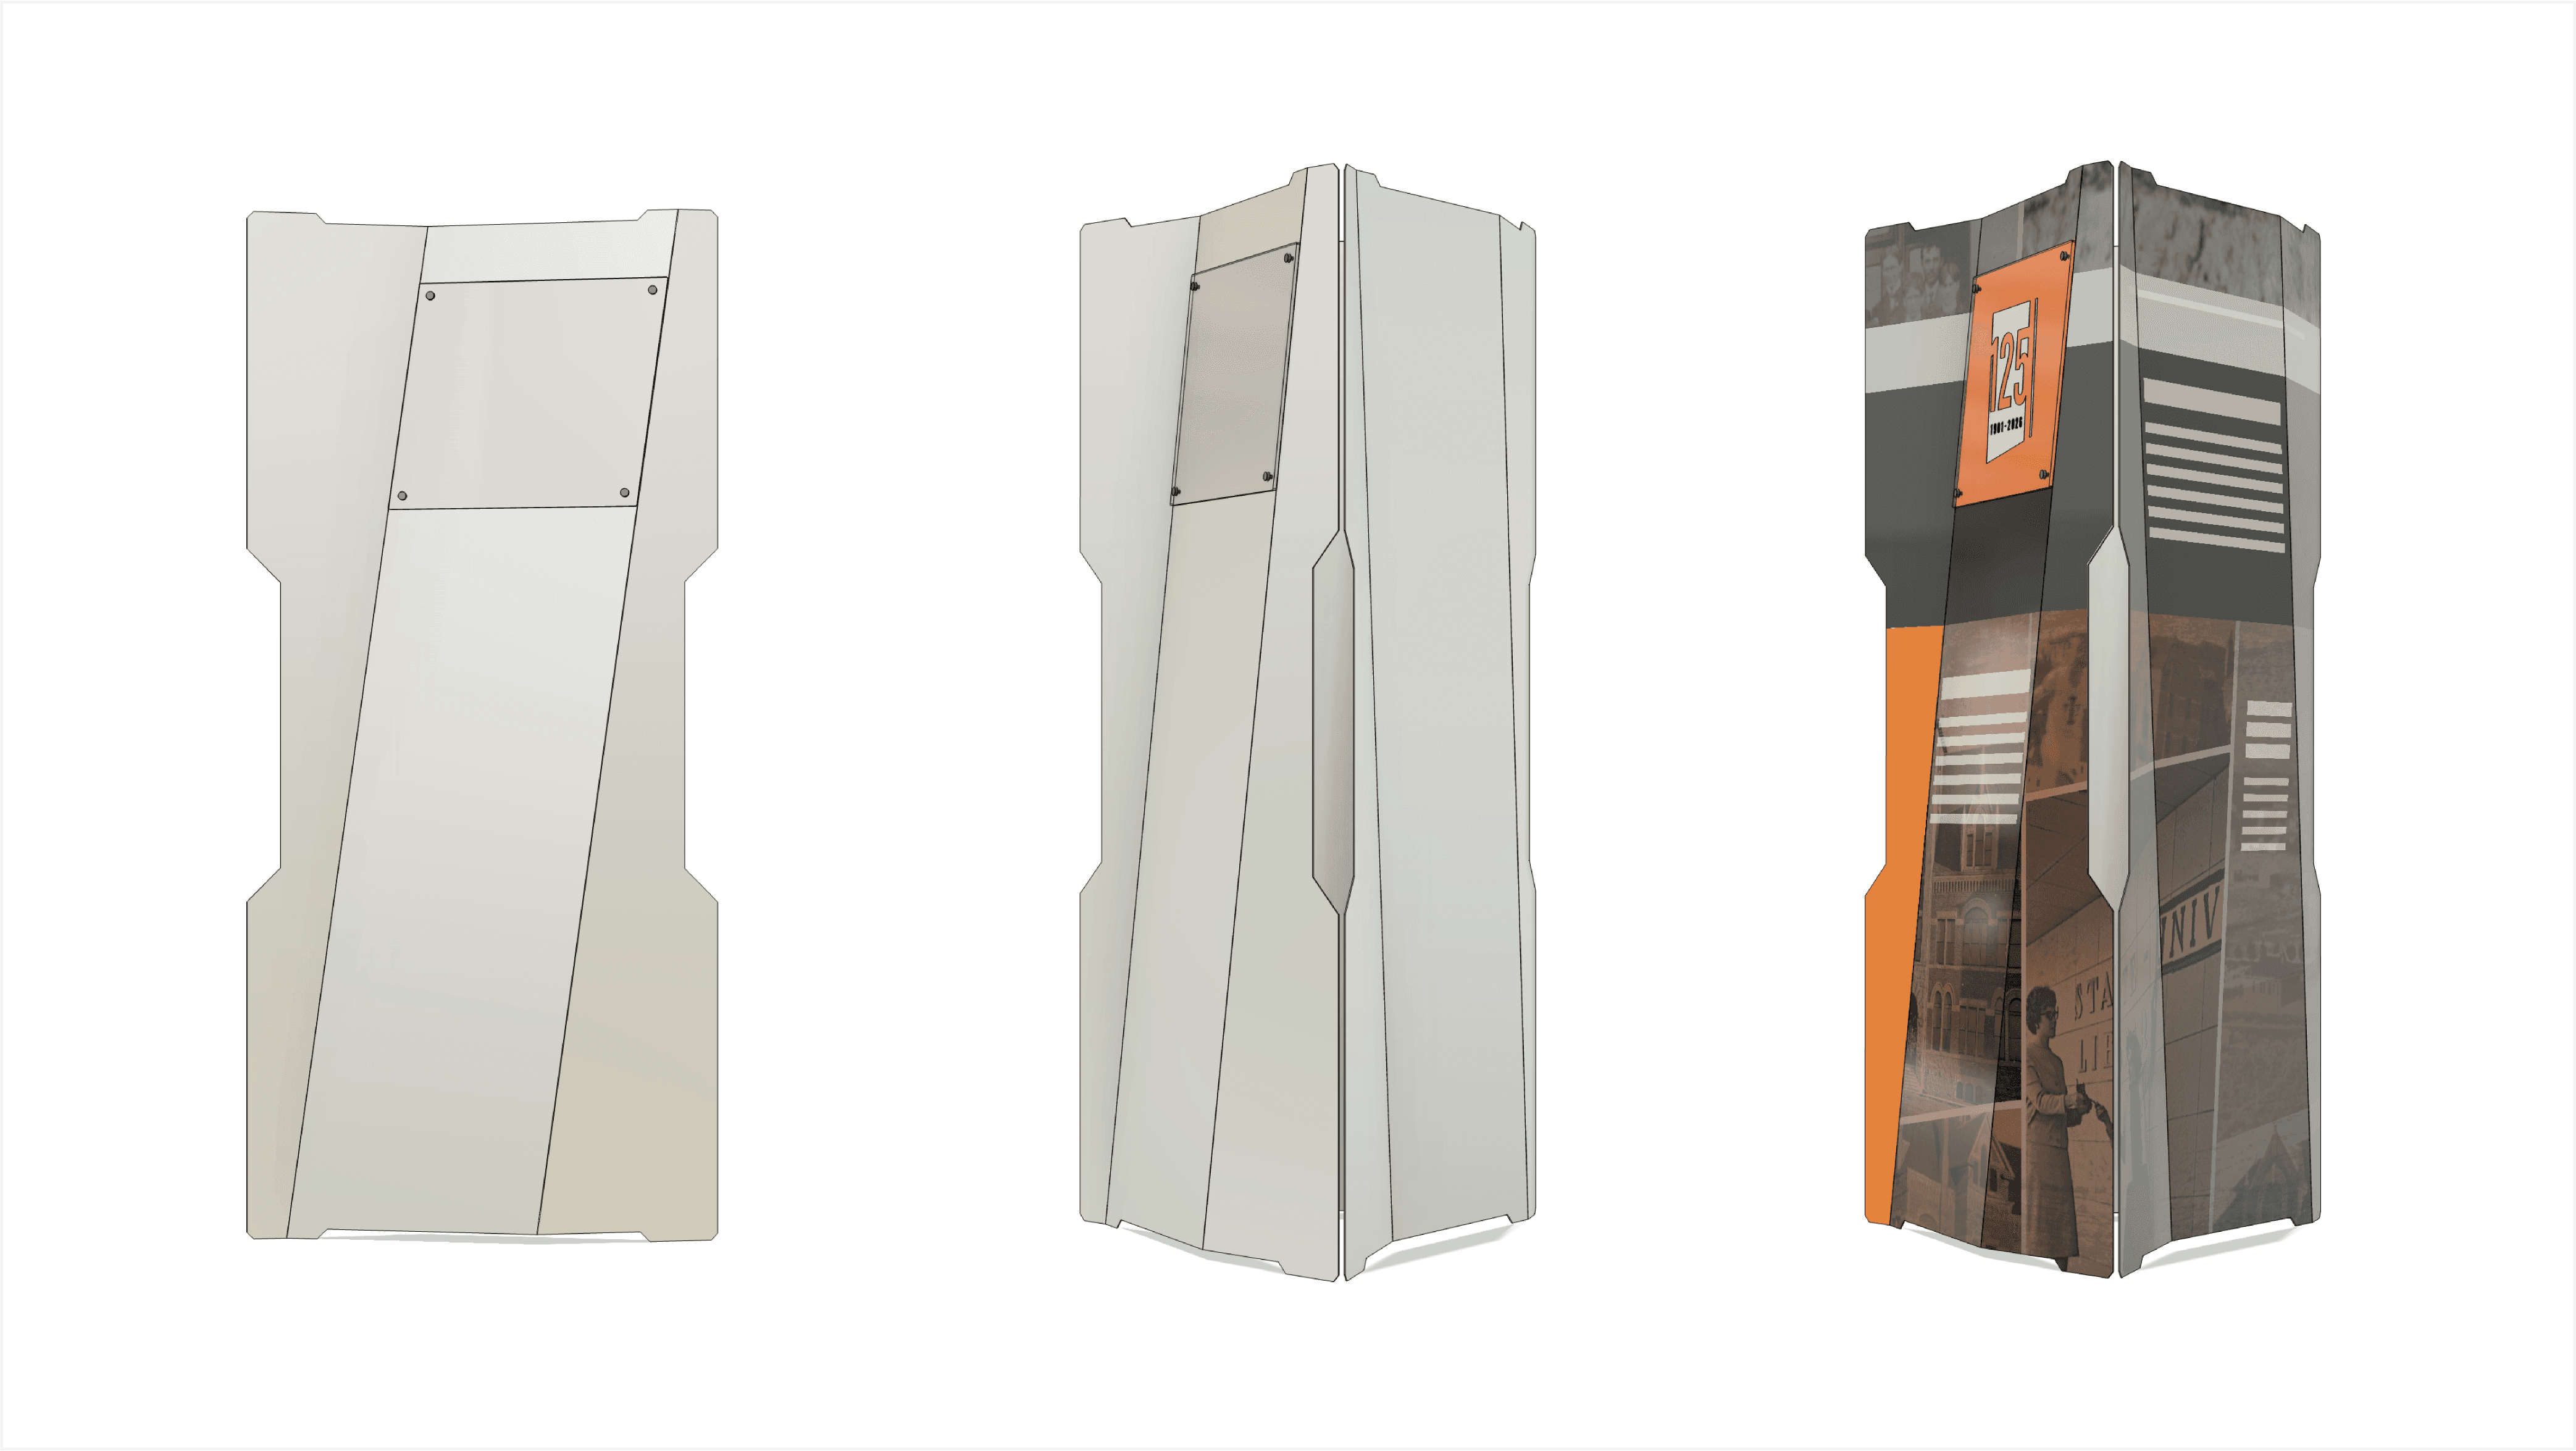
For the Centerpiece… I started started from scratch, exploring all types of forms.
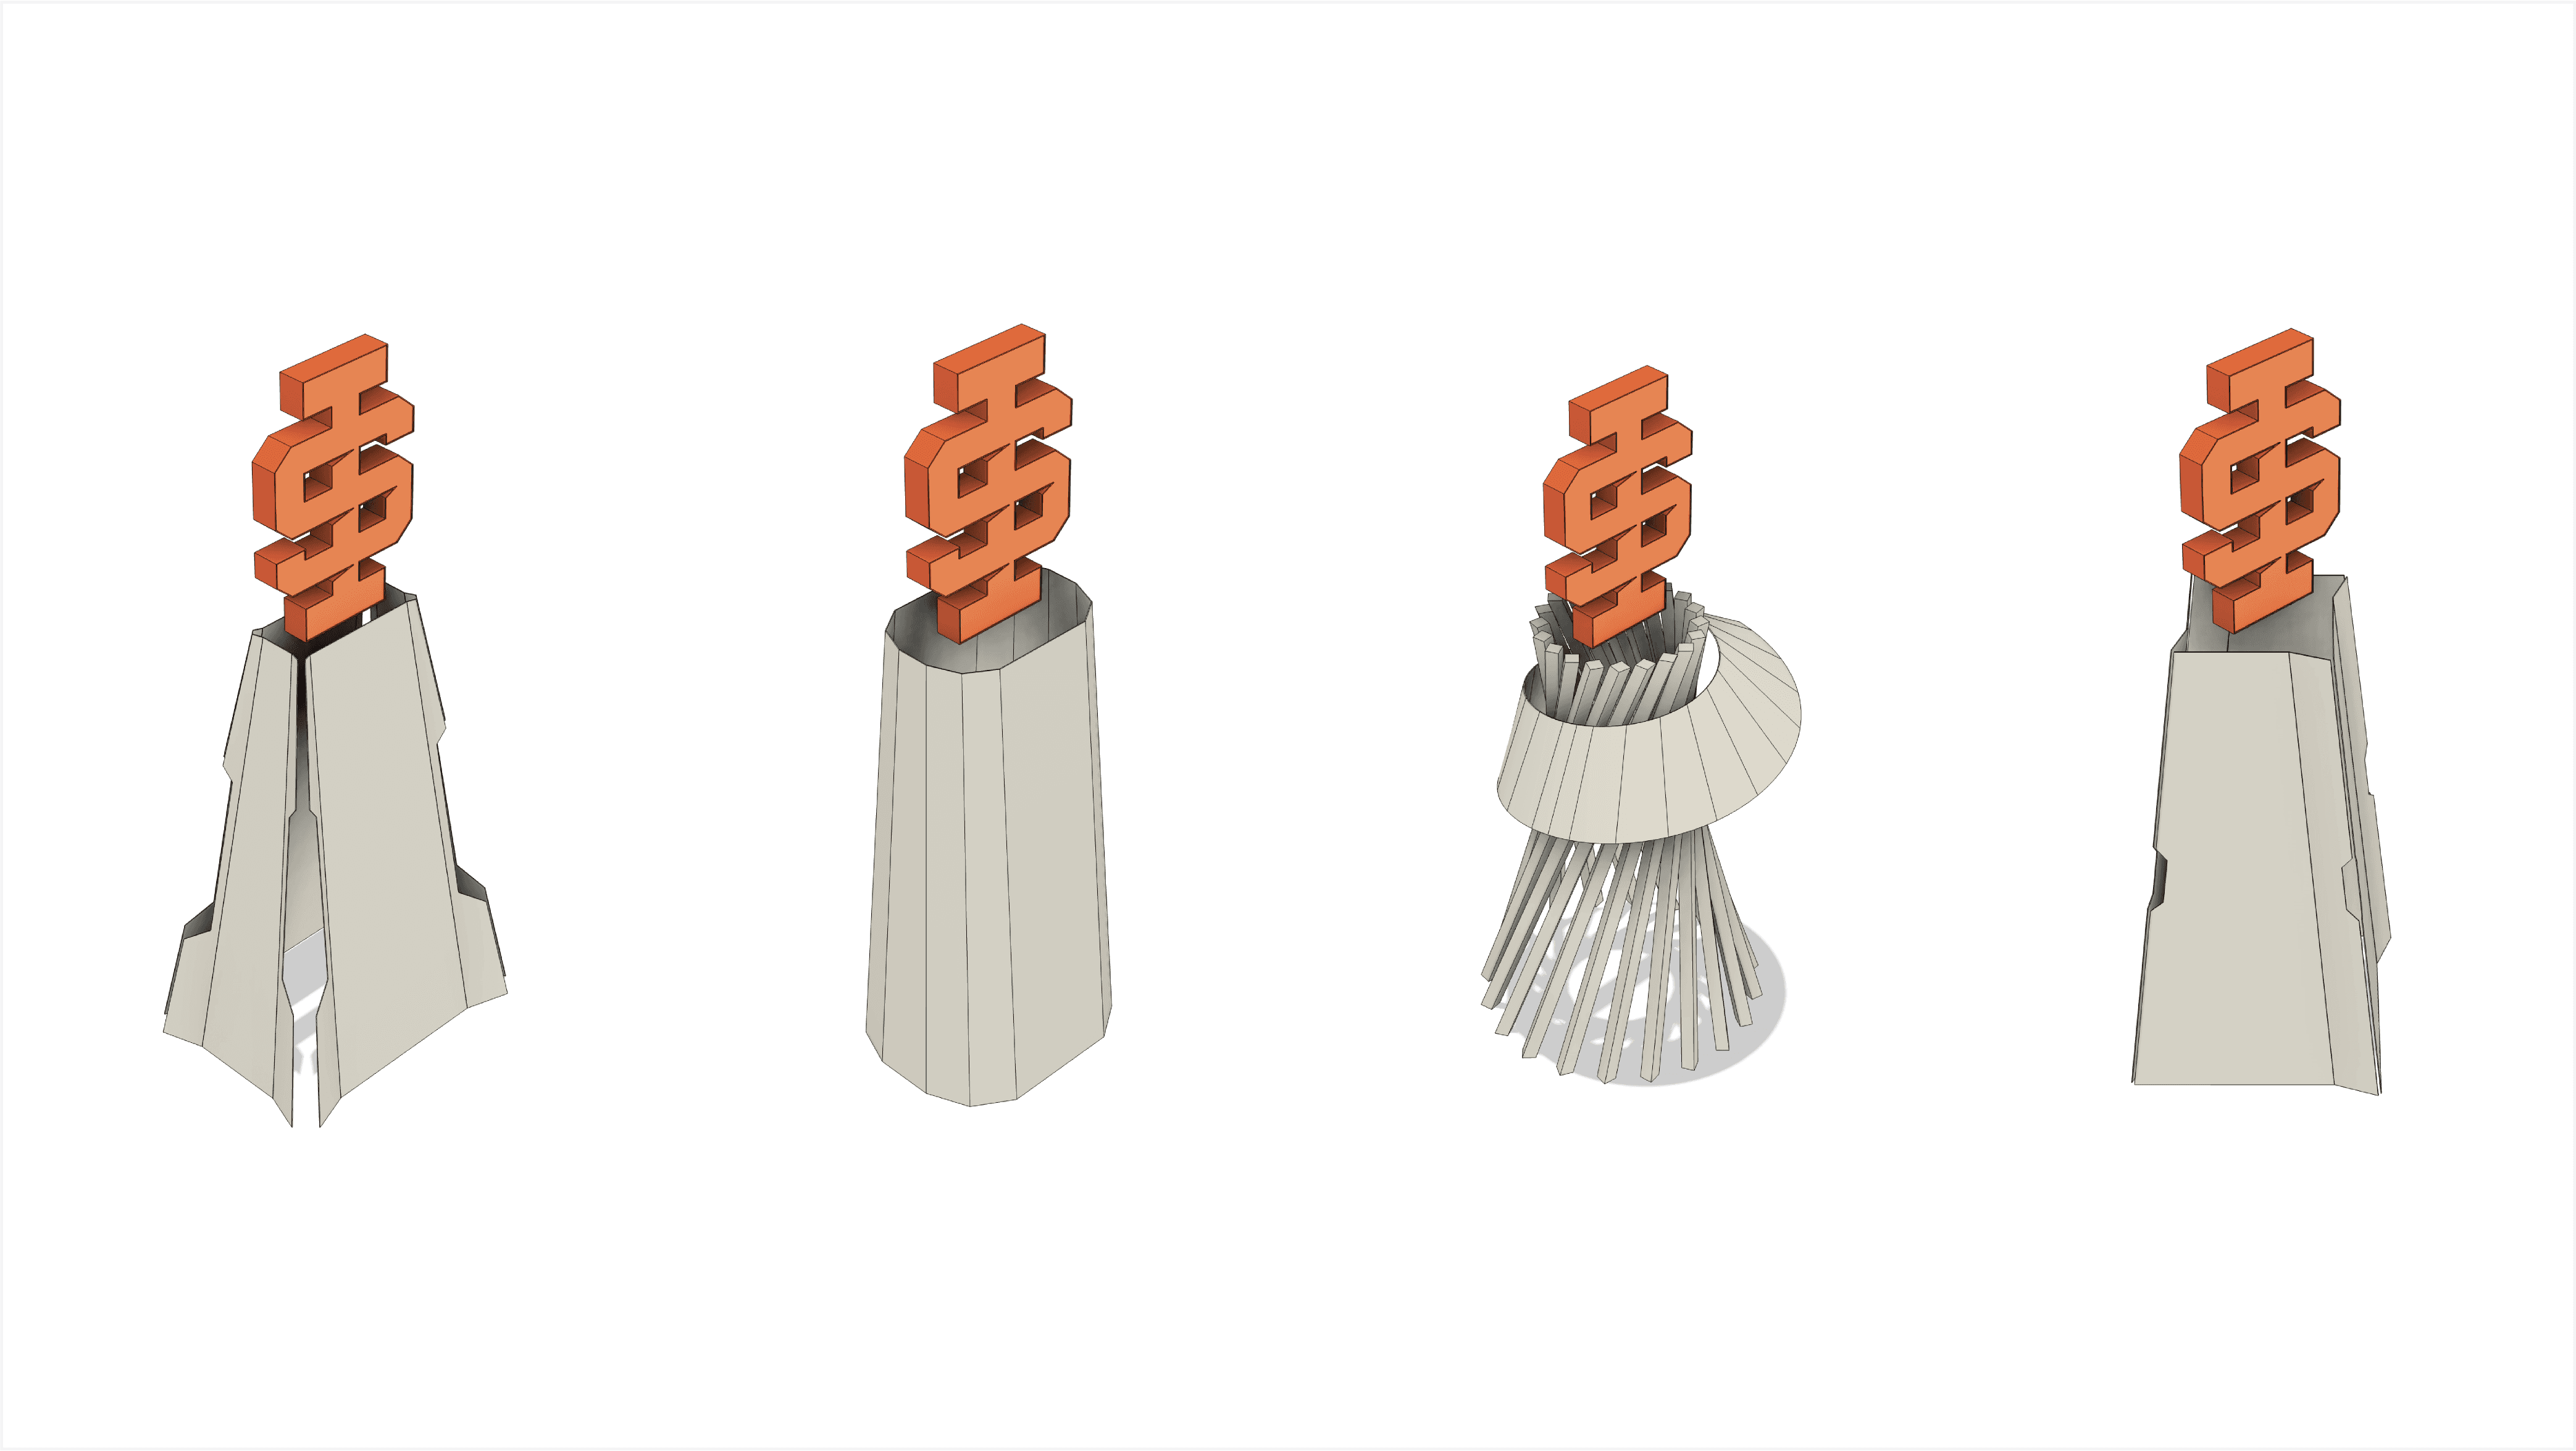
And settled on the one that was the most cohesive.
A bent aluminum panel broke at an angle with a notch on the sides to match the 3 Panel Display.
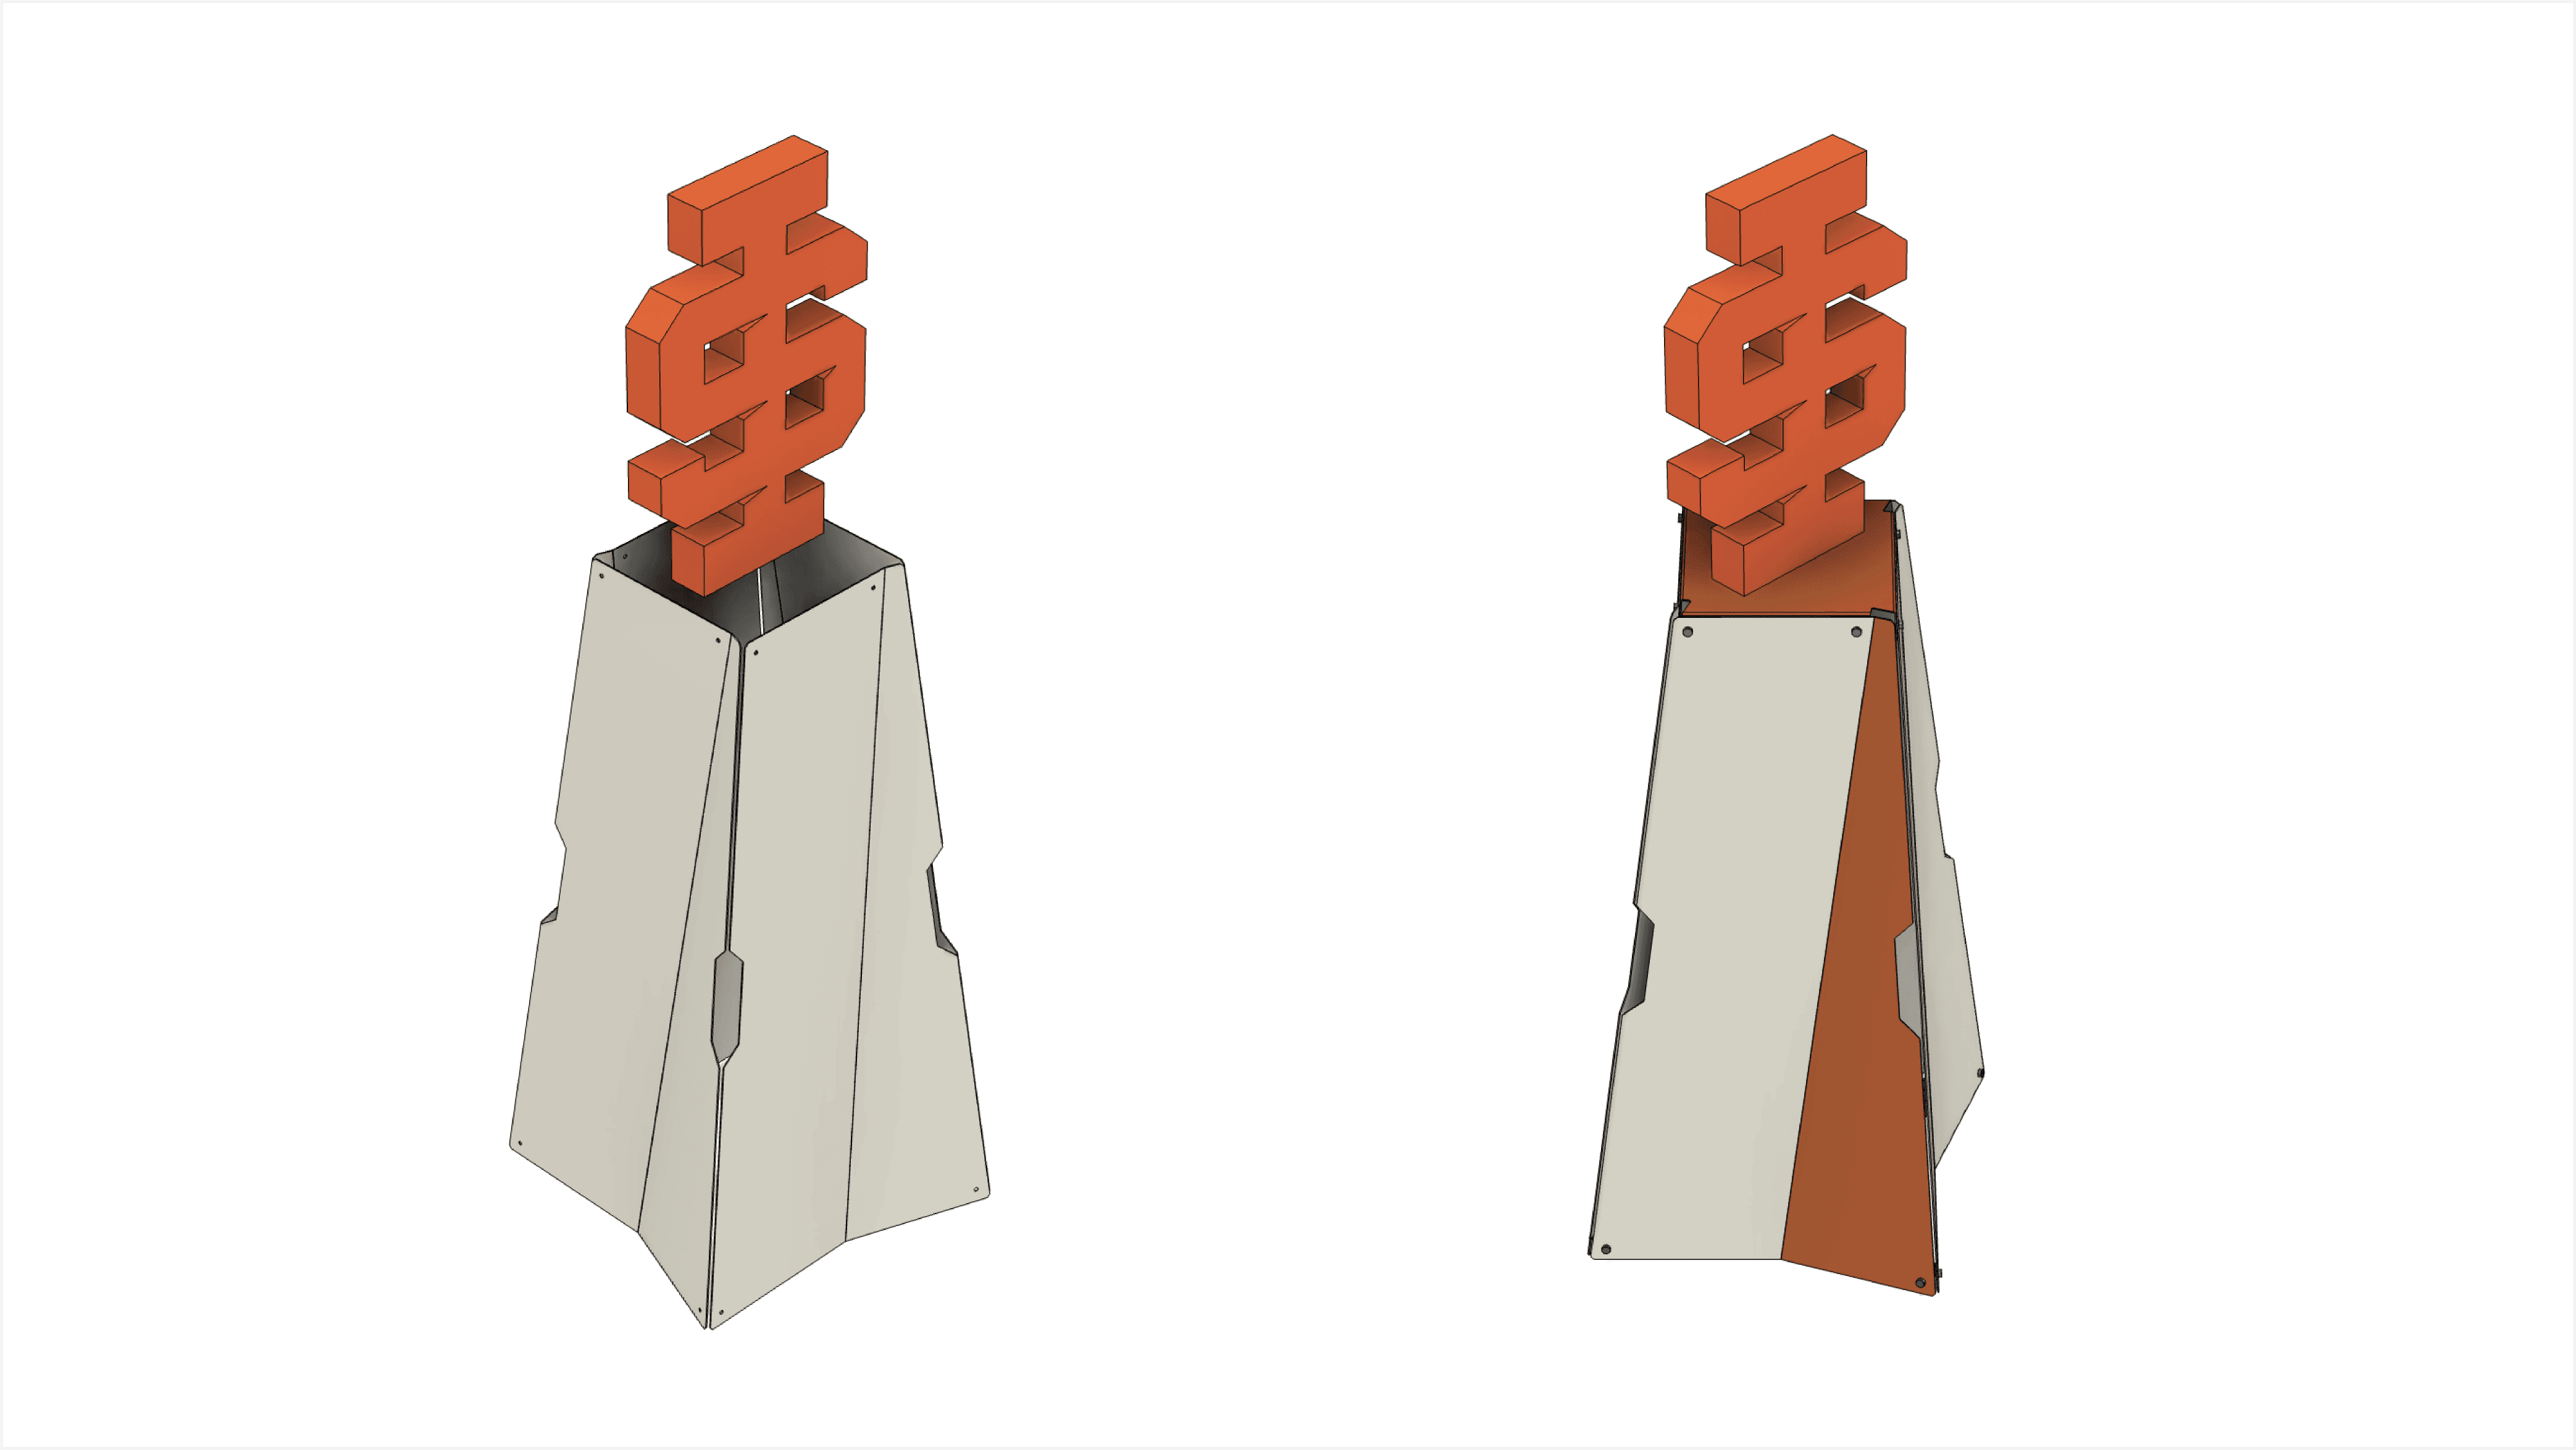
Here are the Round 2 rendering with two choices.
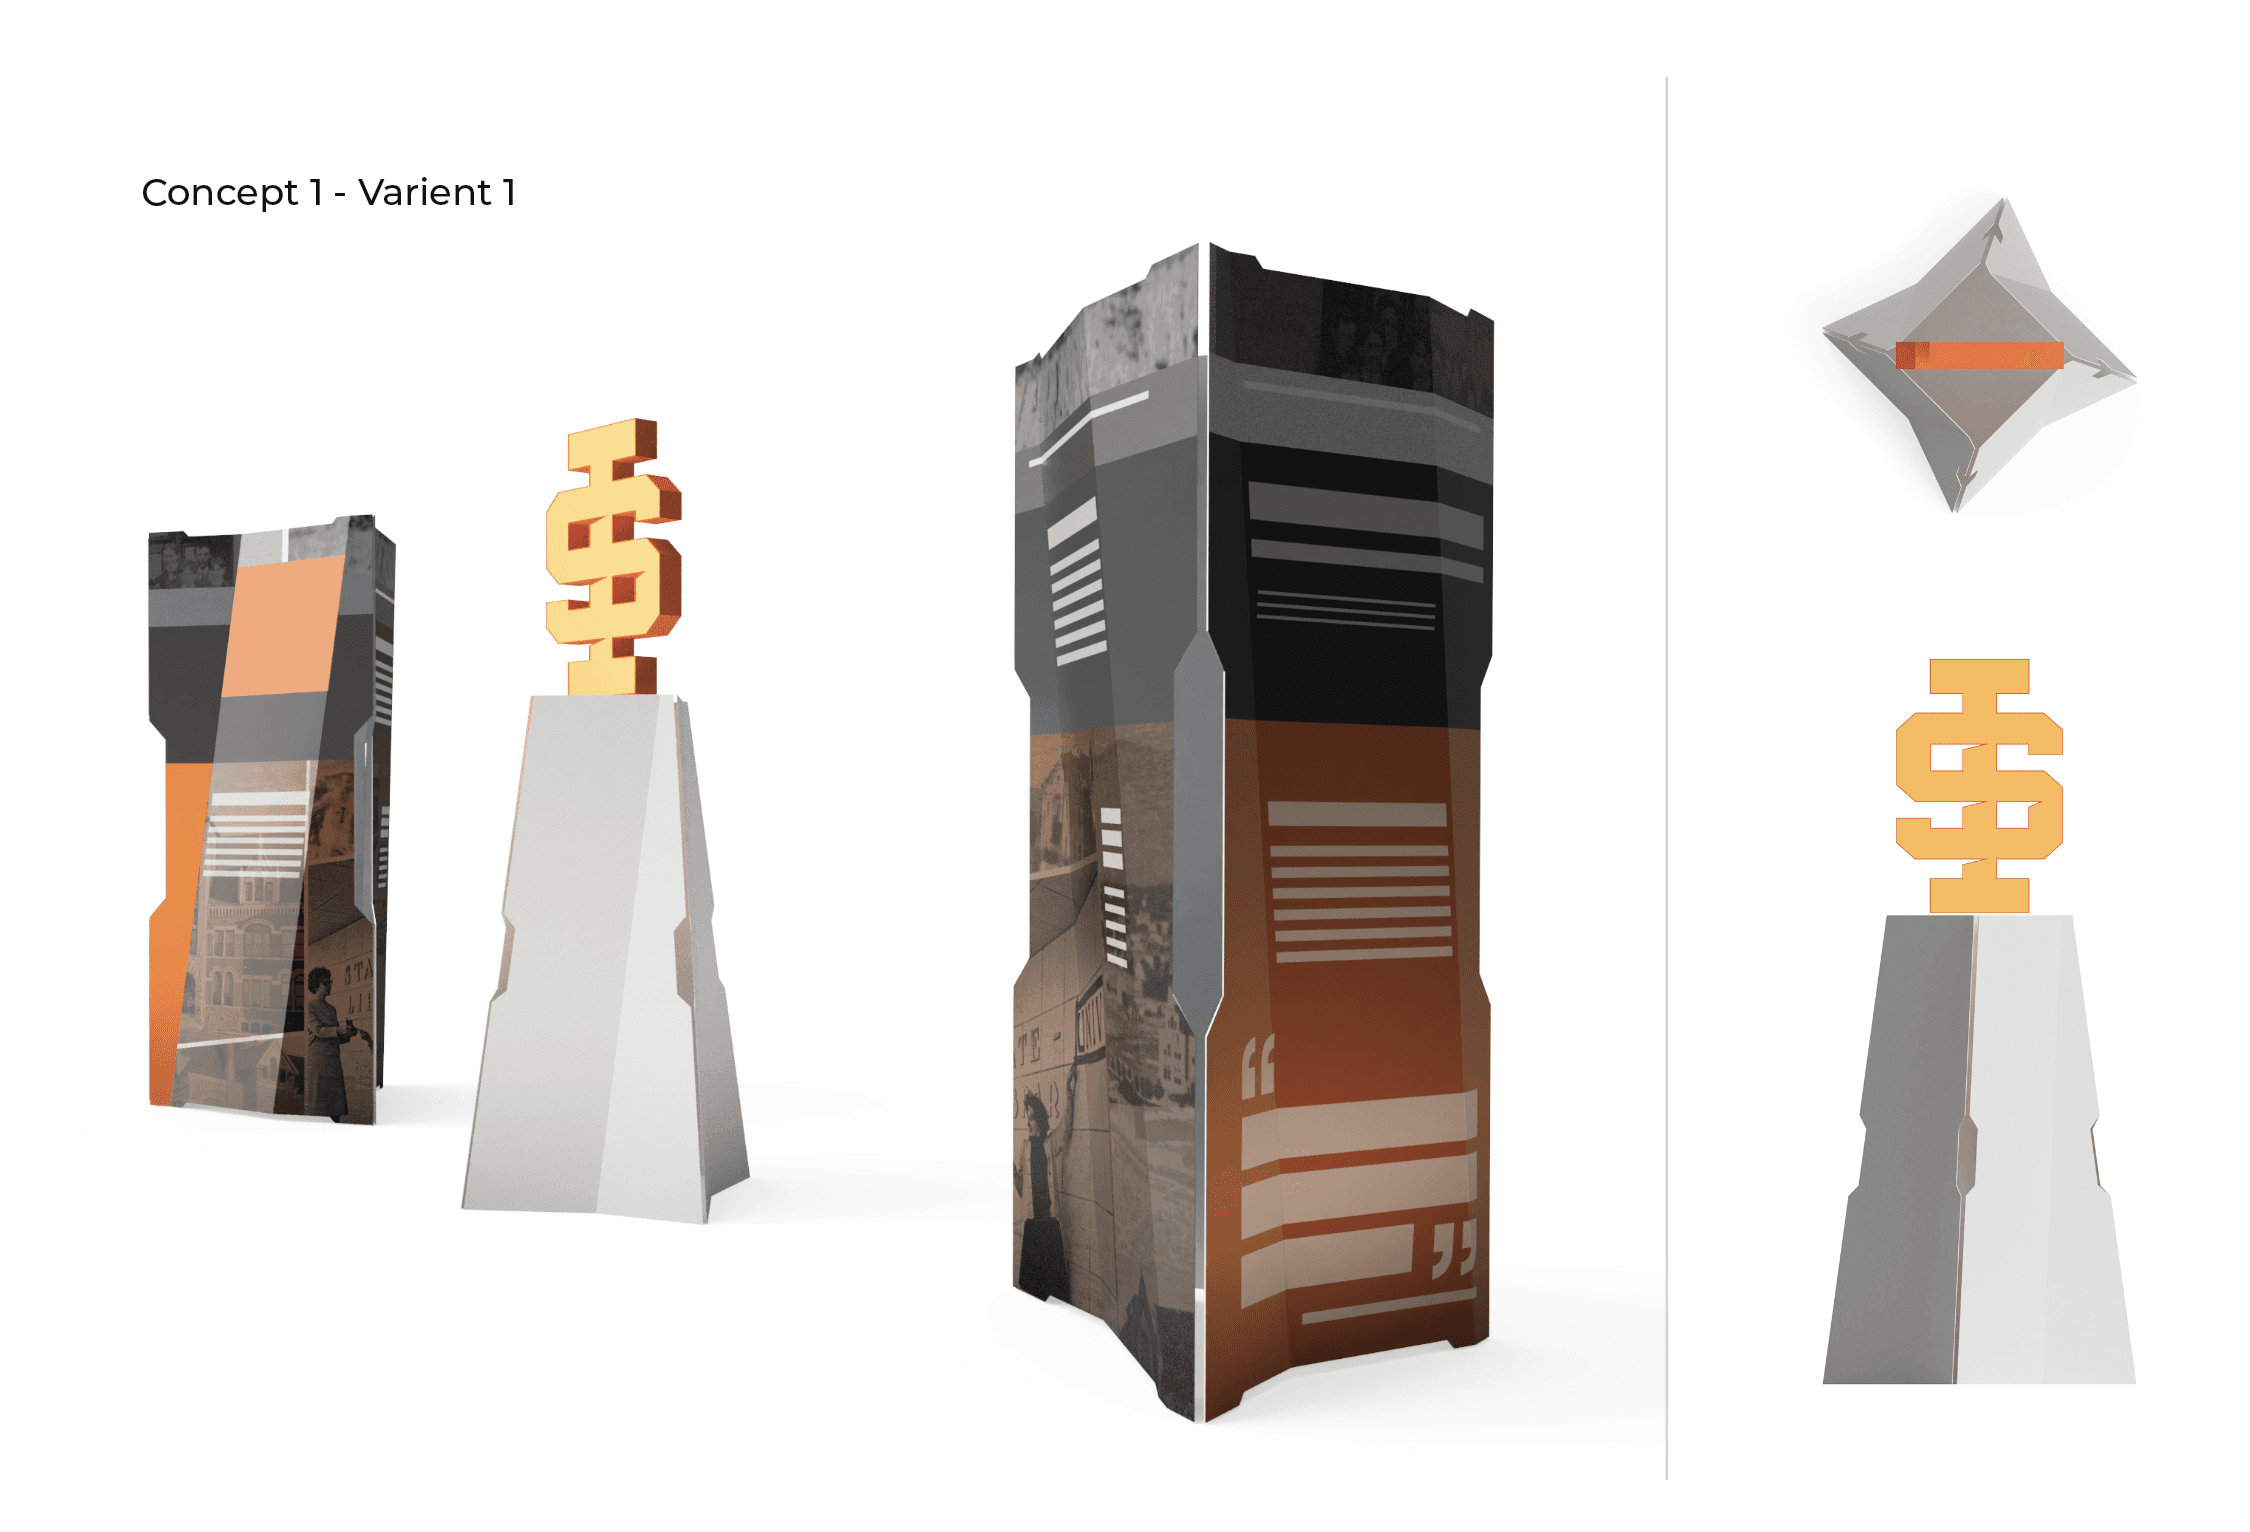
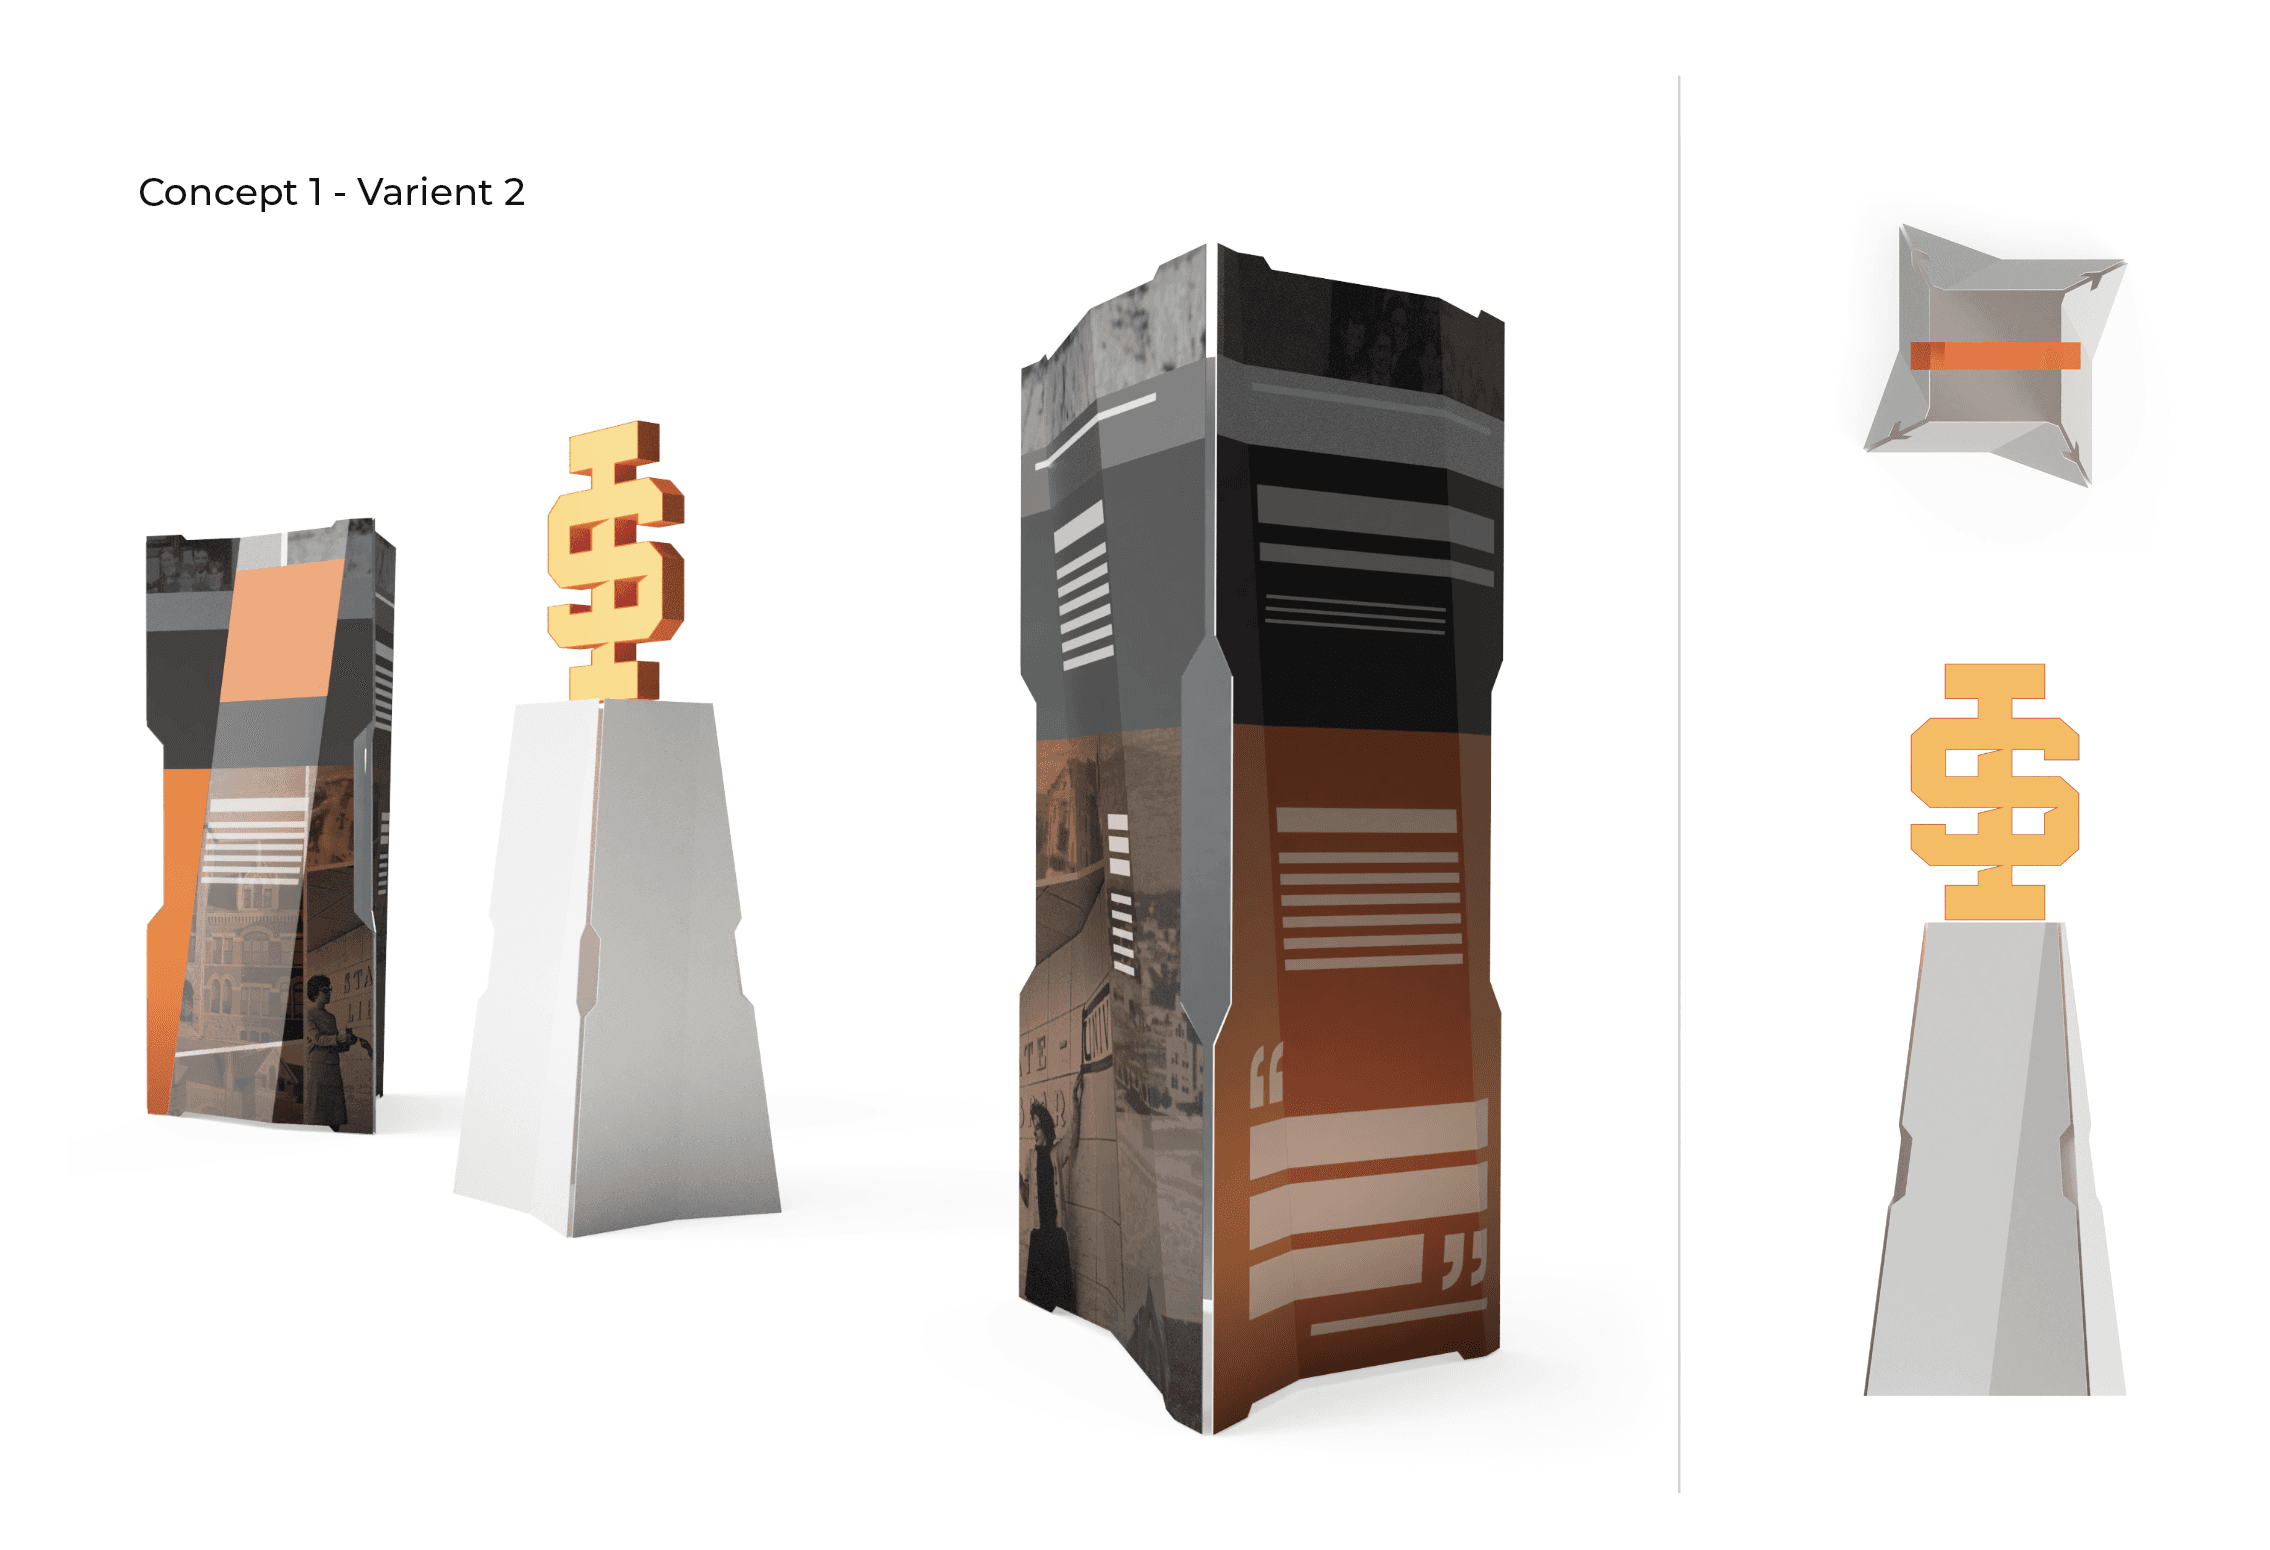
Concept 1 - Variant 1 was the favorite and got the thumbs up to proceed into Development.
Round 1 Development
3 PANEL DISPLAY
The Development of the 3 Panel Display was already 90% of the way there so lets knock that out first.
I simply had to source a hinge that will work for the 4 configurations of this display — Triangle, Zig Zag, Wall, and Stow; then create a technical drawing for laser cutting and breaking to get prices; collect the quotes and put together an estimate.
For custom hardware the #1 resource by most makers and fabricators are McMaster Carr. The Amazon of hardware and I've used this hinge on another project I did so I already knew this would work great.
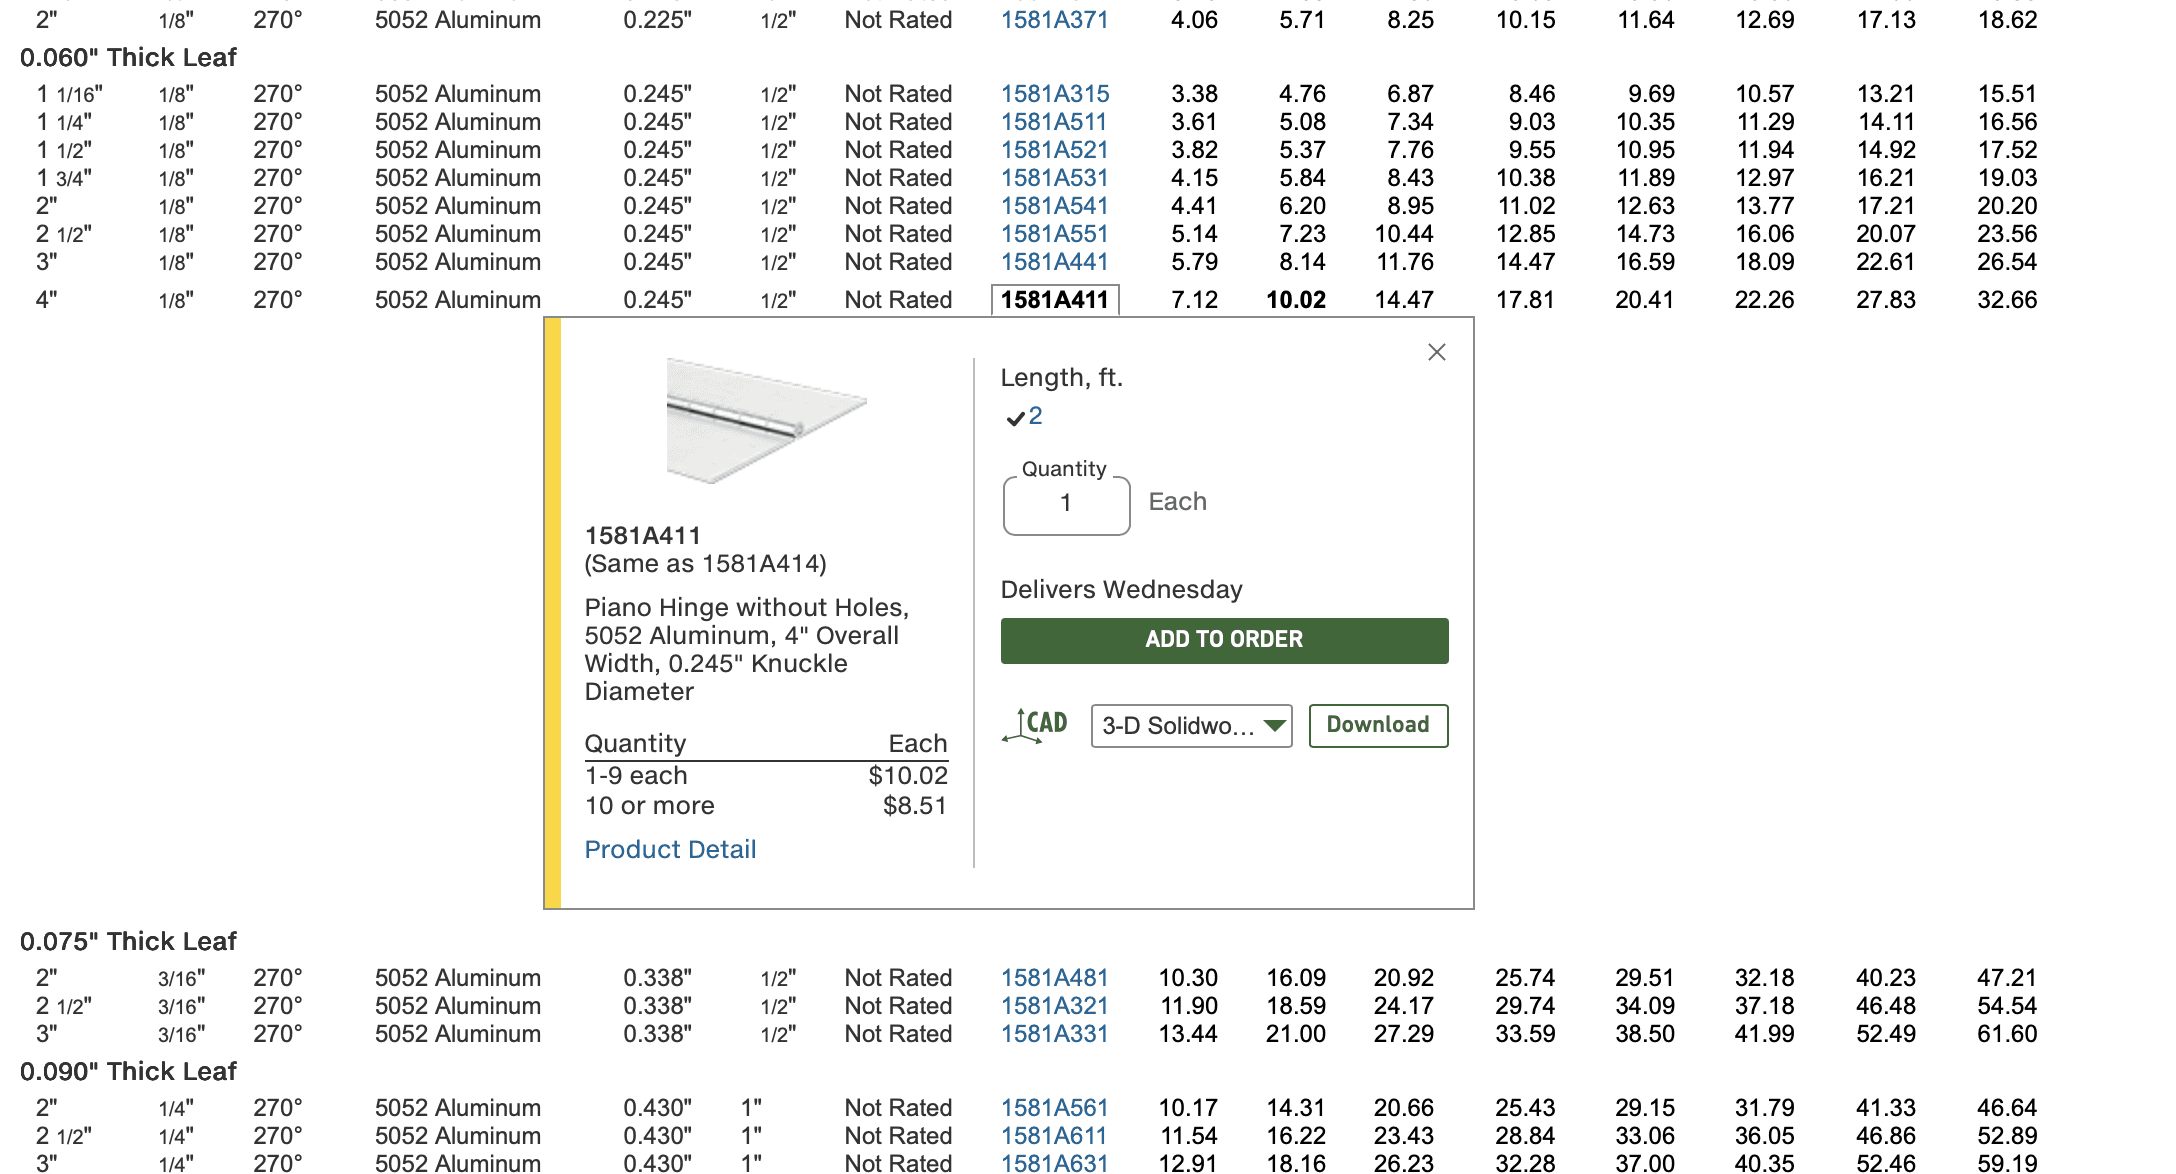
And the unique thing about McMaster Carr is that you can download the hardware into your 3D builds to make sure everything works as planned.
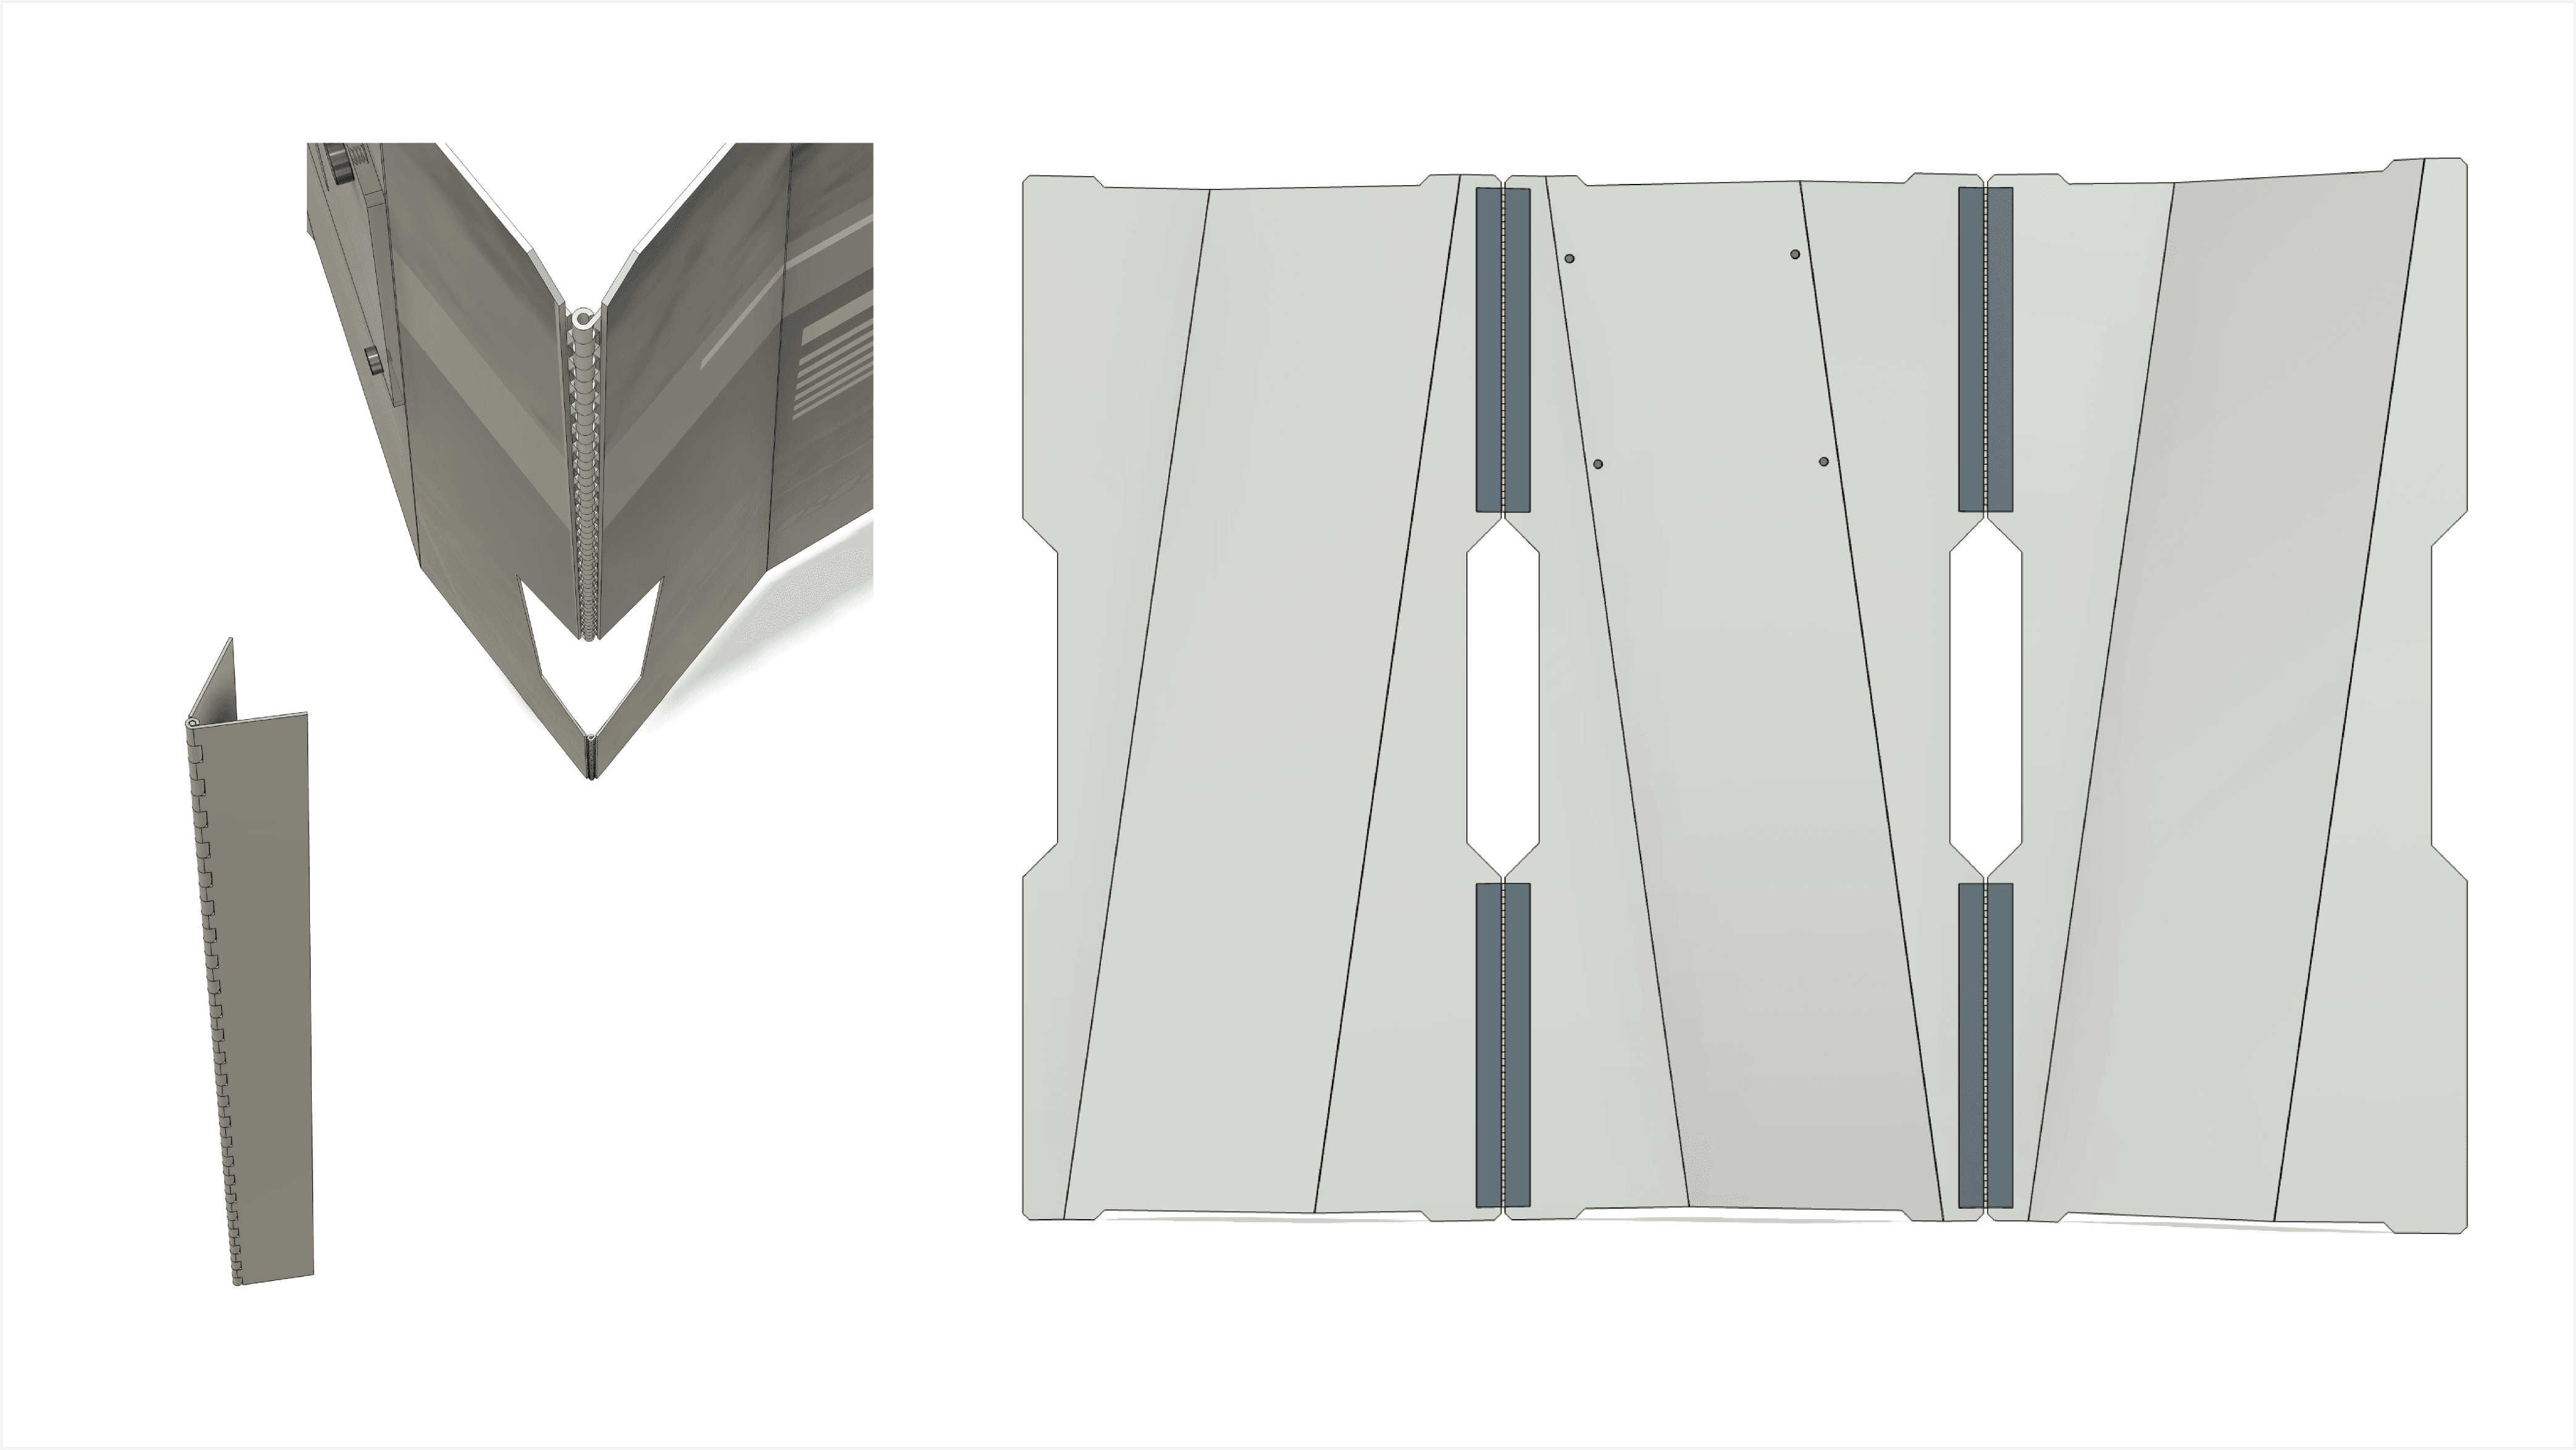
The hinge was to be mounted to the panels via Flat VHB adhesive on the back side of the center piece, which sticks extremely well to aluminum. Near impossible to remove and no hardware needed.
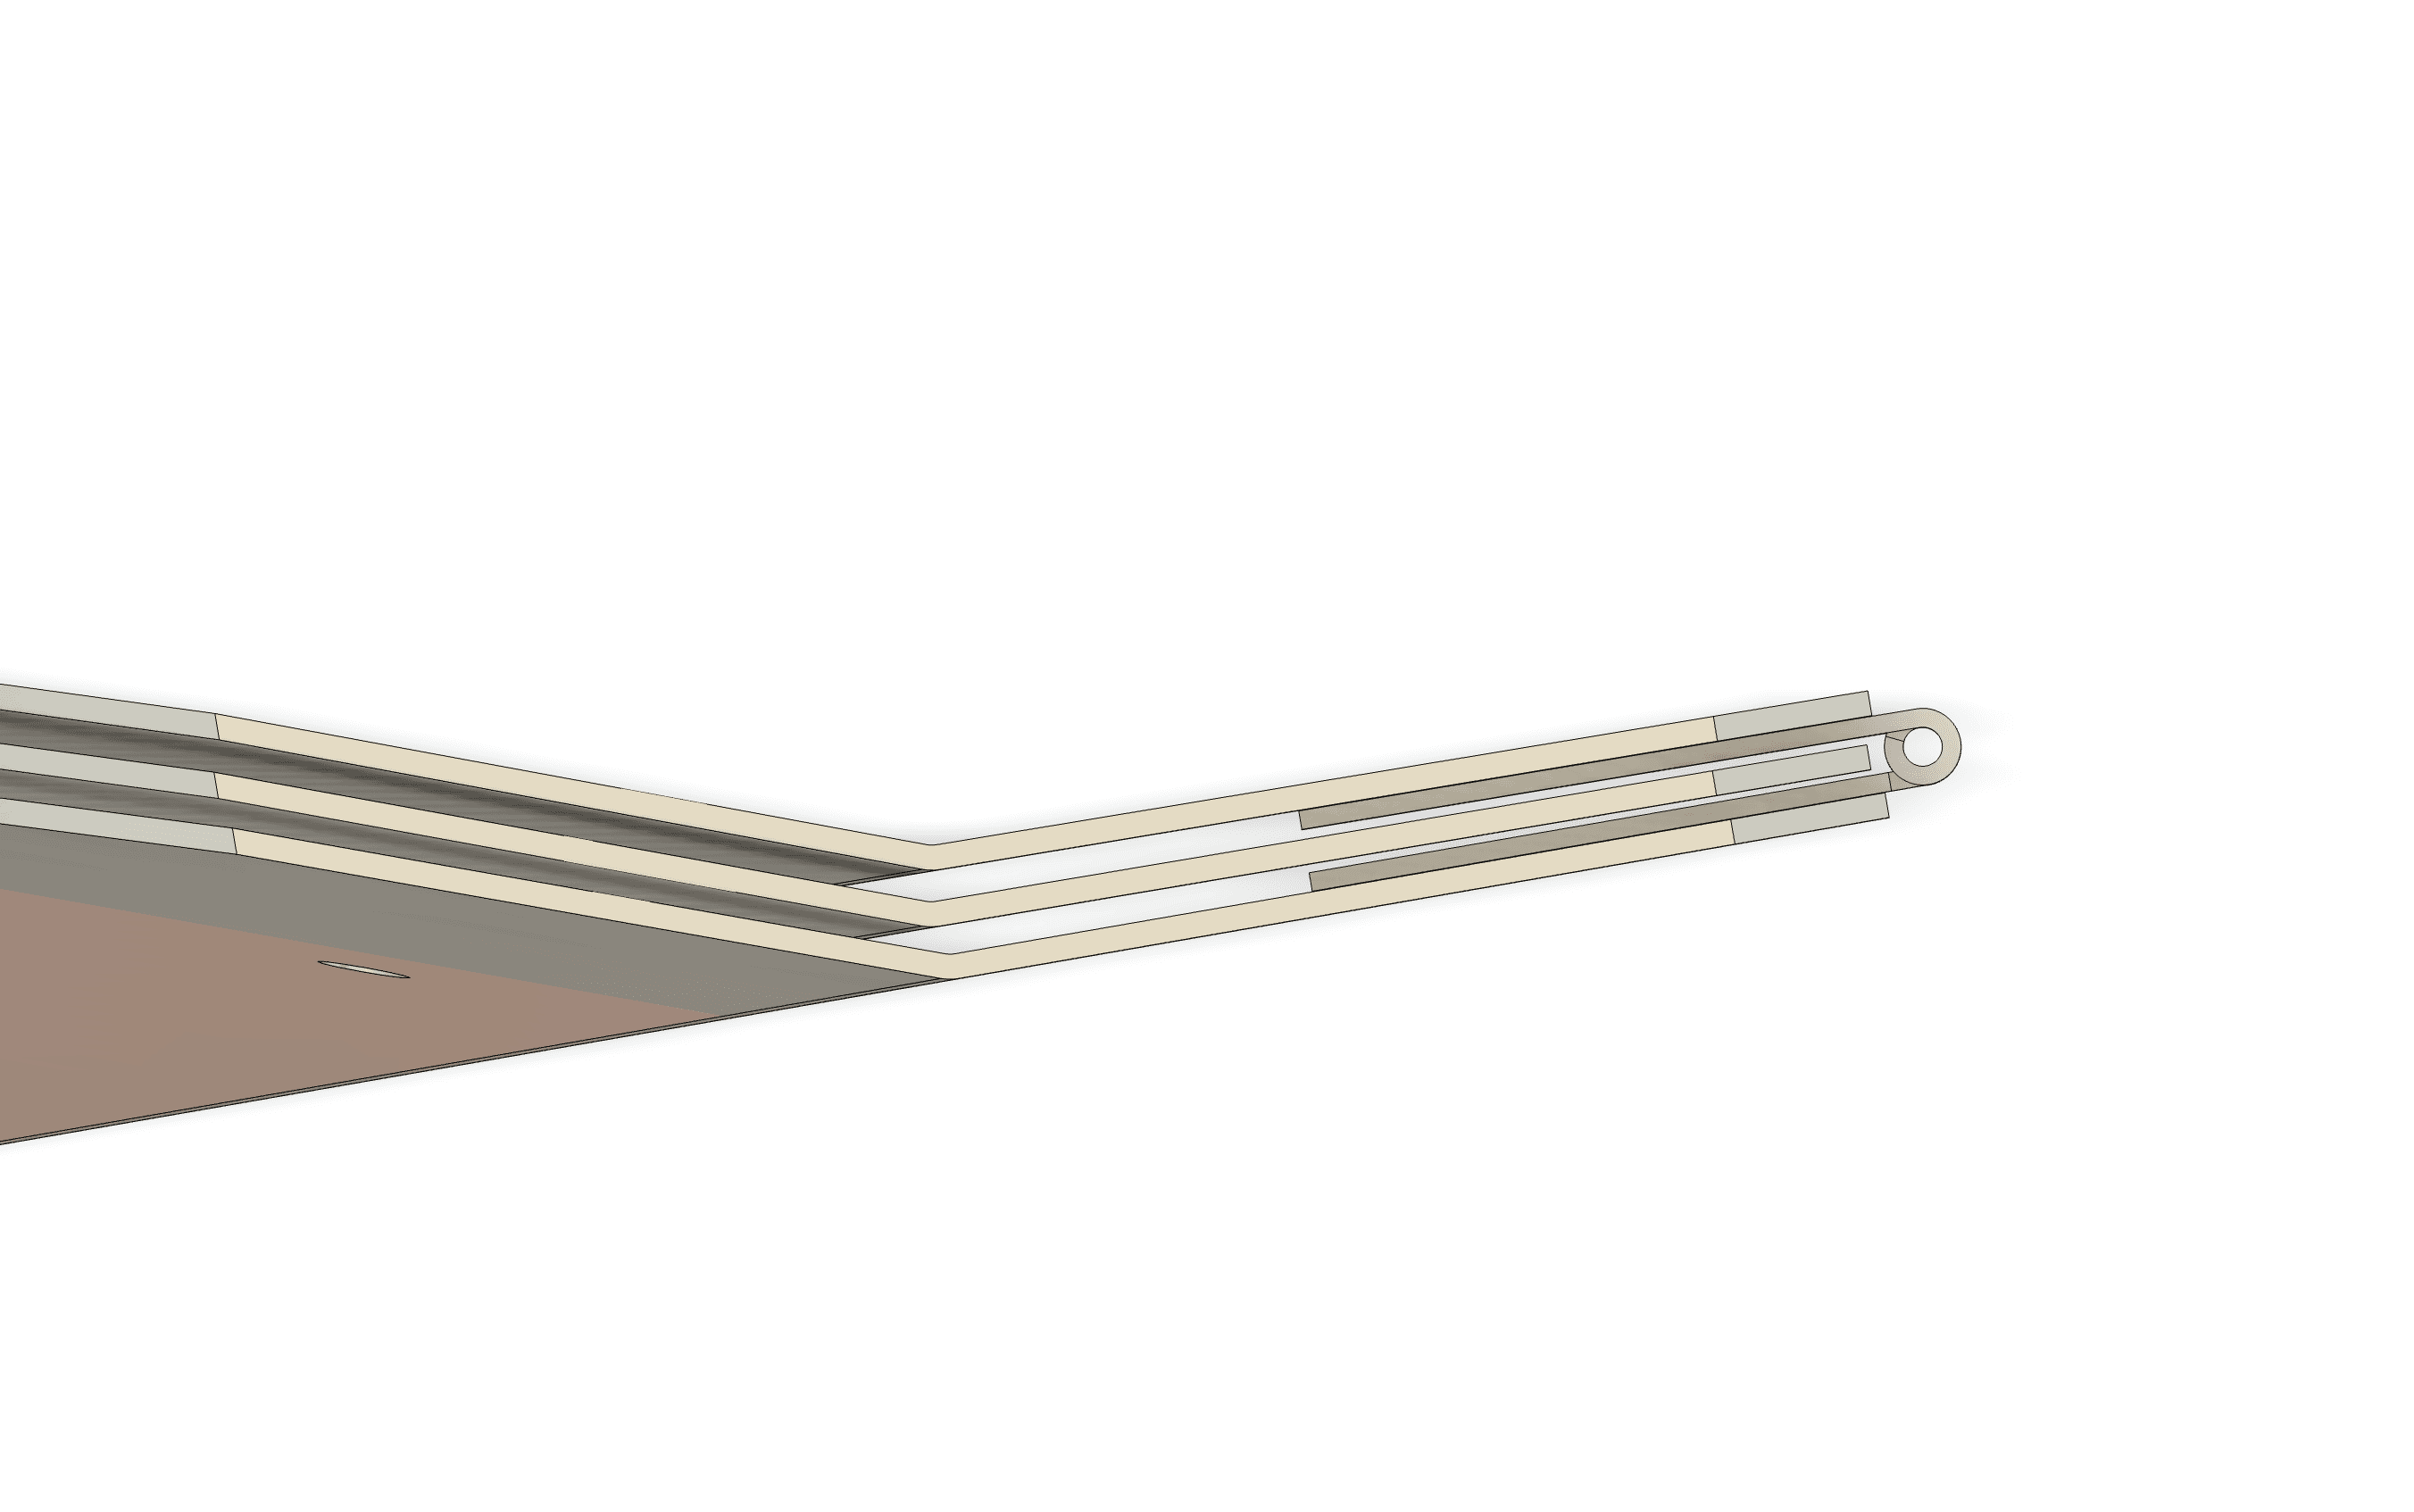
Image below shows how the 3 panels fold together with the second layer fitting perfectly inside the hinge.
Next step.
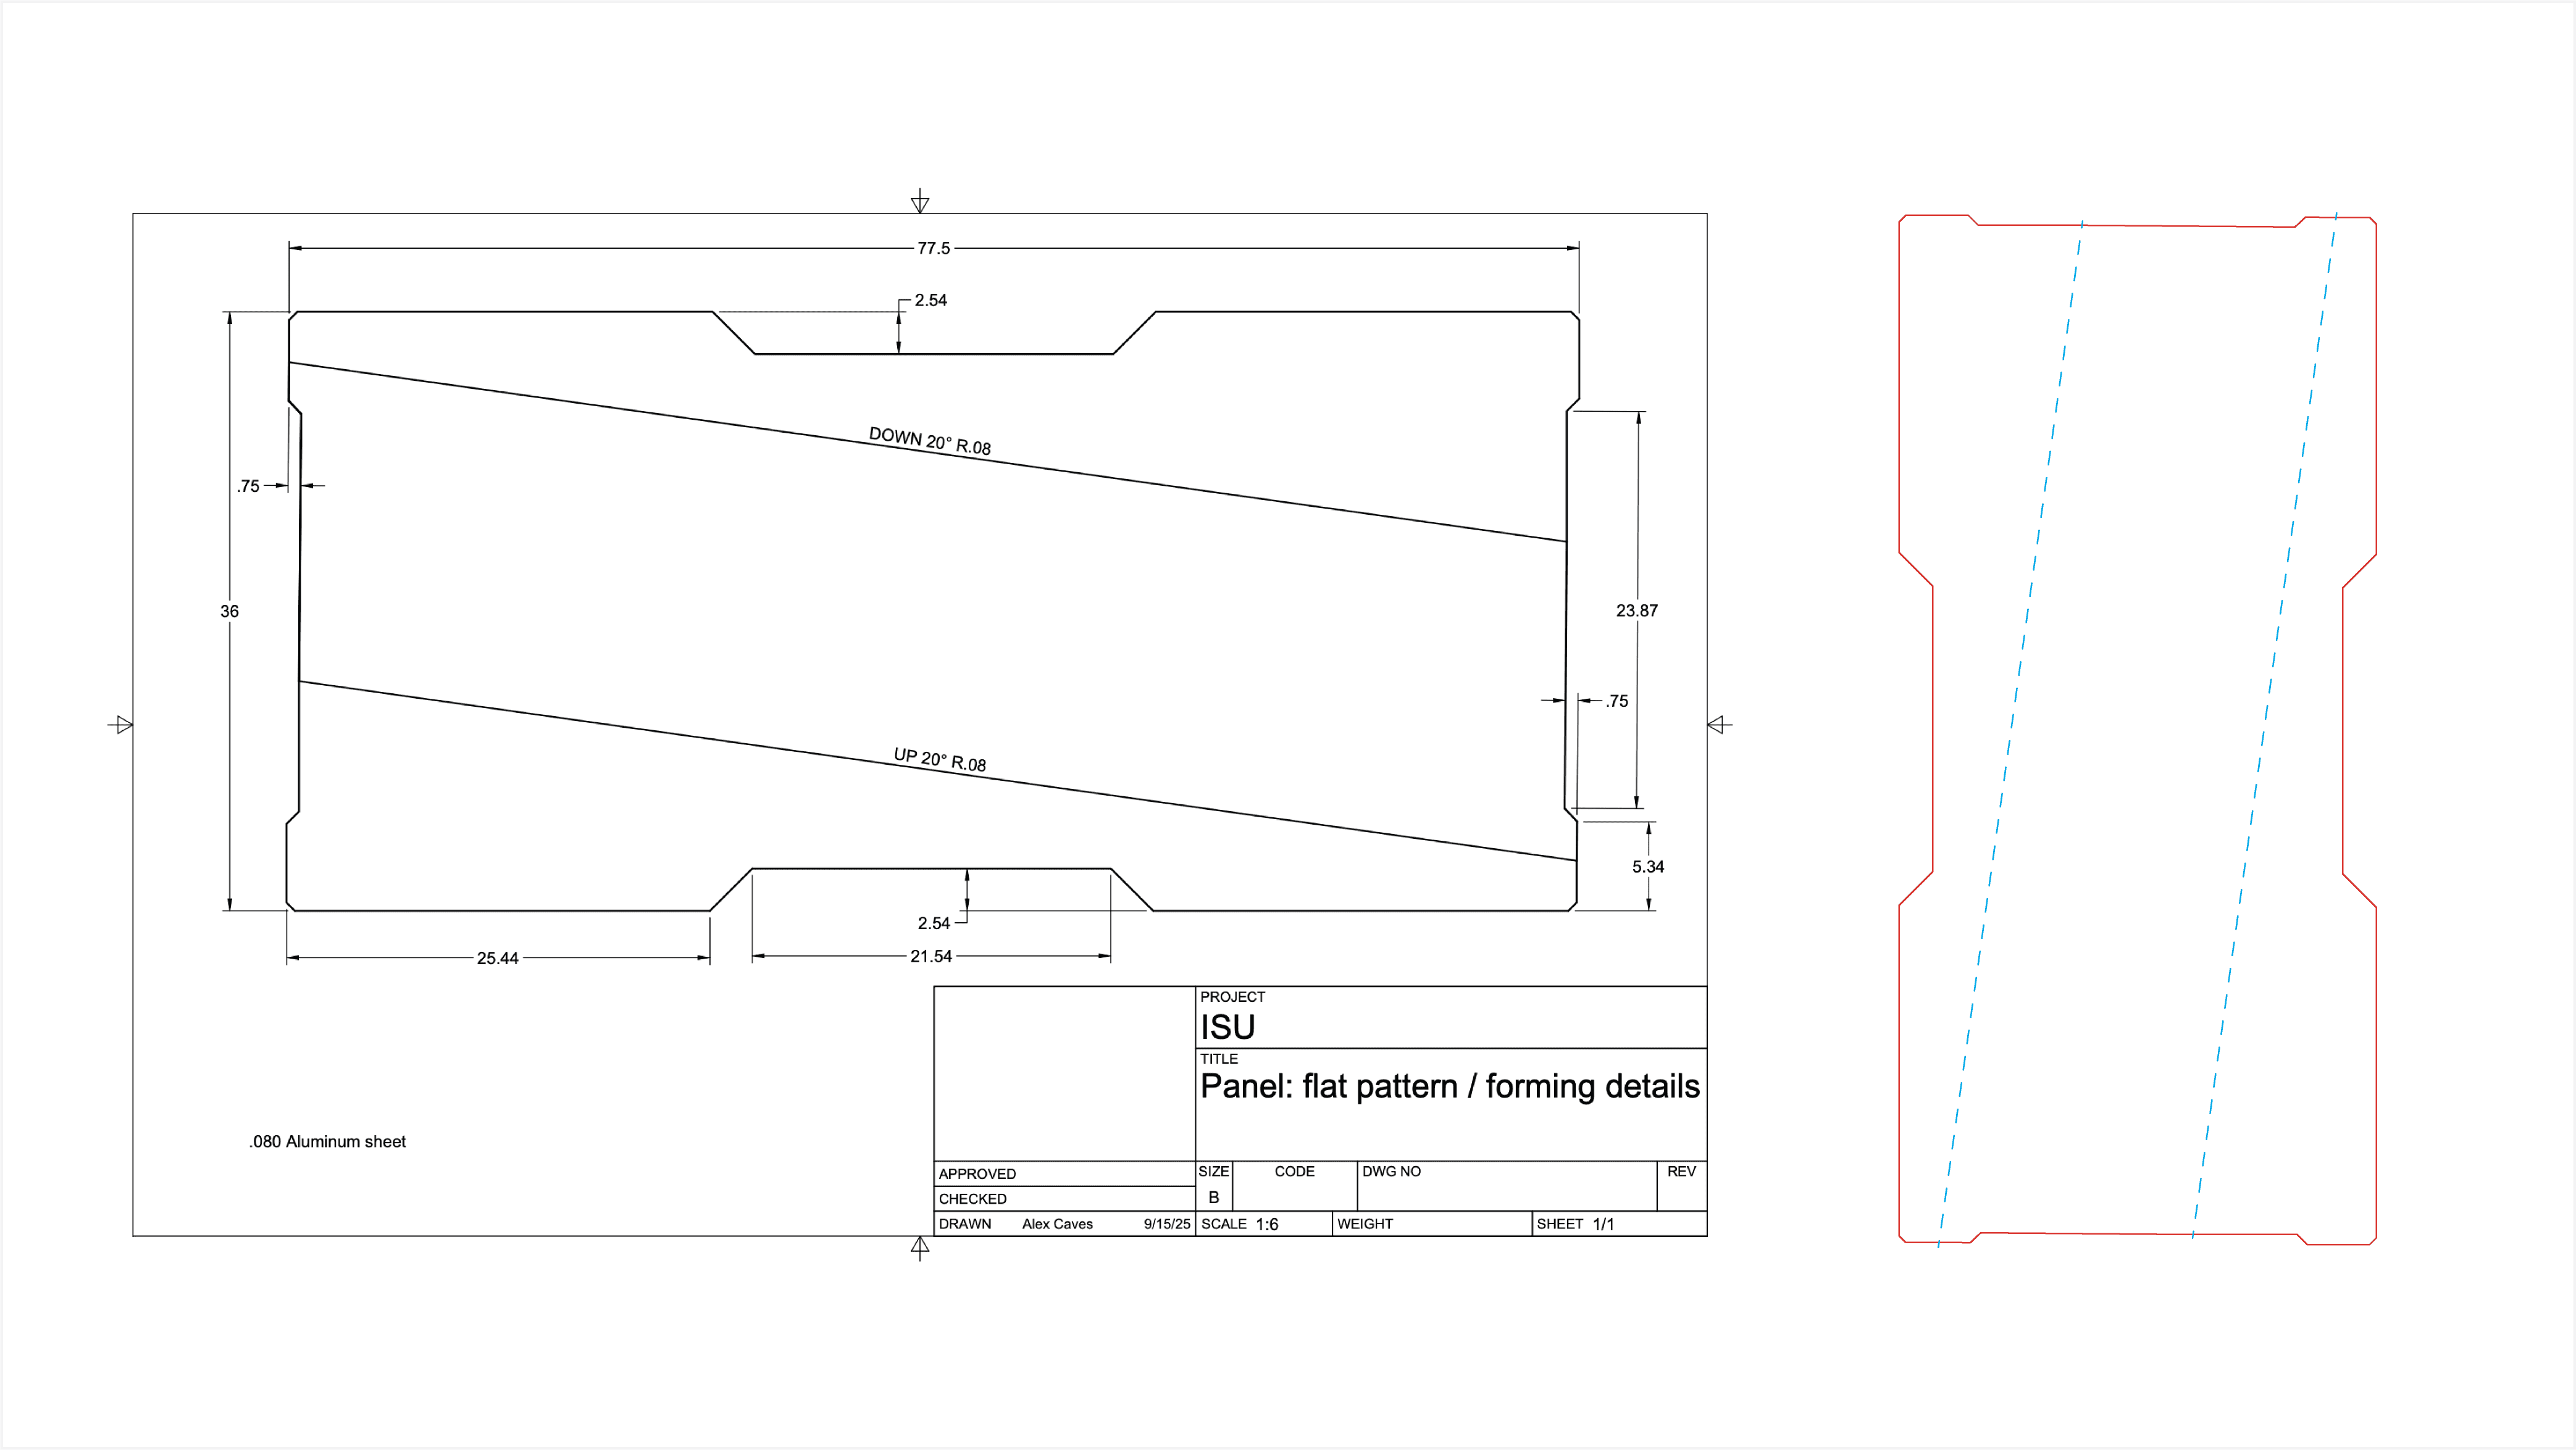
A Technical Drawing and a .DXF profile for Pacific Steel to provide me an estimate.
Then the Vinyl Print. They get priced out per yard so getting a quote was straightforward.
QTY of 3) 73" prints with Matte Lam. Gloss lam on the center facet. (If pricing allowed)
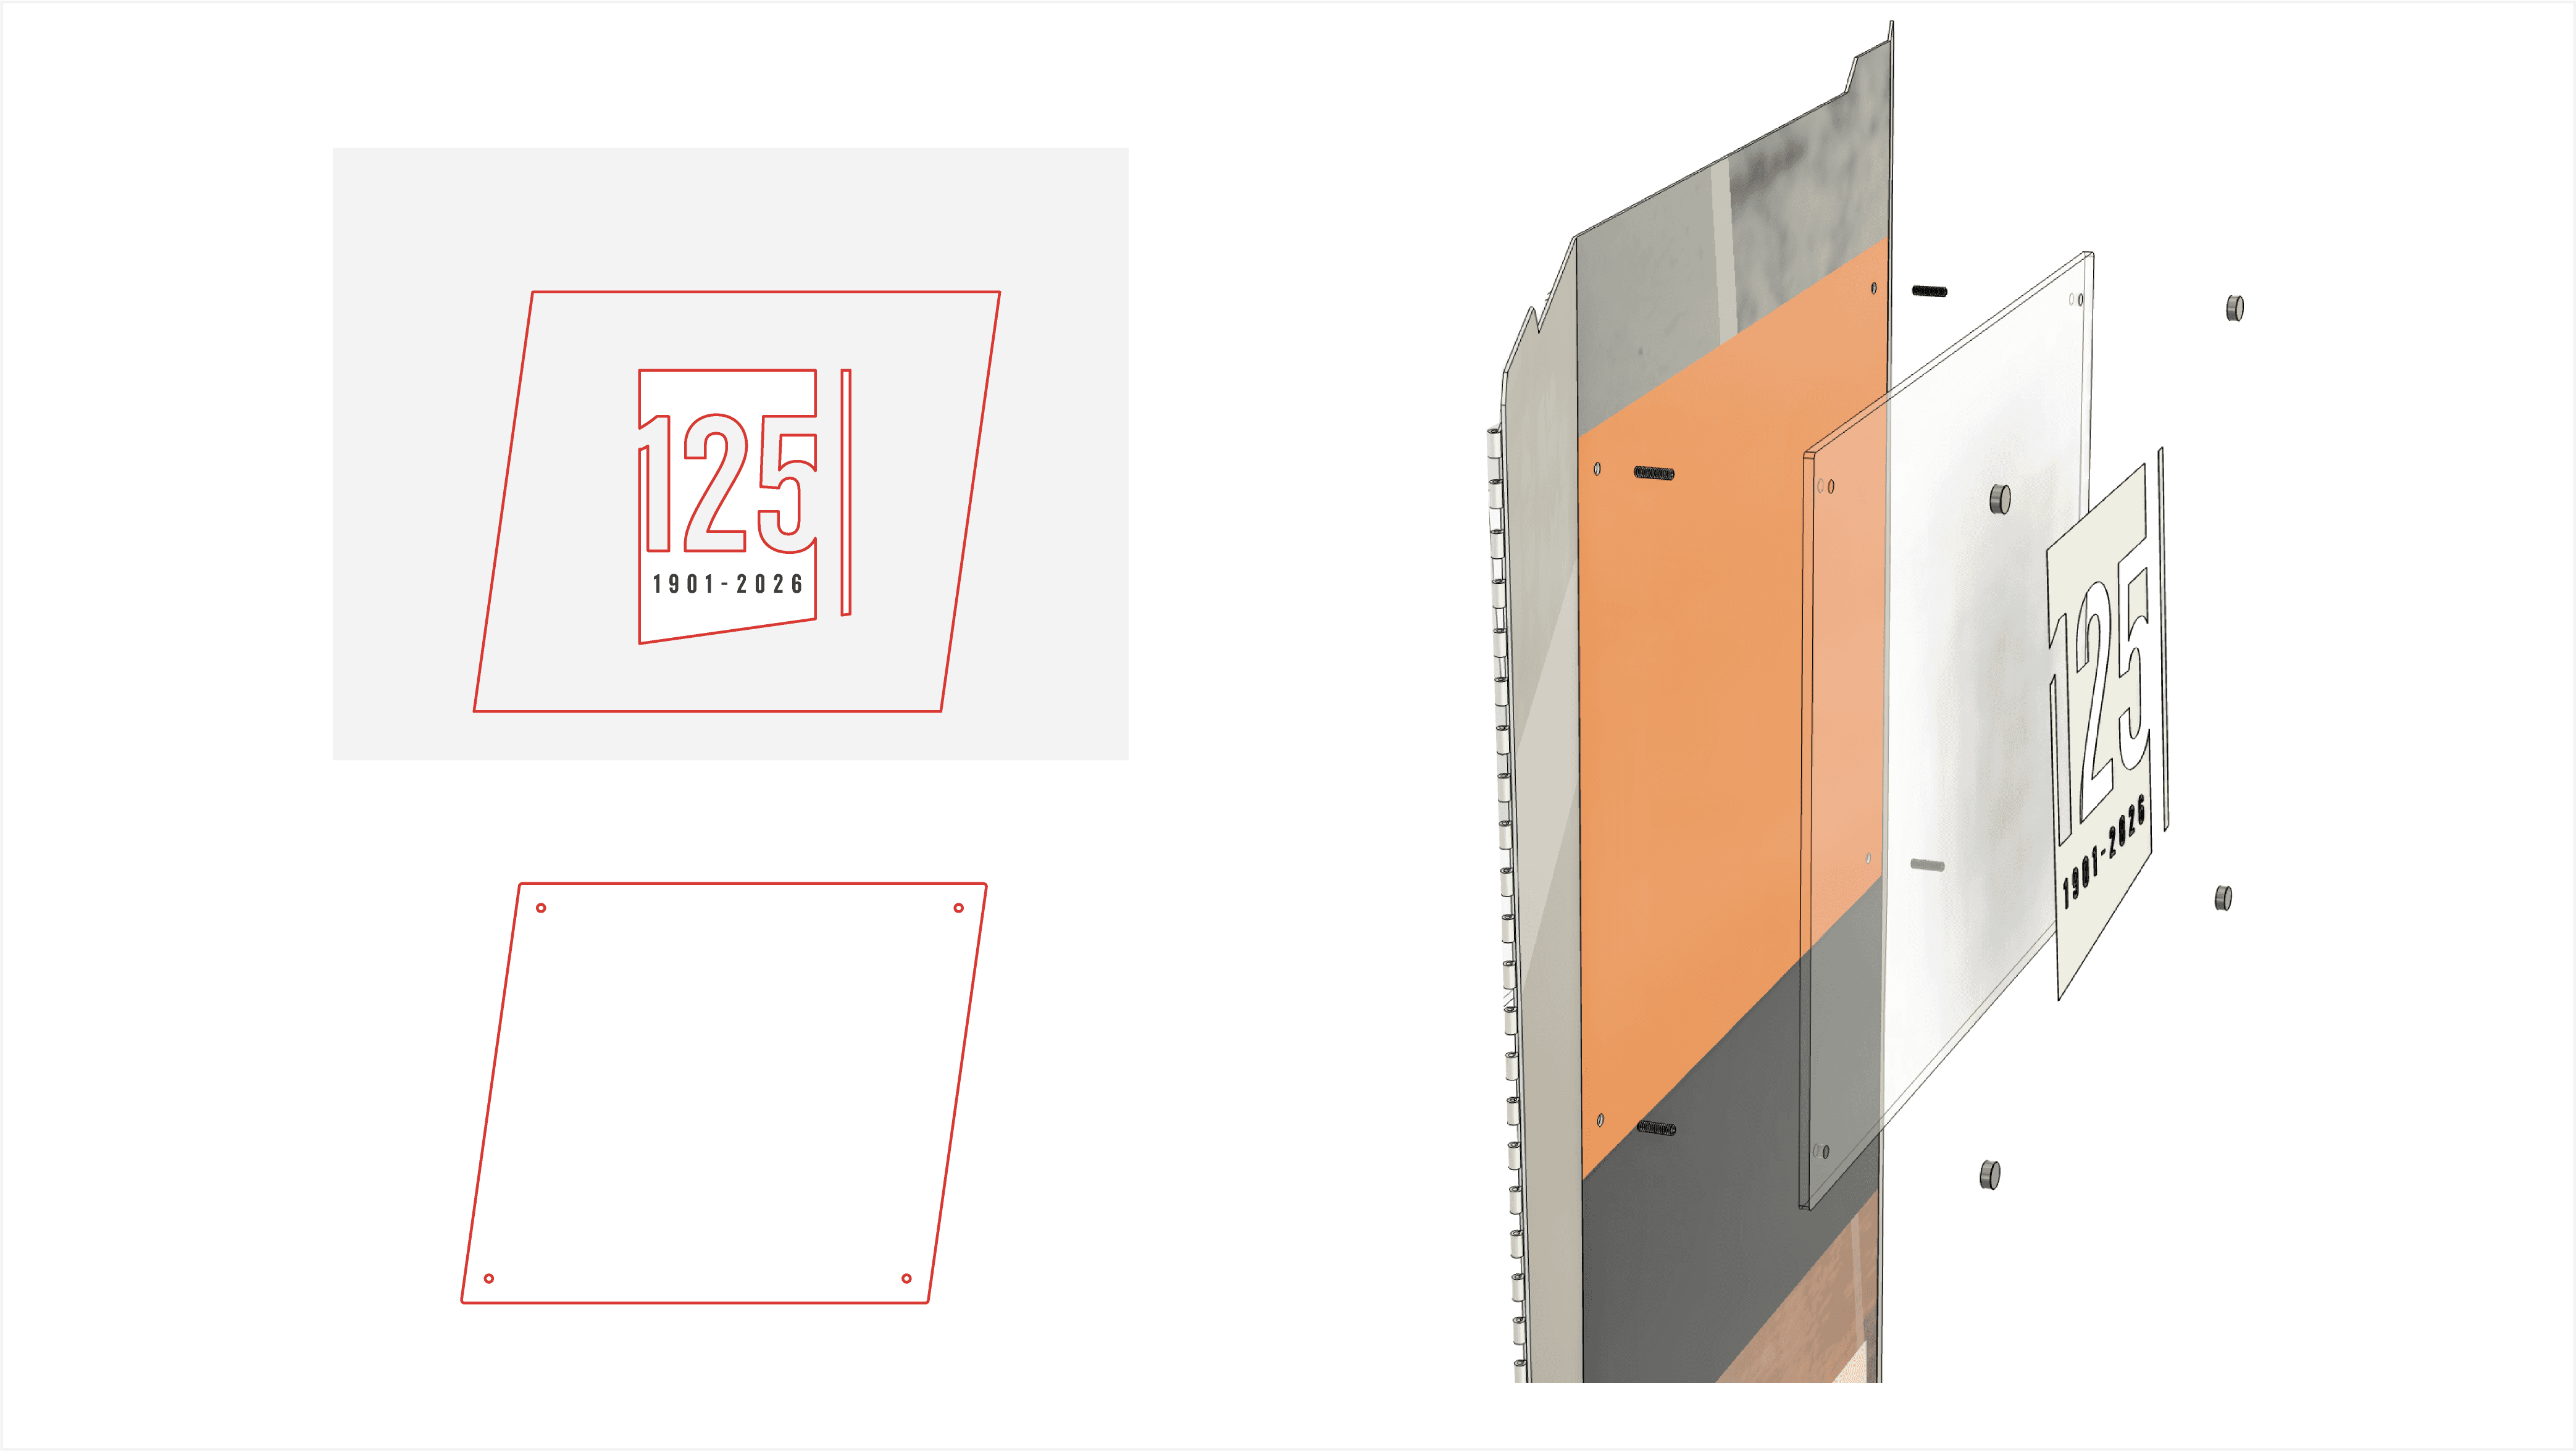
Oh, and the plaque. Vinyl print, plot, laser cut of the clear acrylic, and hardware.
Go here >> 3 Panel Display << to check out the 3D interactive to see the 4 configurations of this display.
CENTERPIECE:
I'd say this one was more around 60% developed. The overall dimensions and scale, the panels, and the Spirit Mark was close to being final but, the internal structure to hold everything in place was still missing.
The challenging part of this build was creating a framework that was both lightweight and stable, and hold the panels securely at its unique angle, which meant the attachment points had to be formed sheet metal as well.
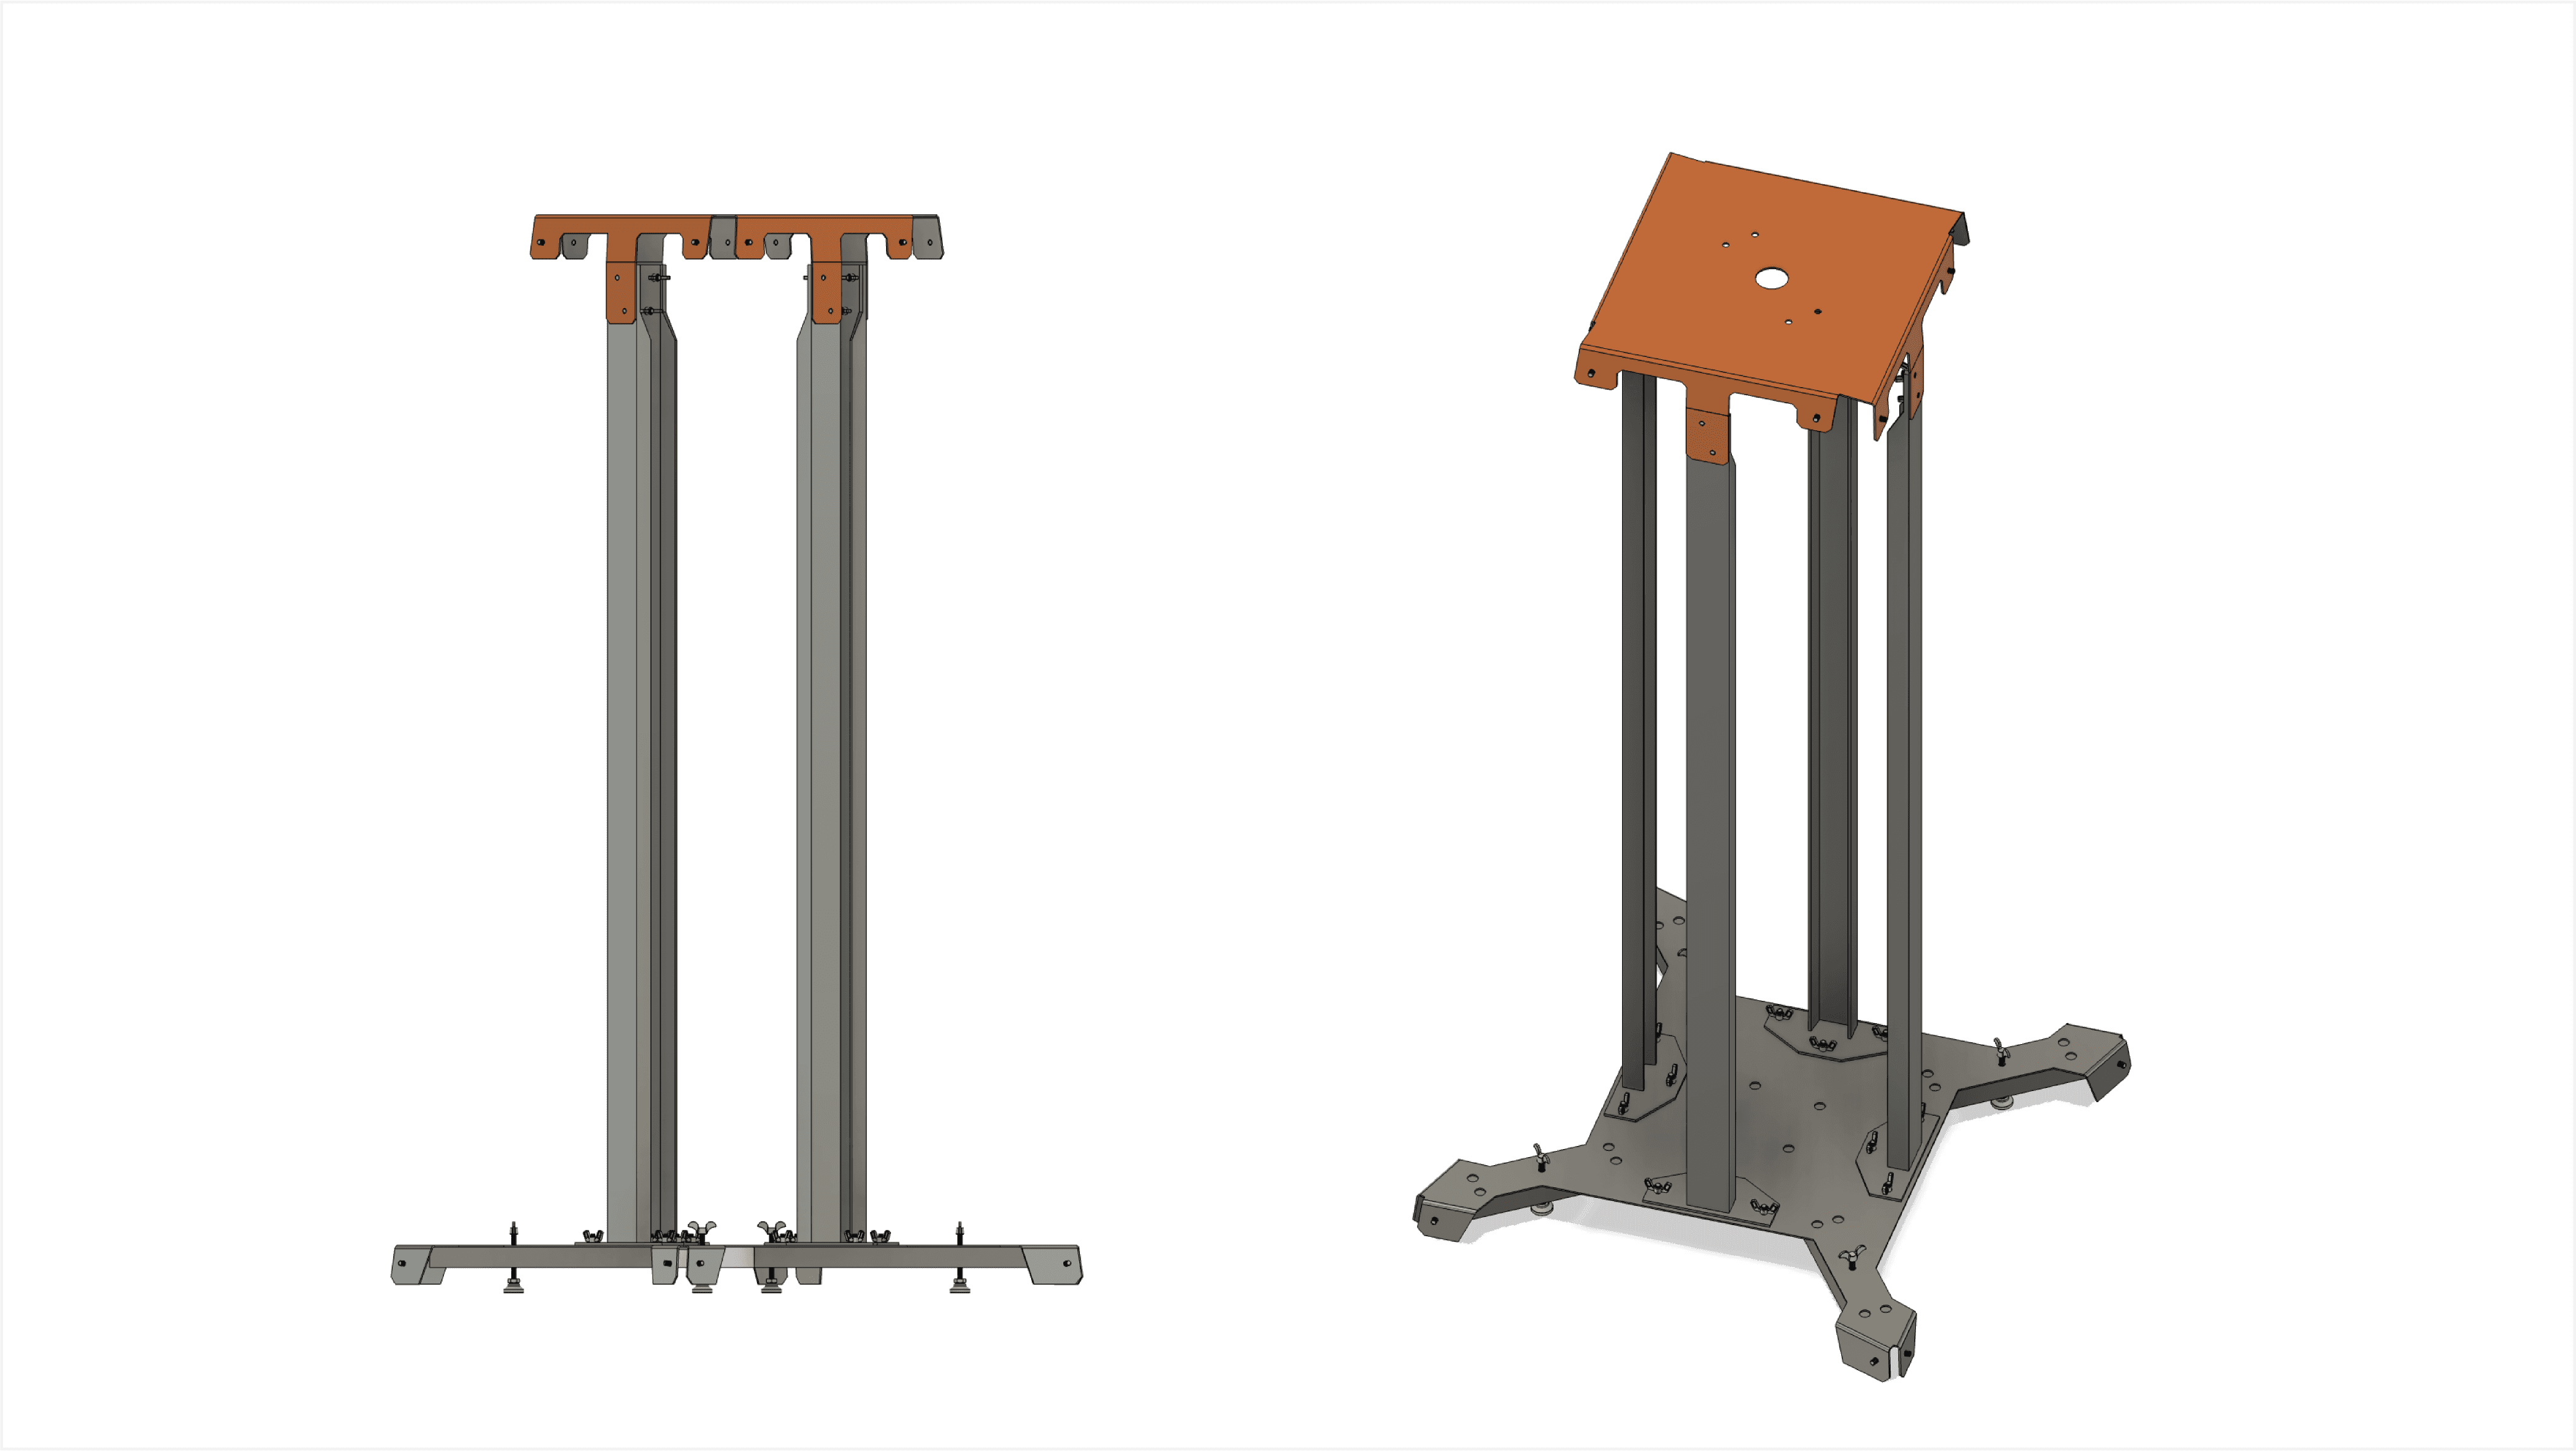
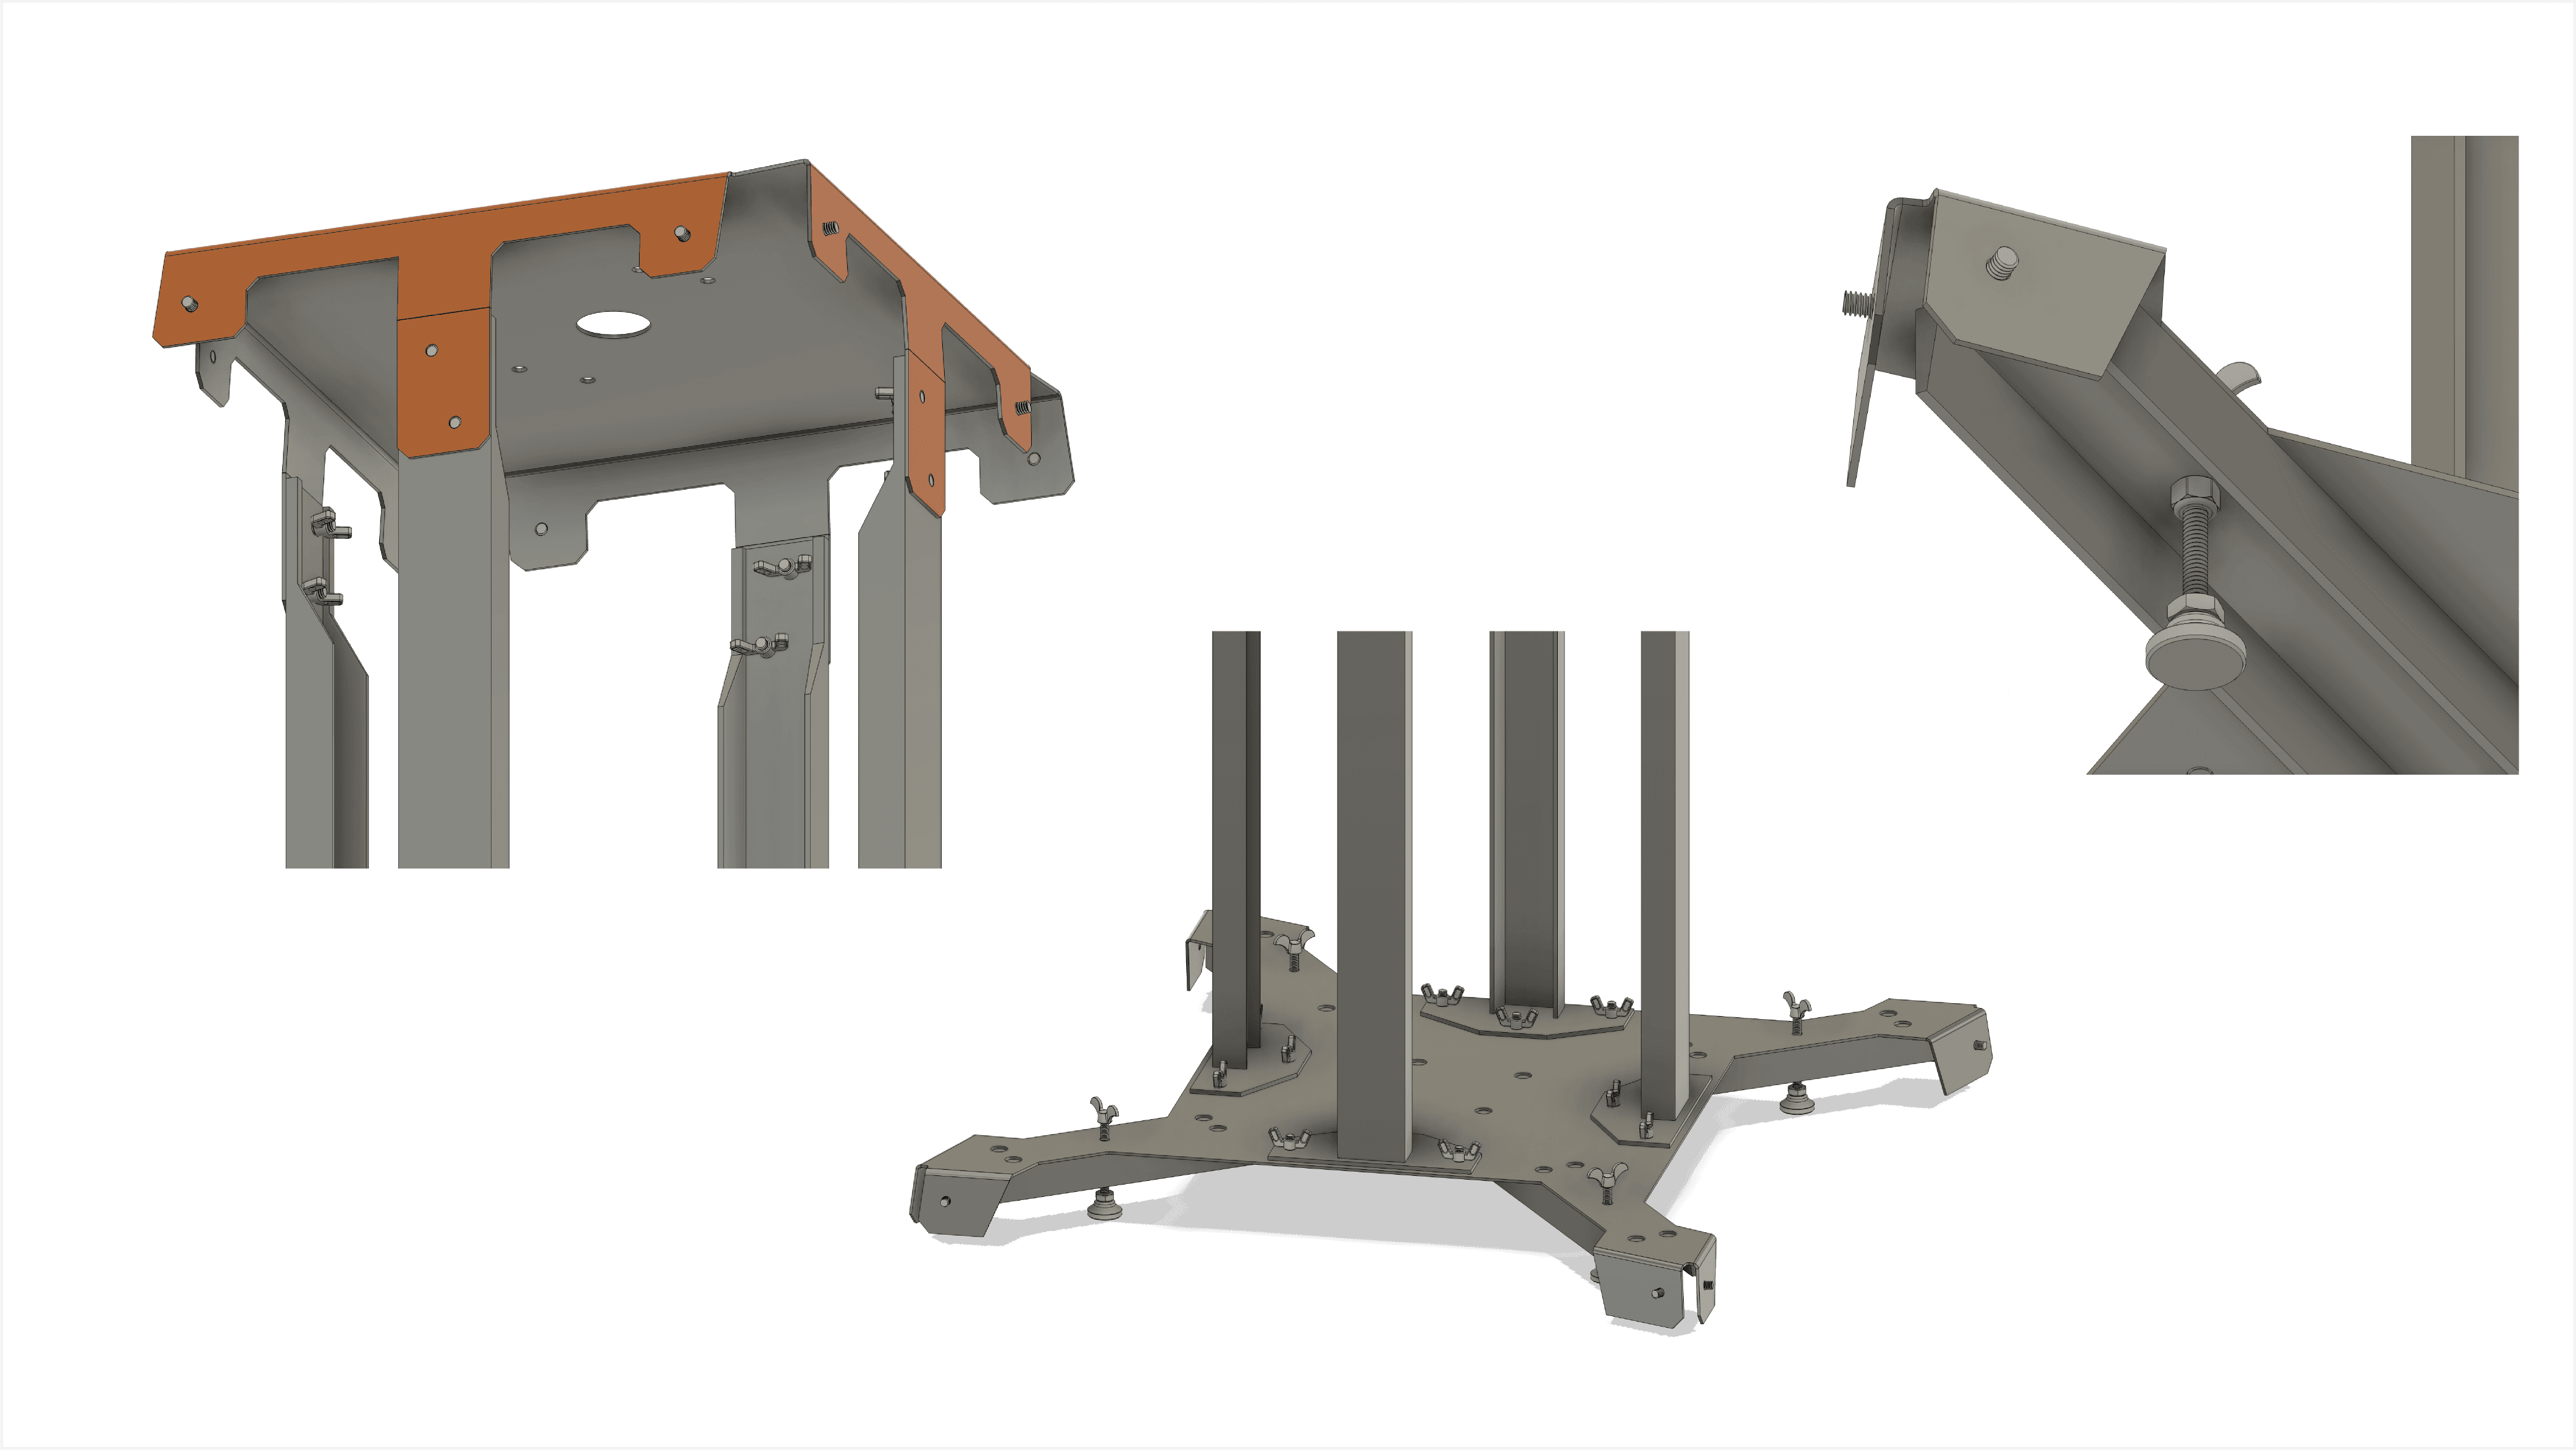
For the sake of easily welding the threads to the formed pieces for easy assembly with wing nuts, the framework was to be built out of mild steel.
The Spirit Mark was to be 28" tall, illuminated can lettering. A sign product that I've used in the past.
This was also made out of aluminum which for this application was perfect because we could embed studs for mounting it to the Pedestal.
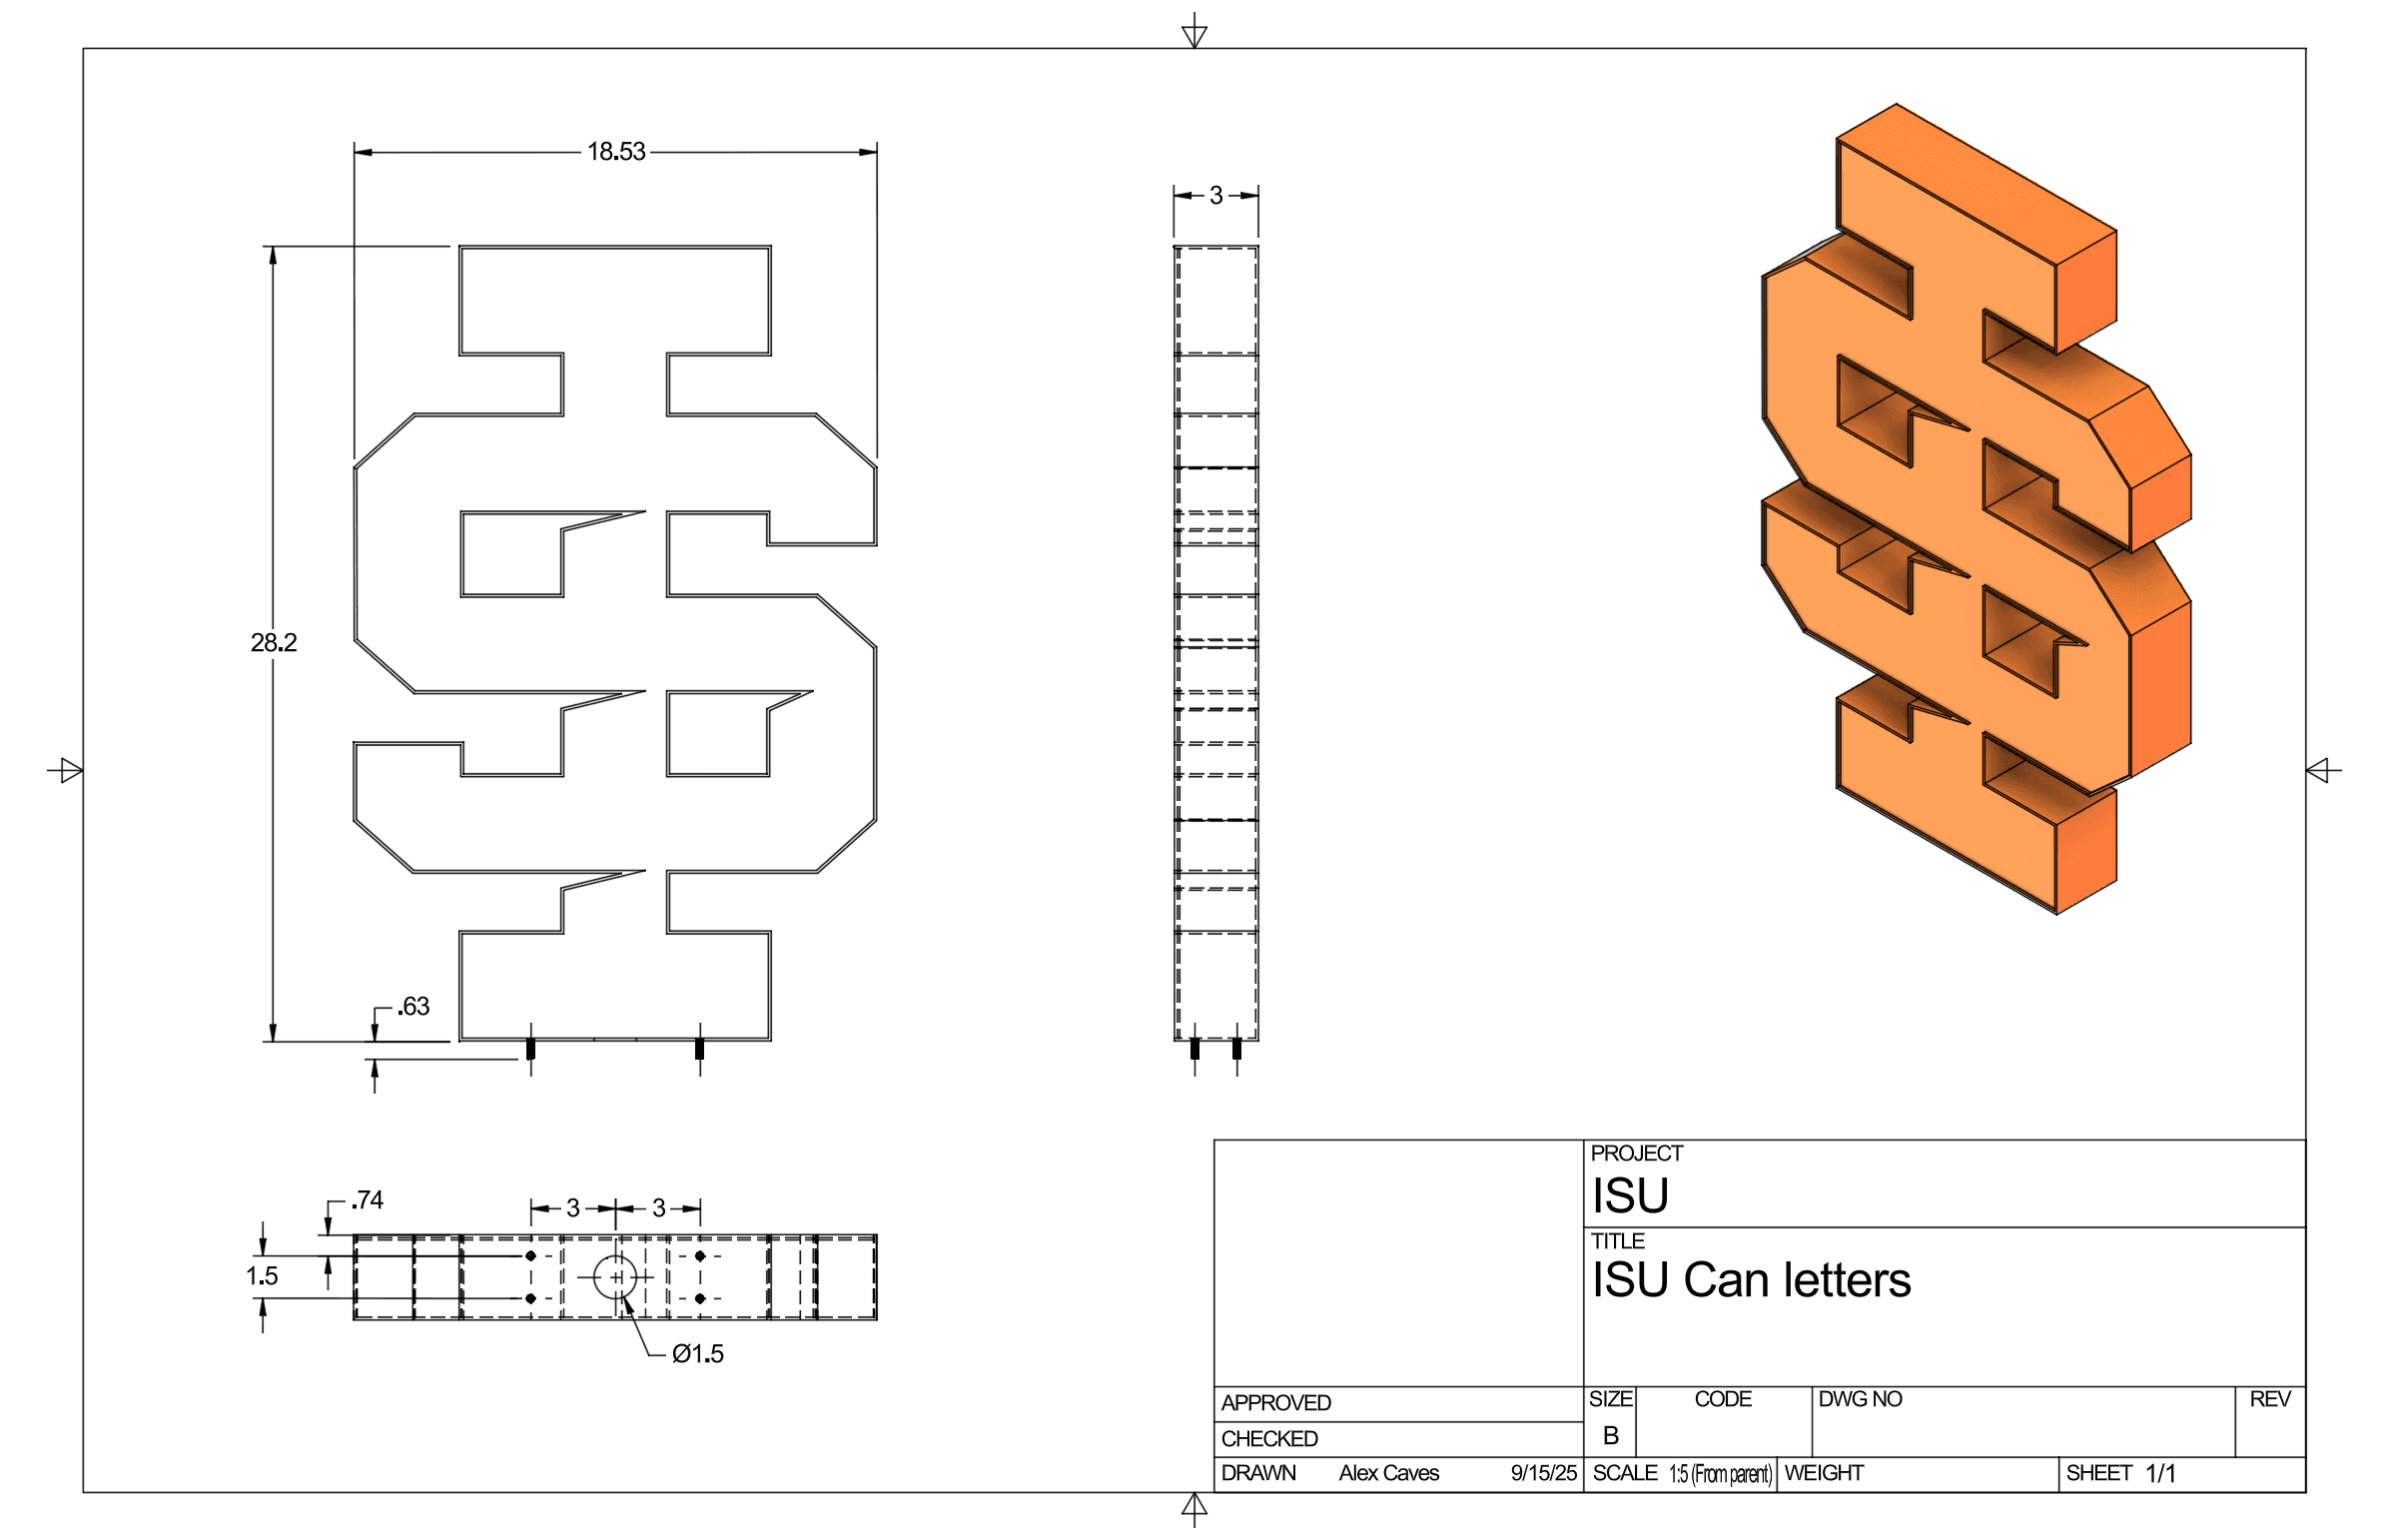
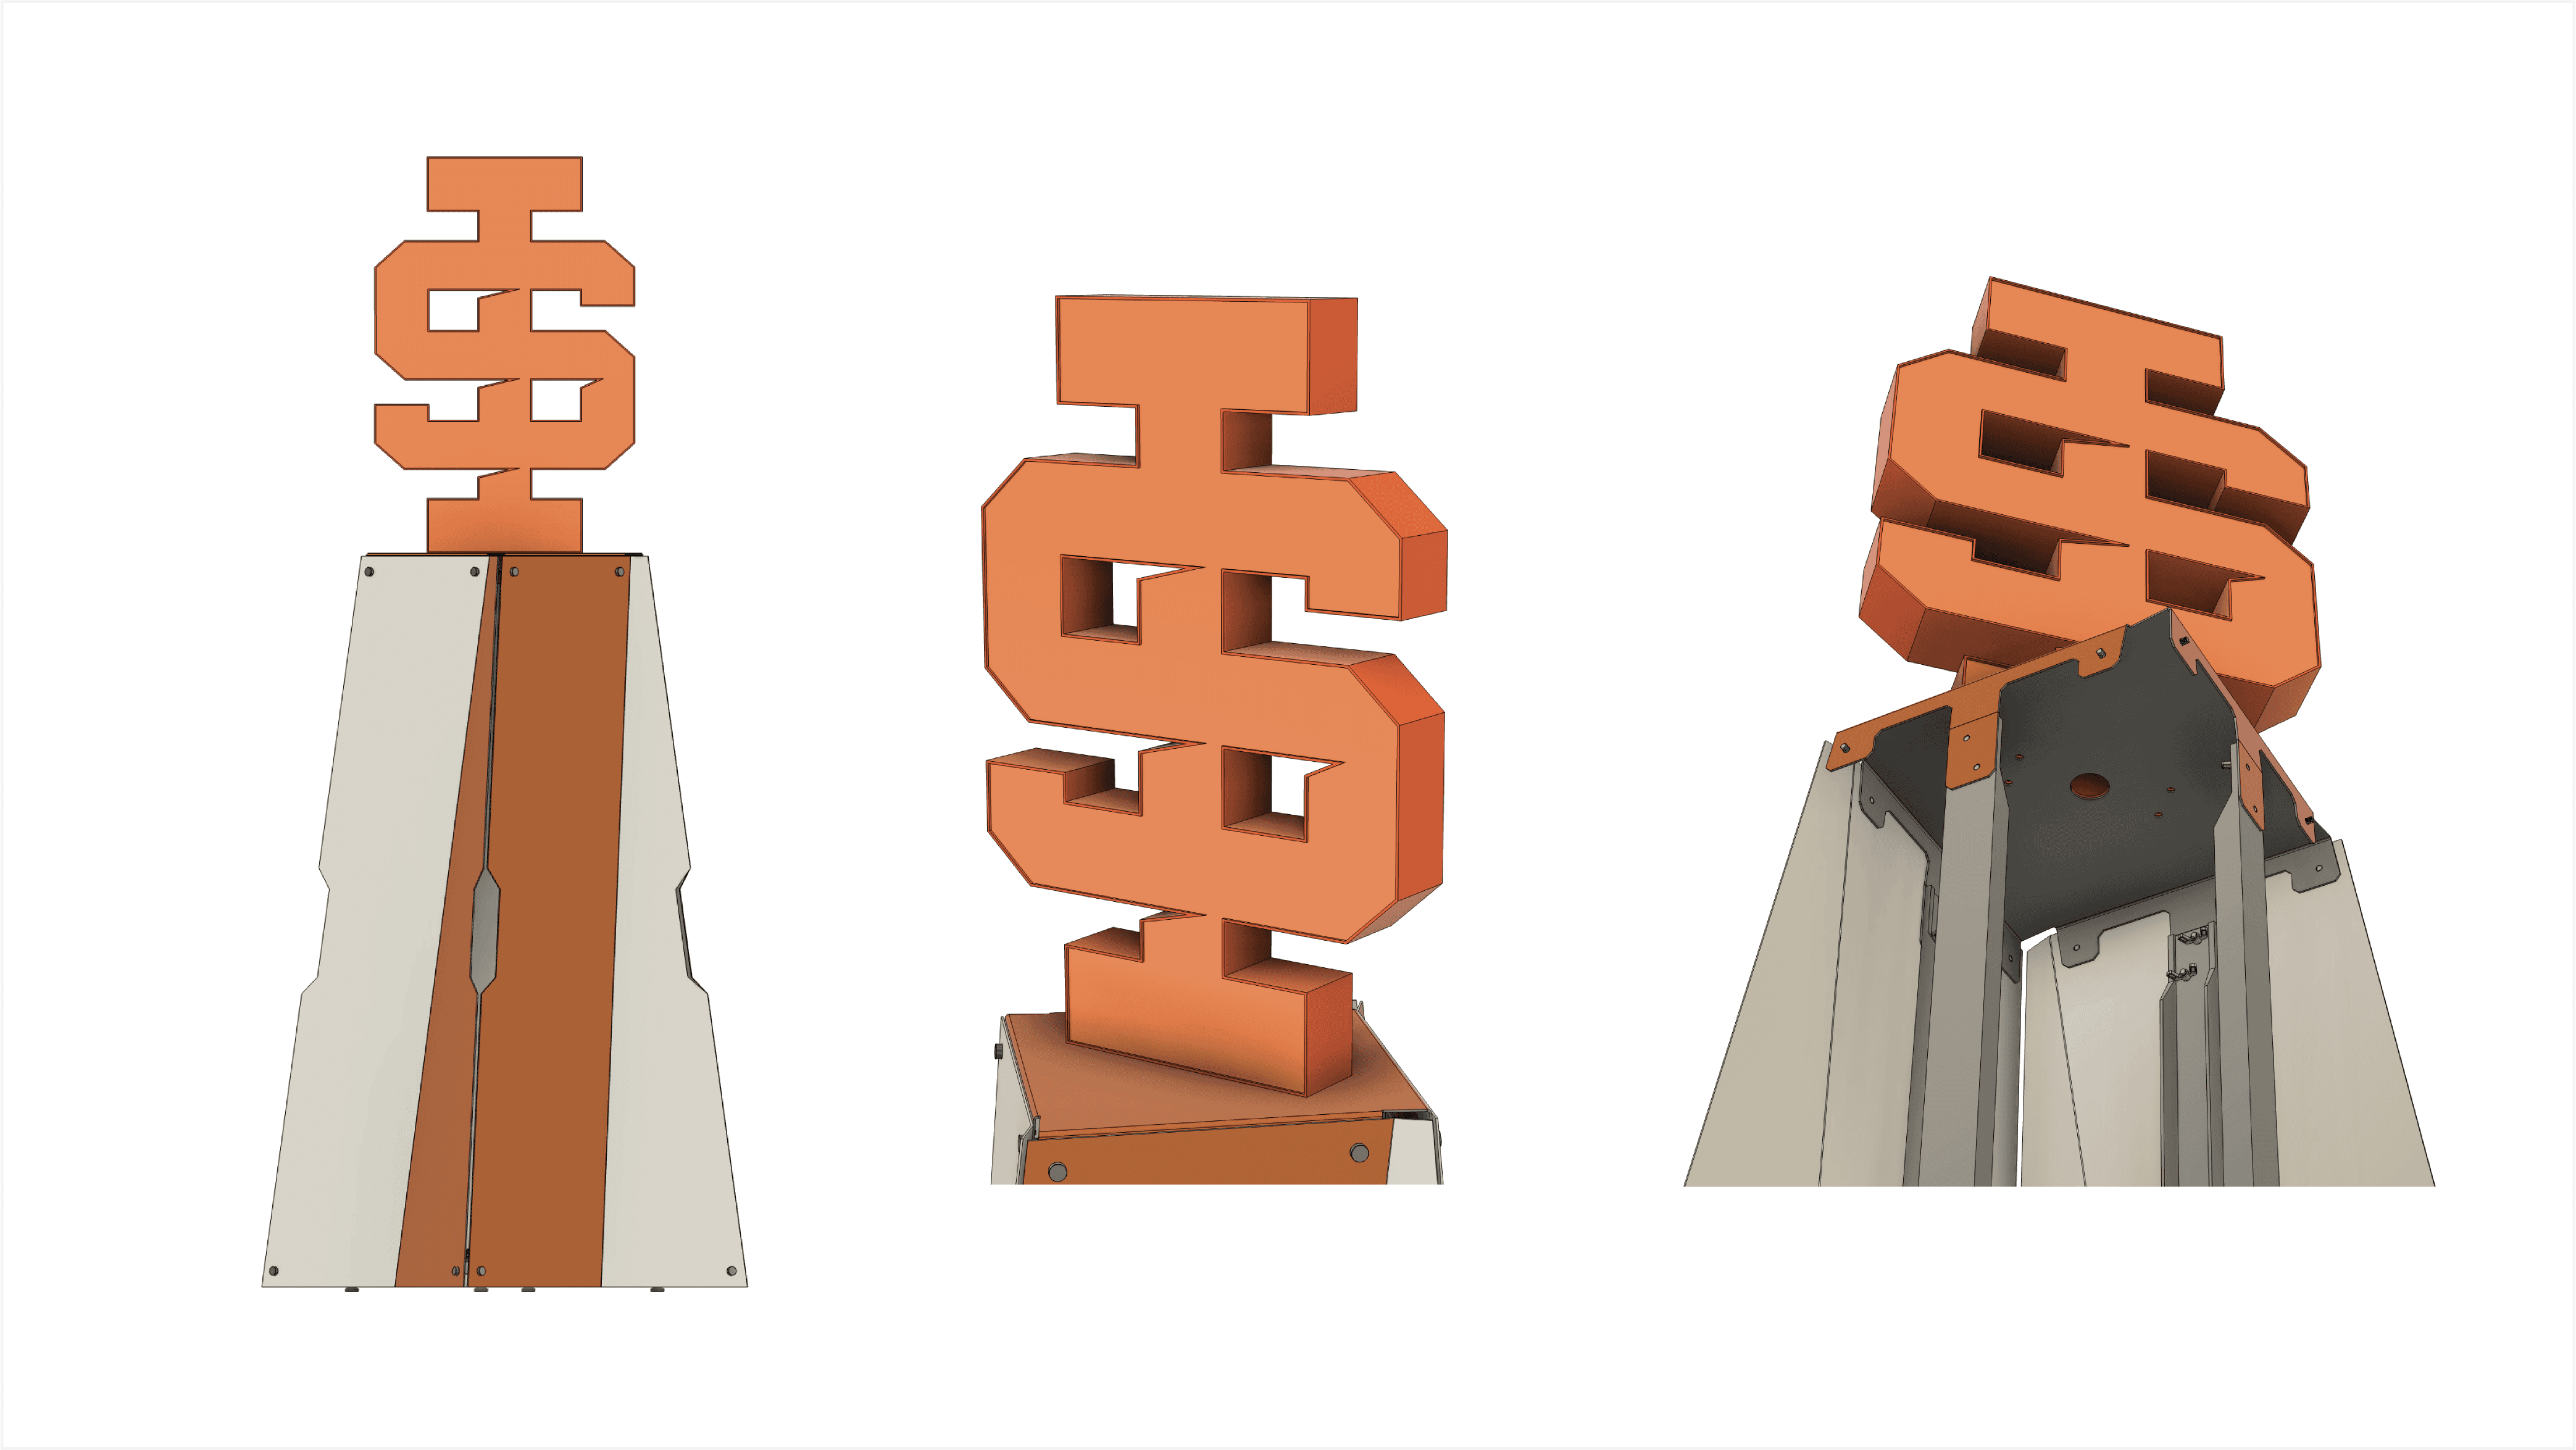
(The hole is for the wiring.)
Now that all the elements were developed, we can put together an accurate fabrication estimate.
Round 2 Development
The only thing we can modify is the framework of the pedestal and then changing the size of the Spirit Mark so for this refinement round that was the focus.
For the pedestal, since we're going to utilize and existing table base product, we need to source one that will work for our intended use case.
I found this.
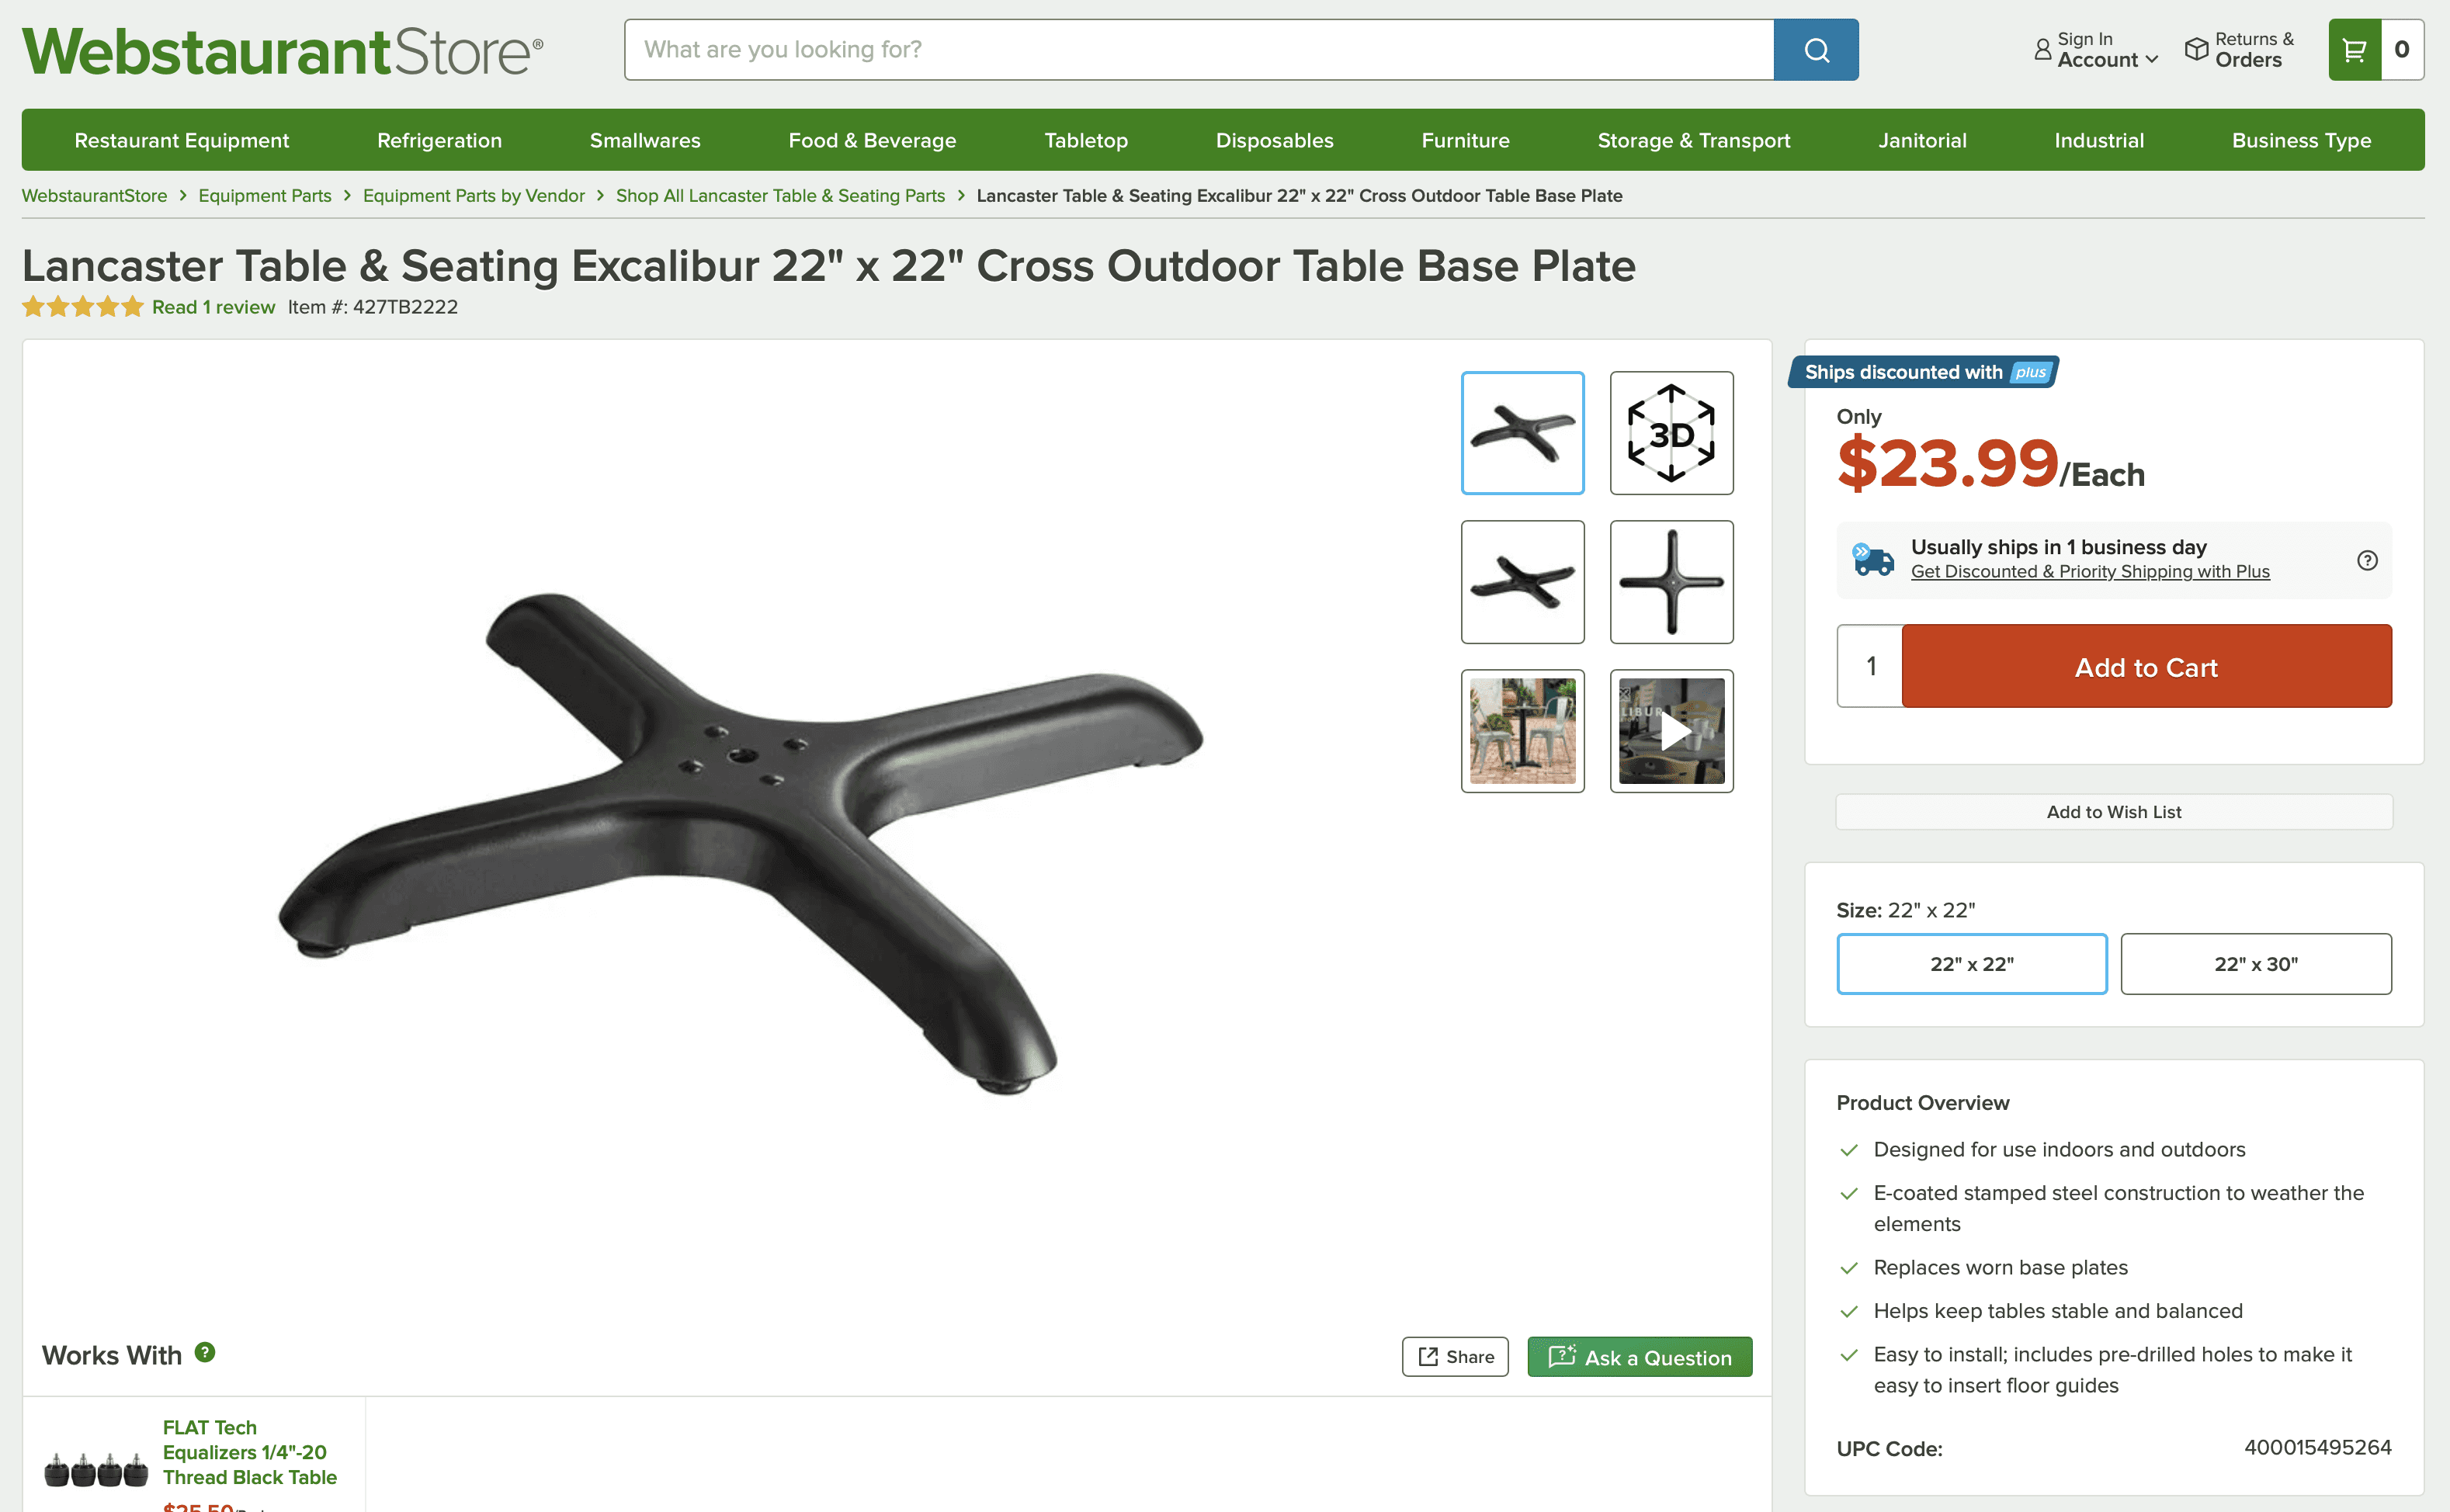
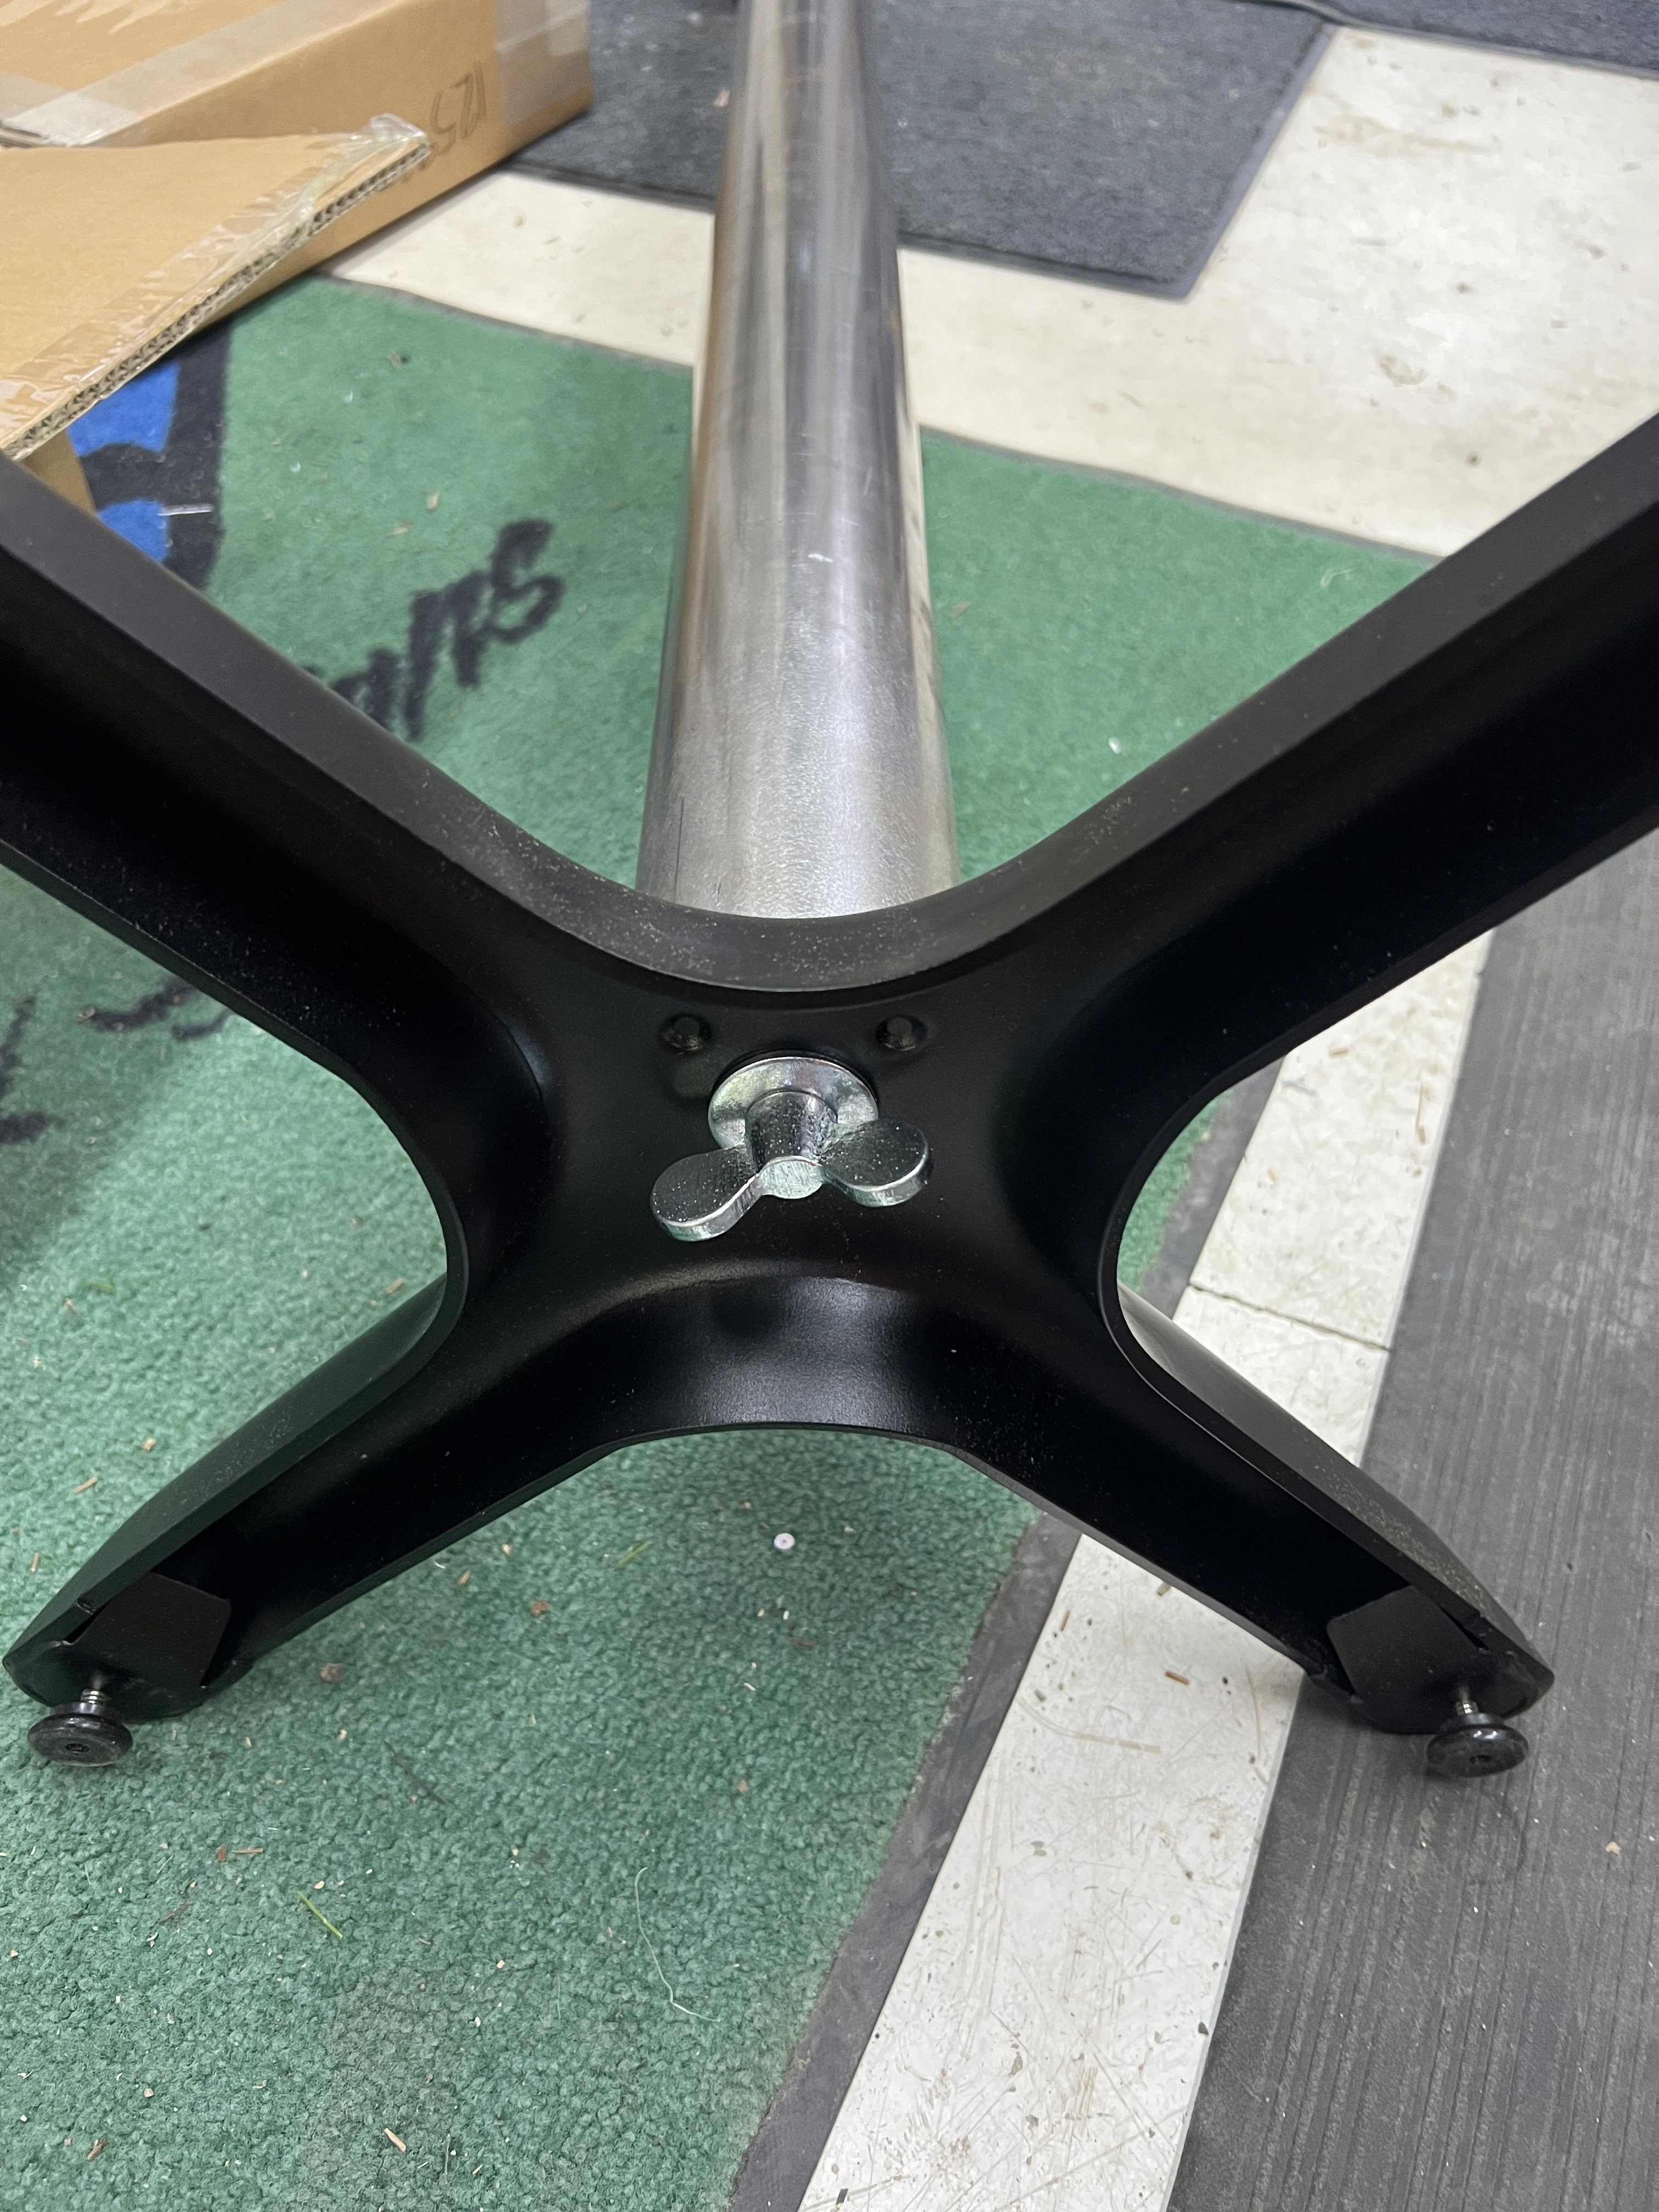
Commercial grade table base with adjustable feet with a 5/8in hole through the center for mounting a post. And surprisingly affordable.
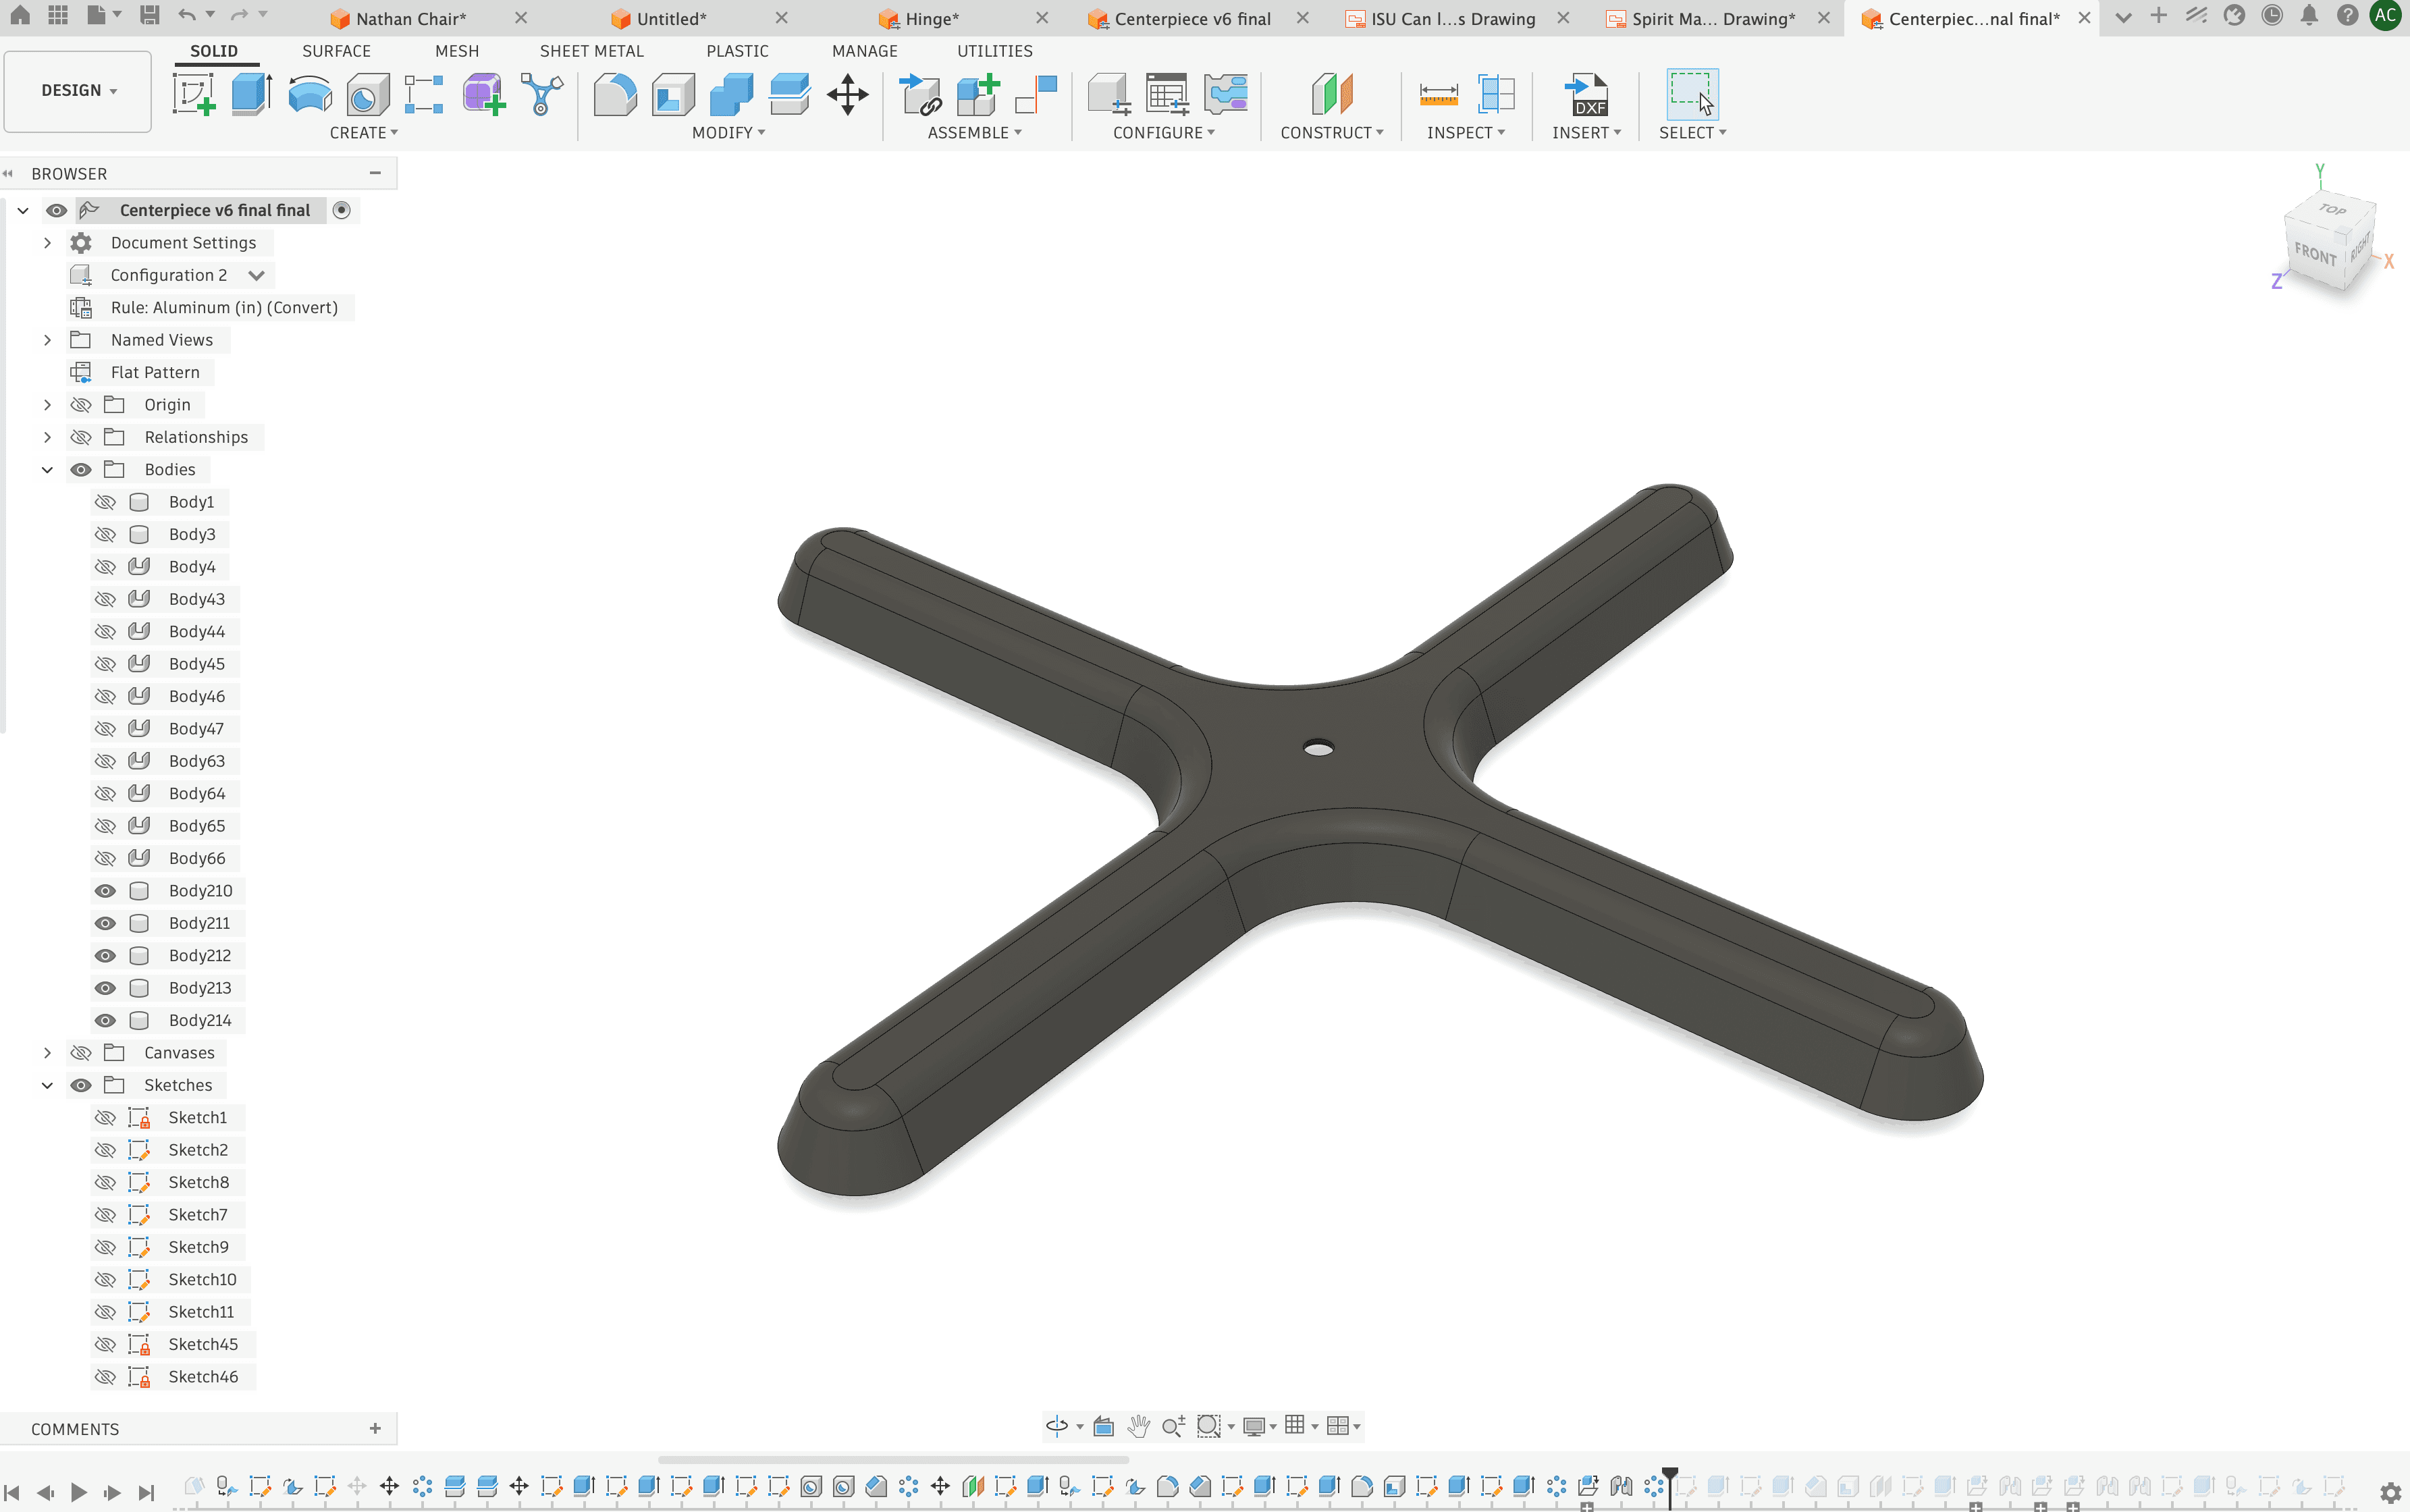
Next step was to model this in 3D from scratch basing the dimensions off the specs and photos on the website which was minimal at best. No downloadable model like McMaster for this one.
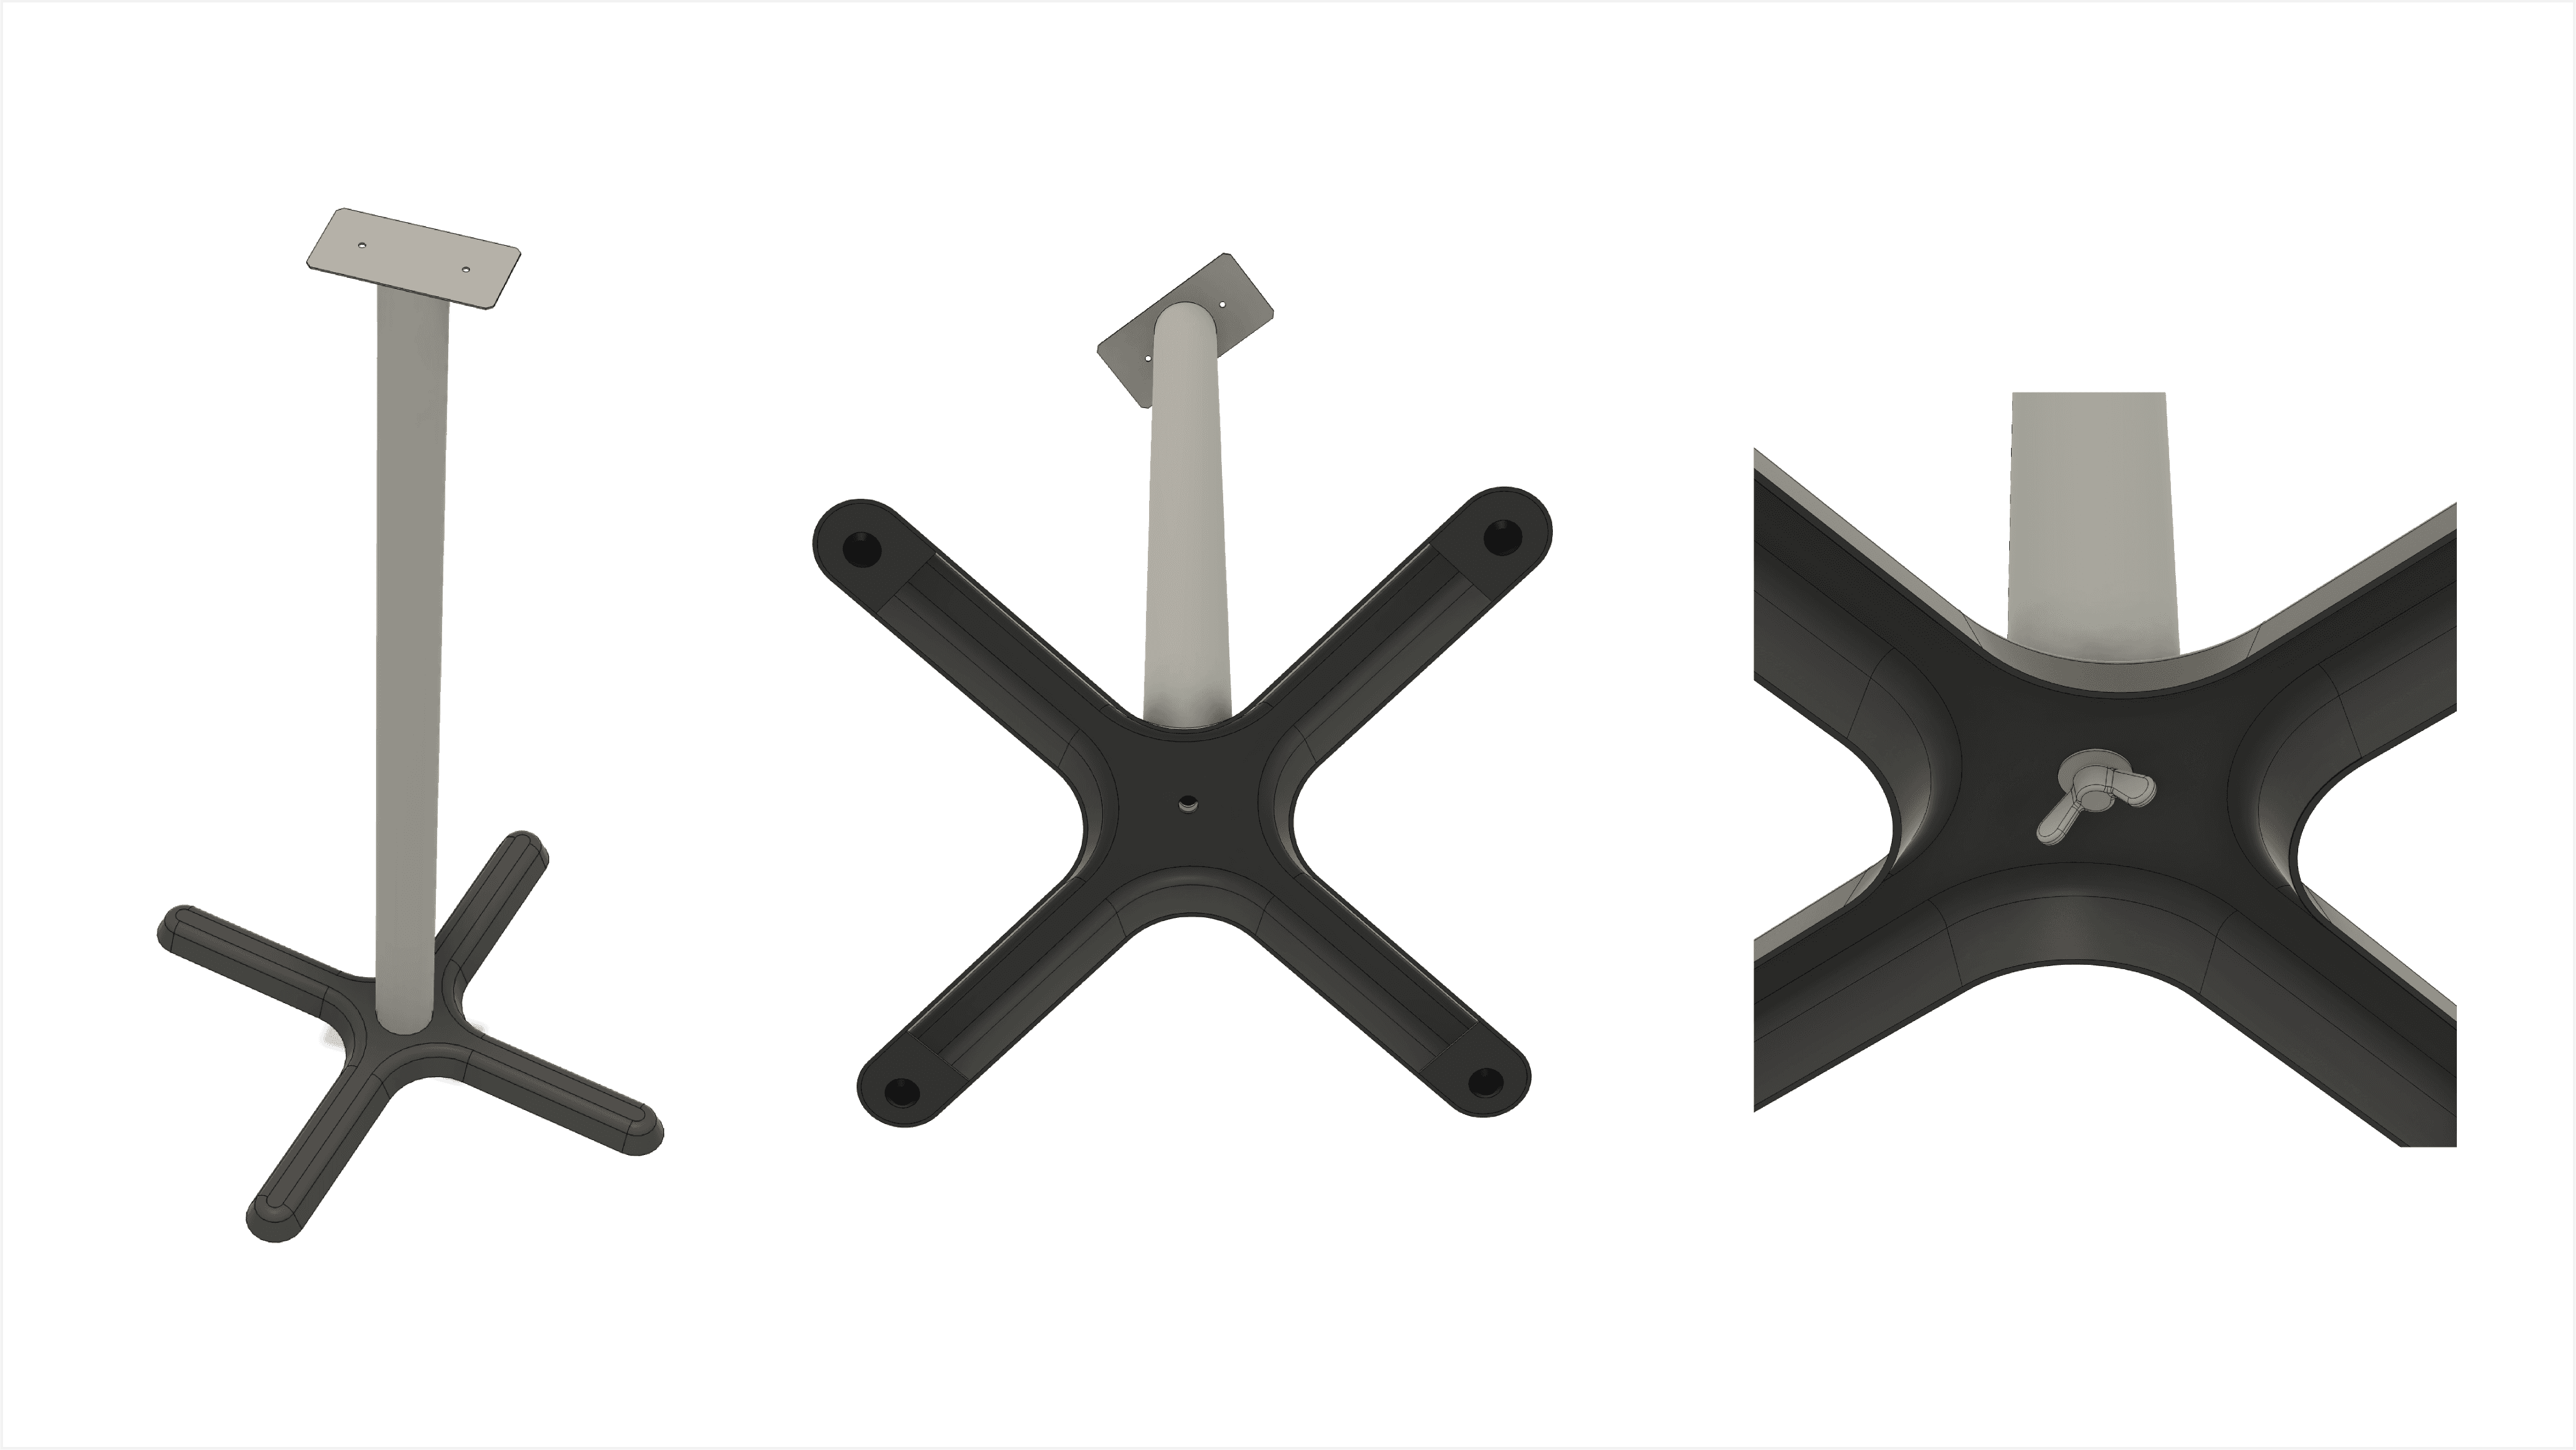
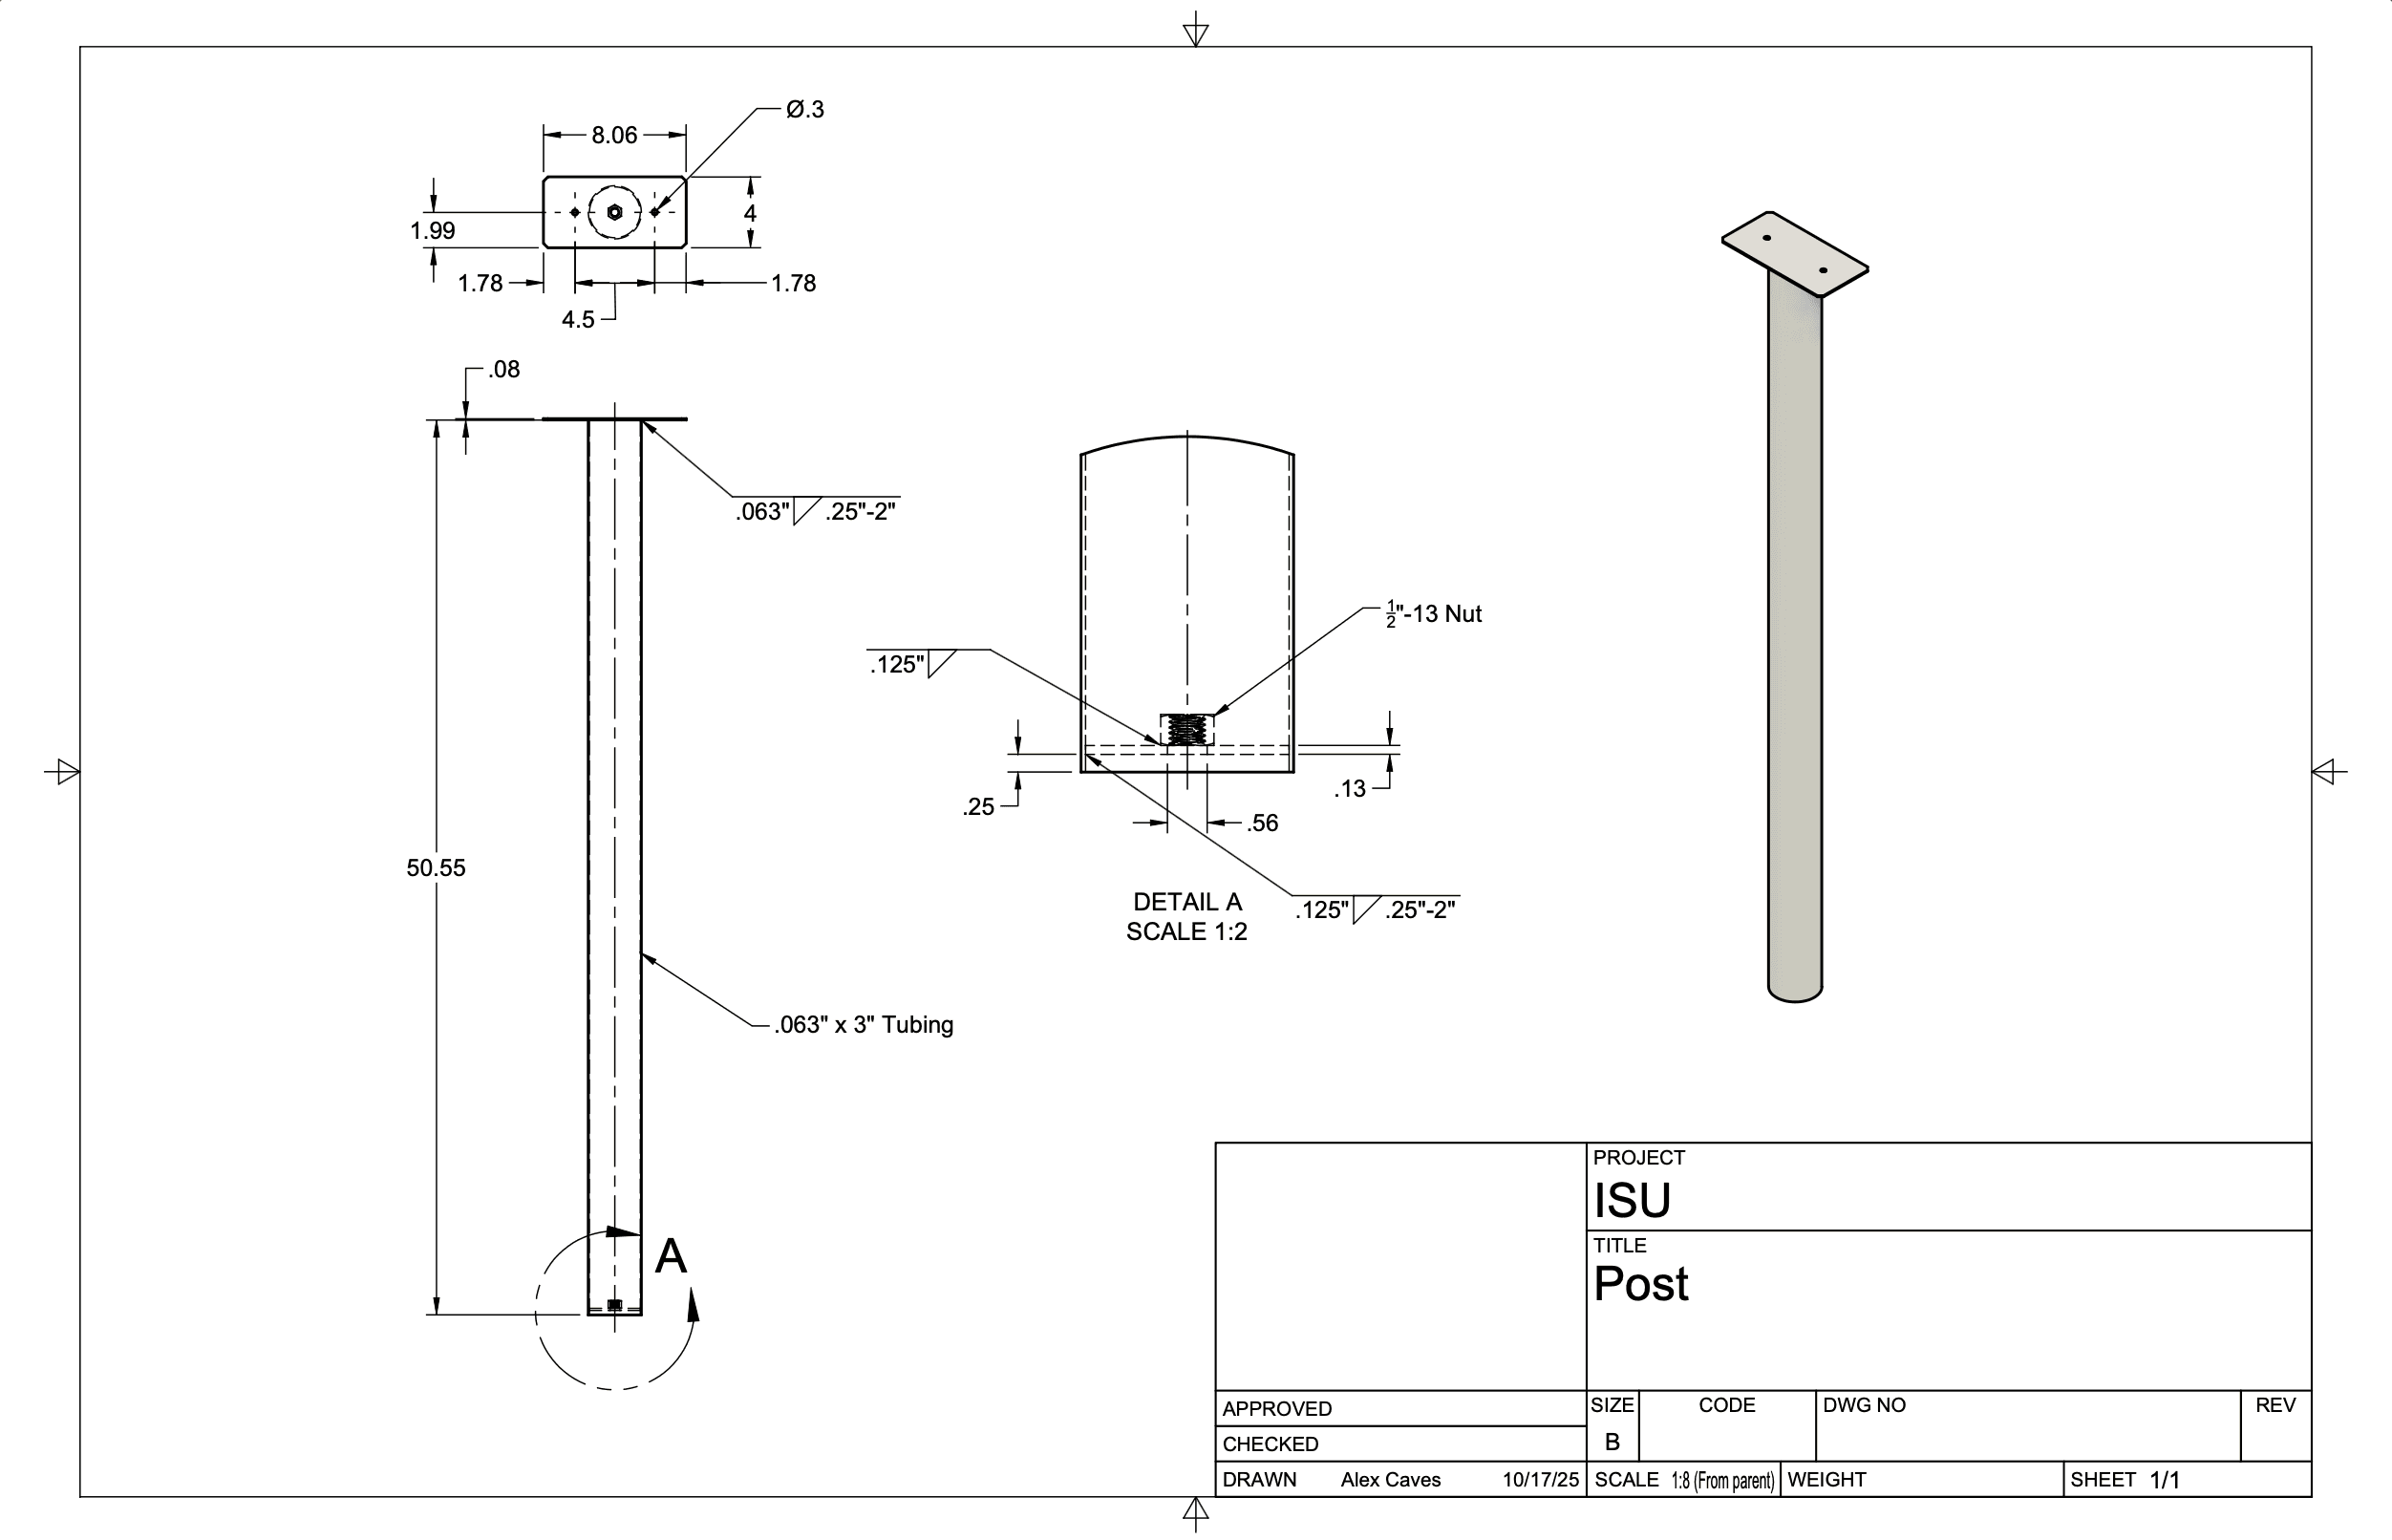
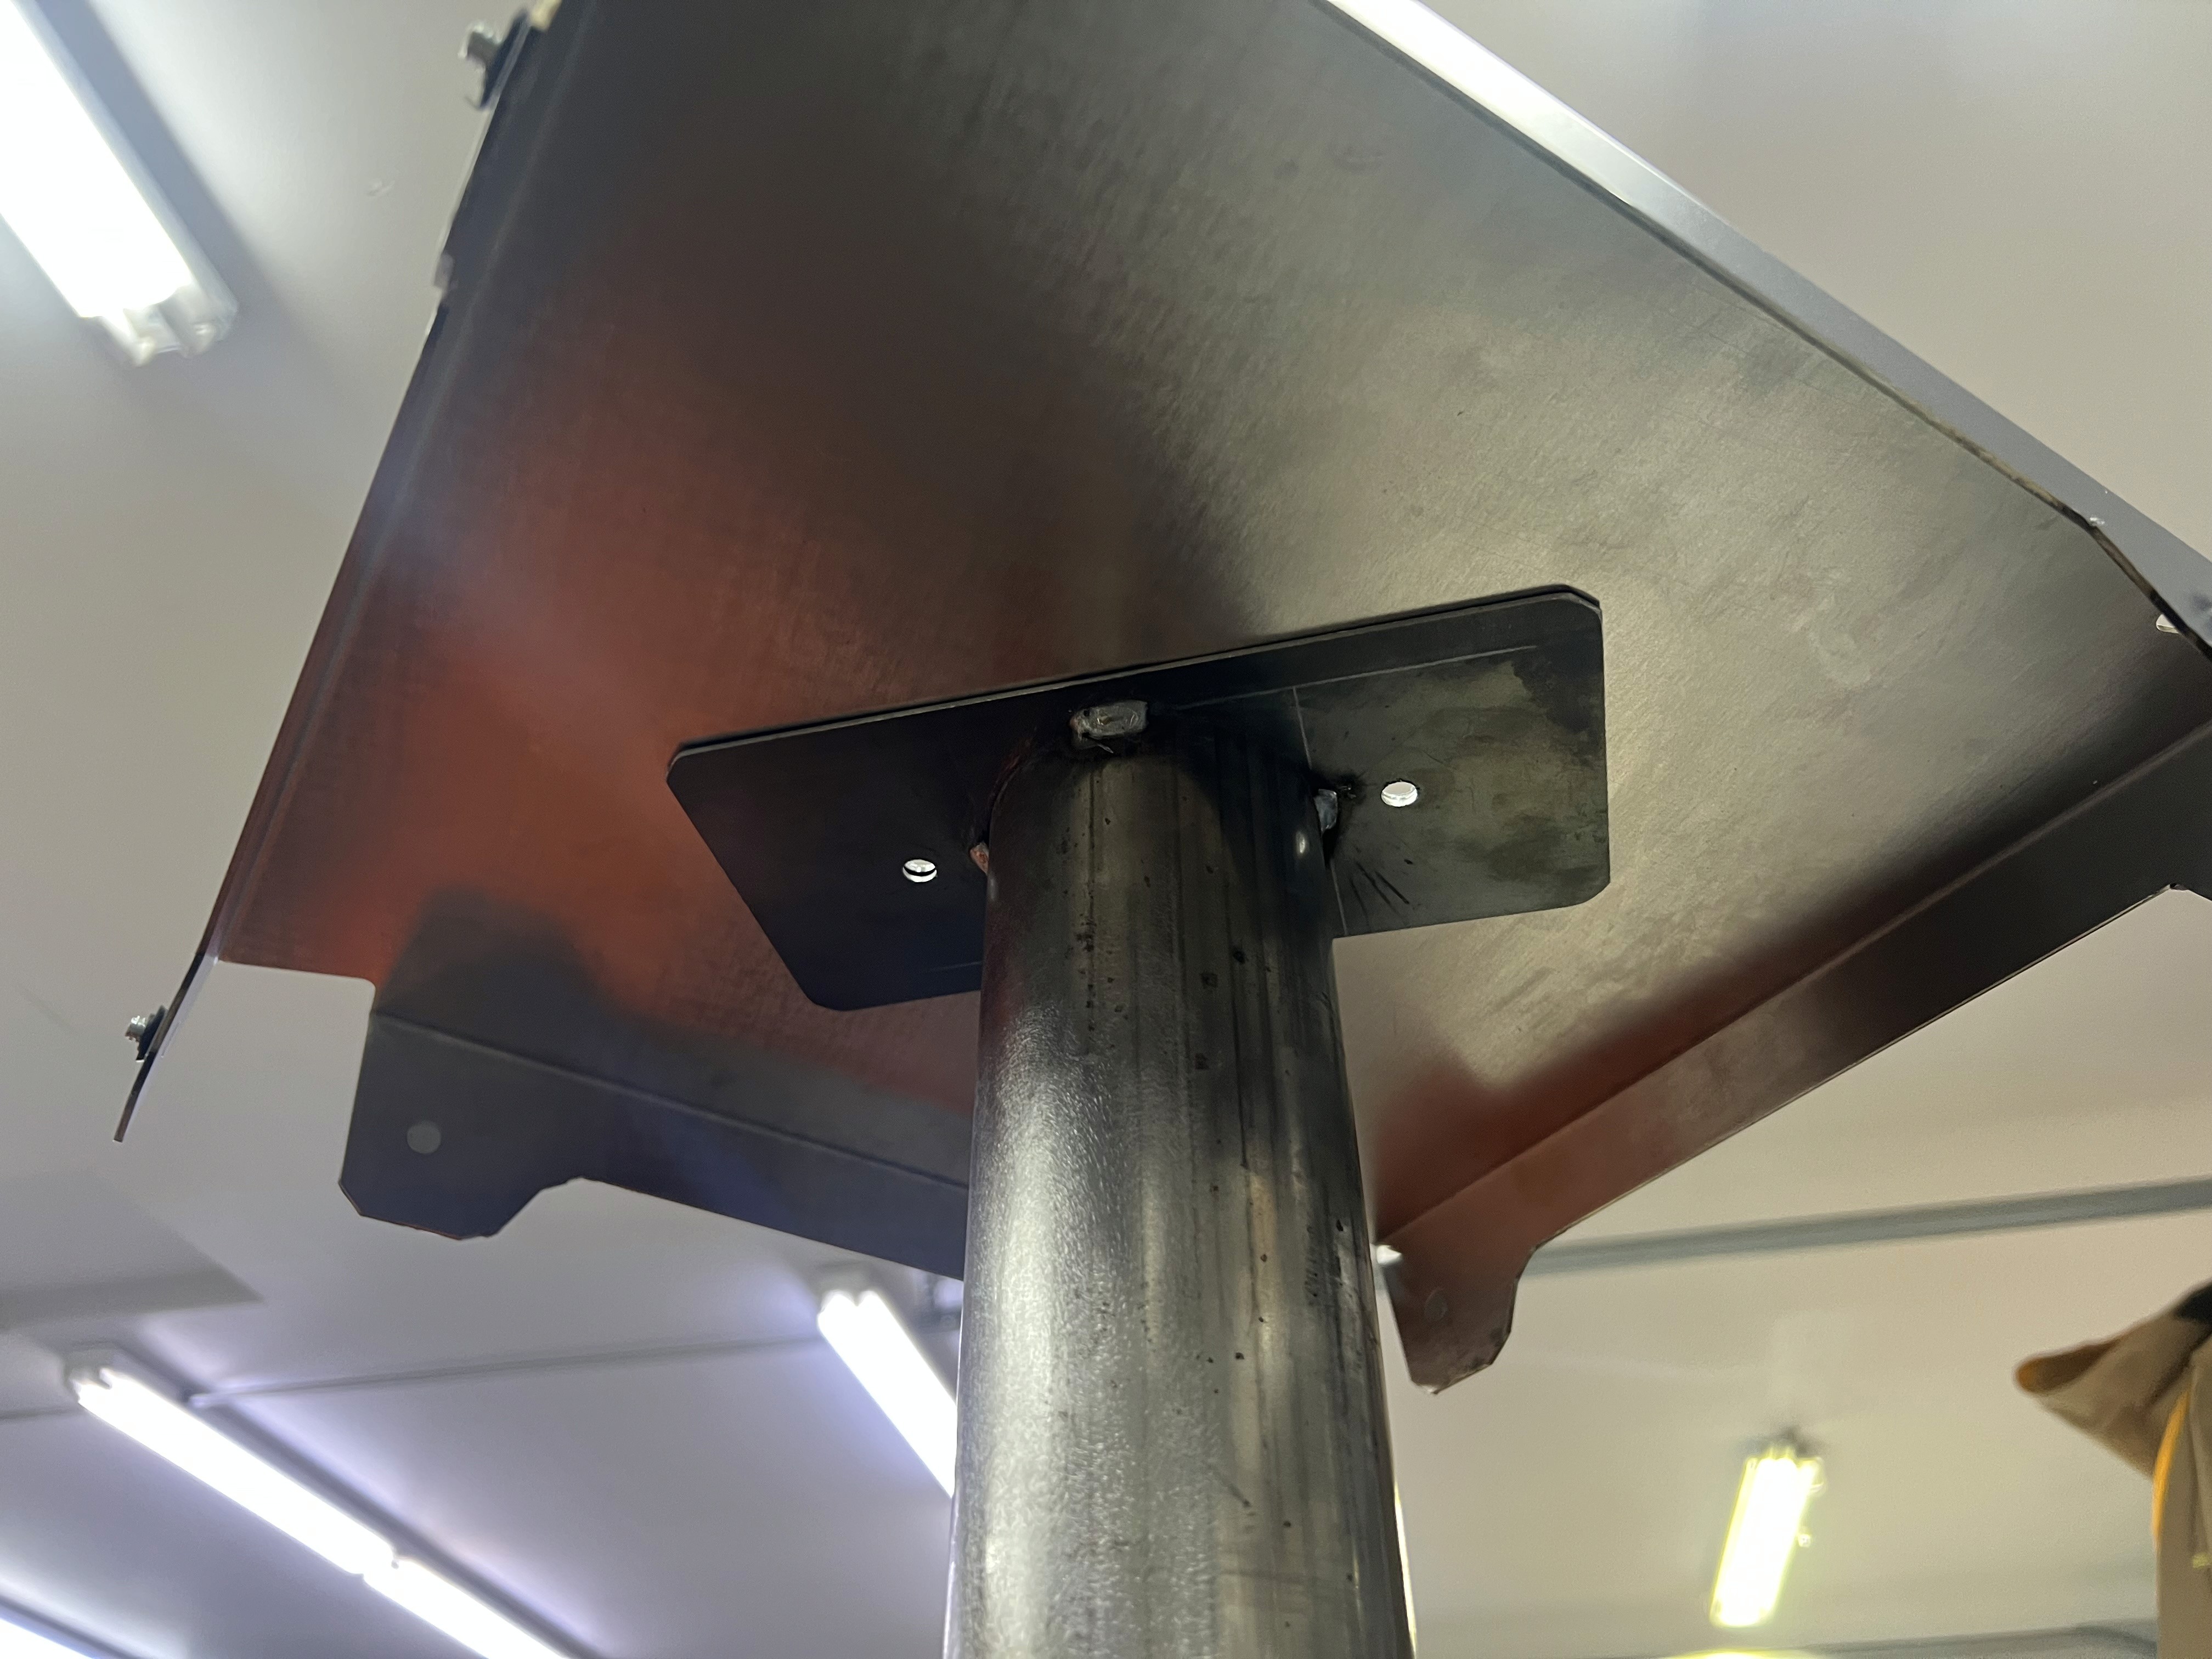
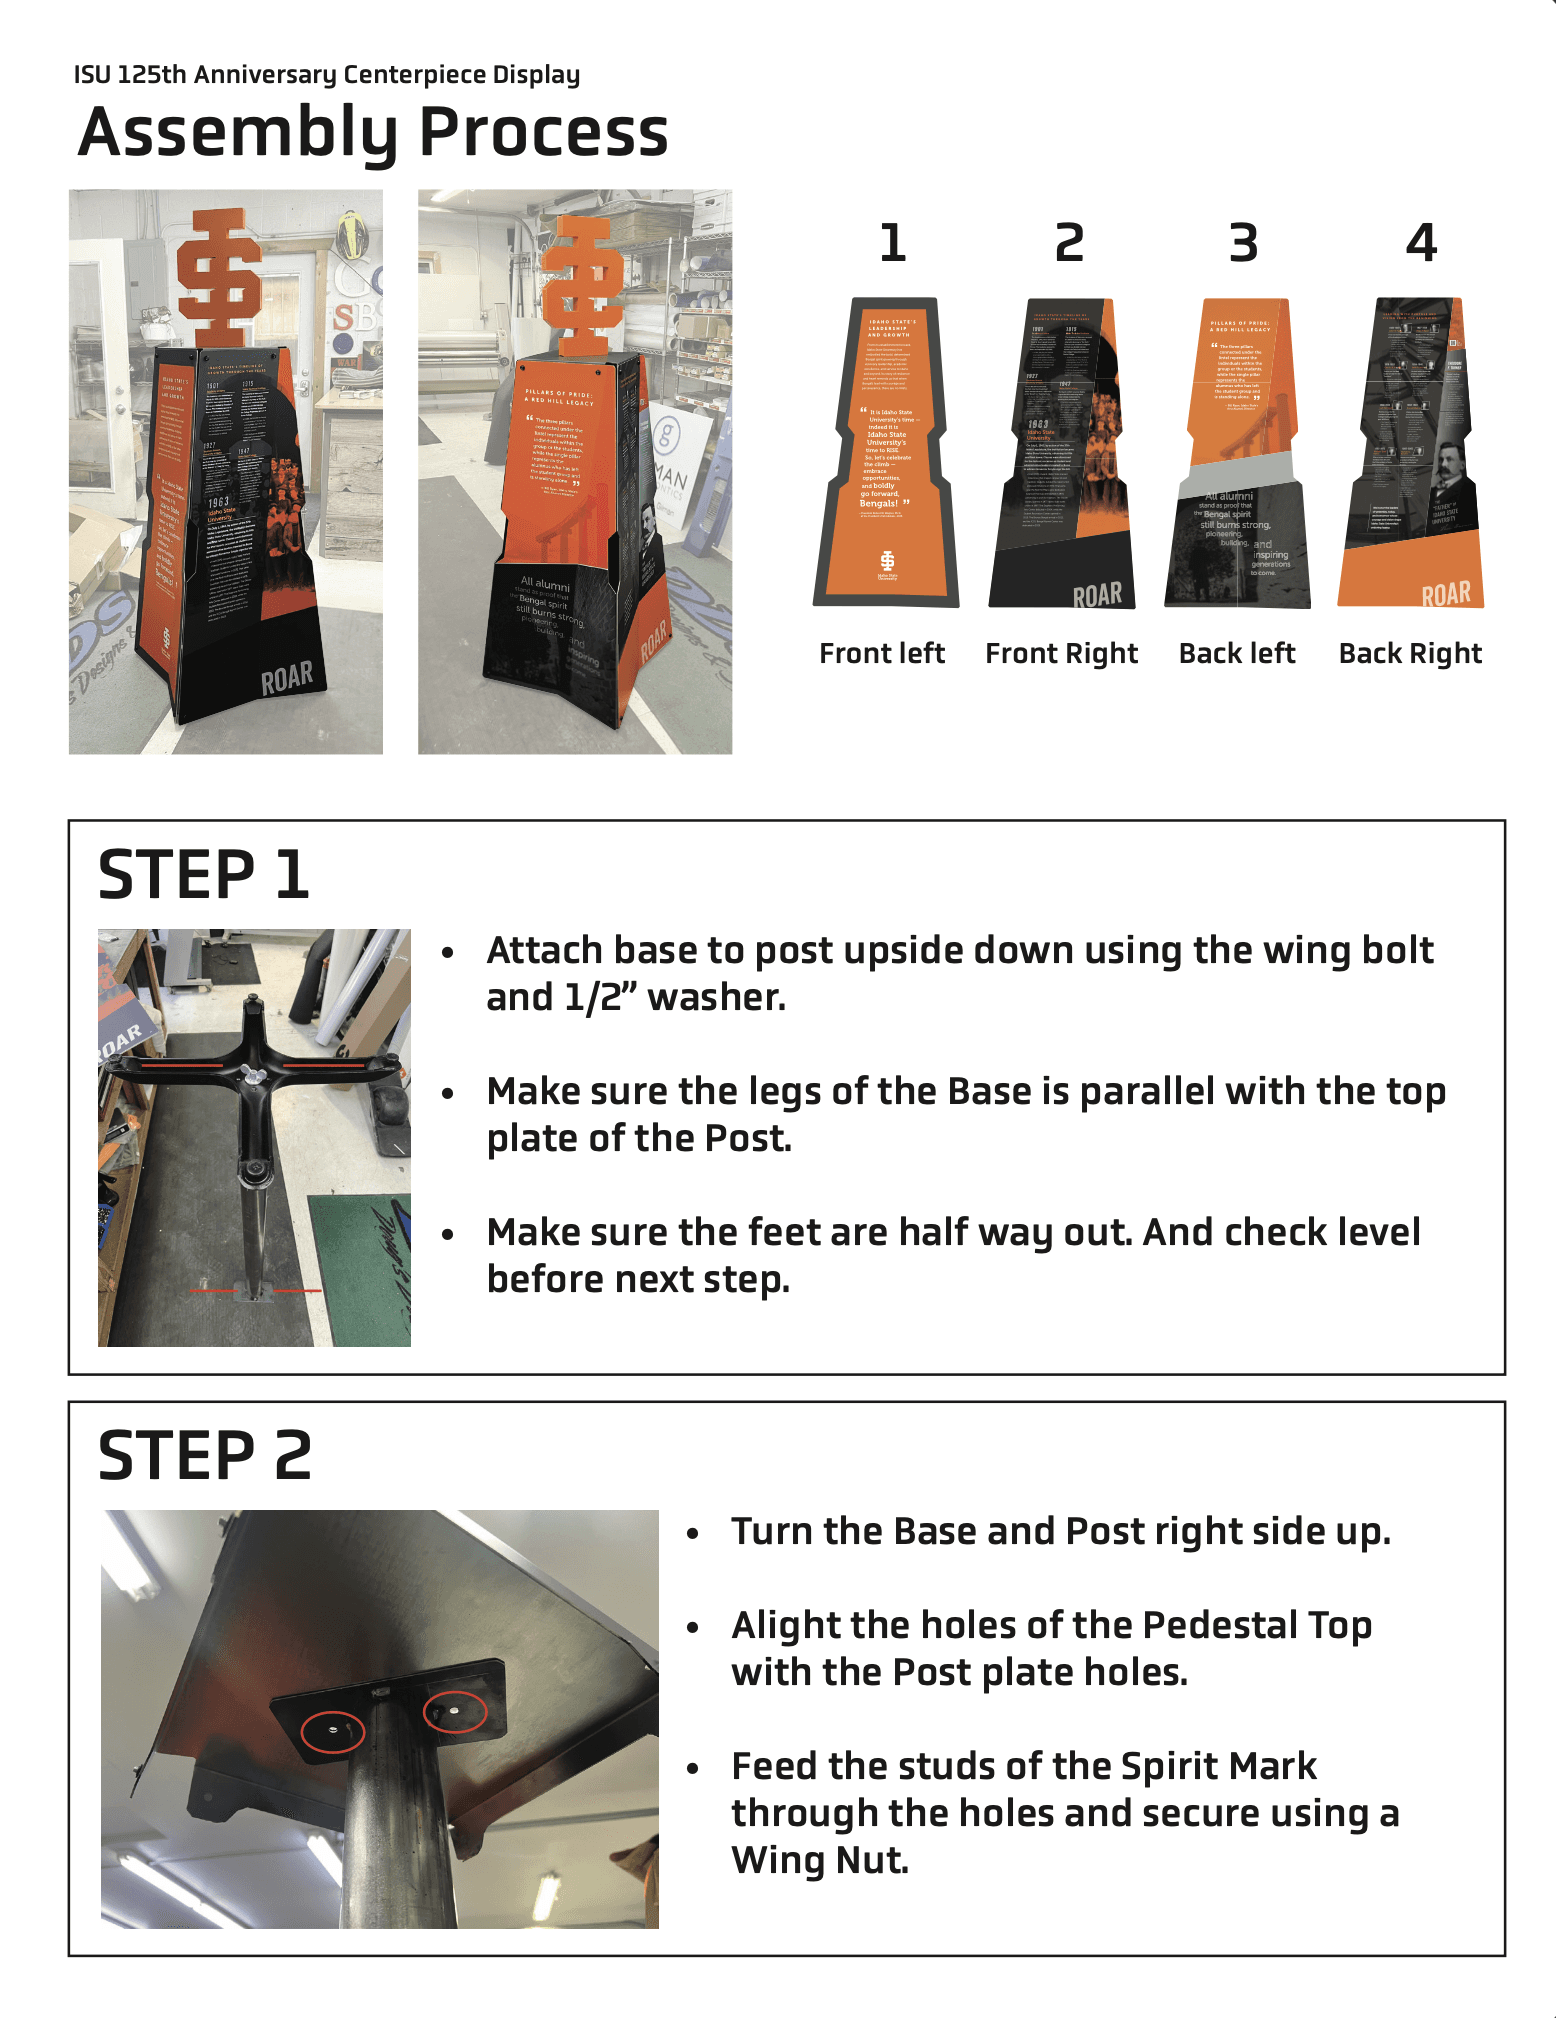
Then a custom 3" post with a mounting plate for the Spirit Mark, bolted to the table base via 1/2-13 wing bolt.
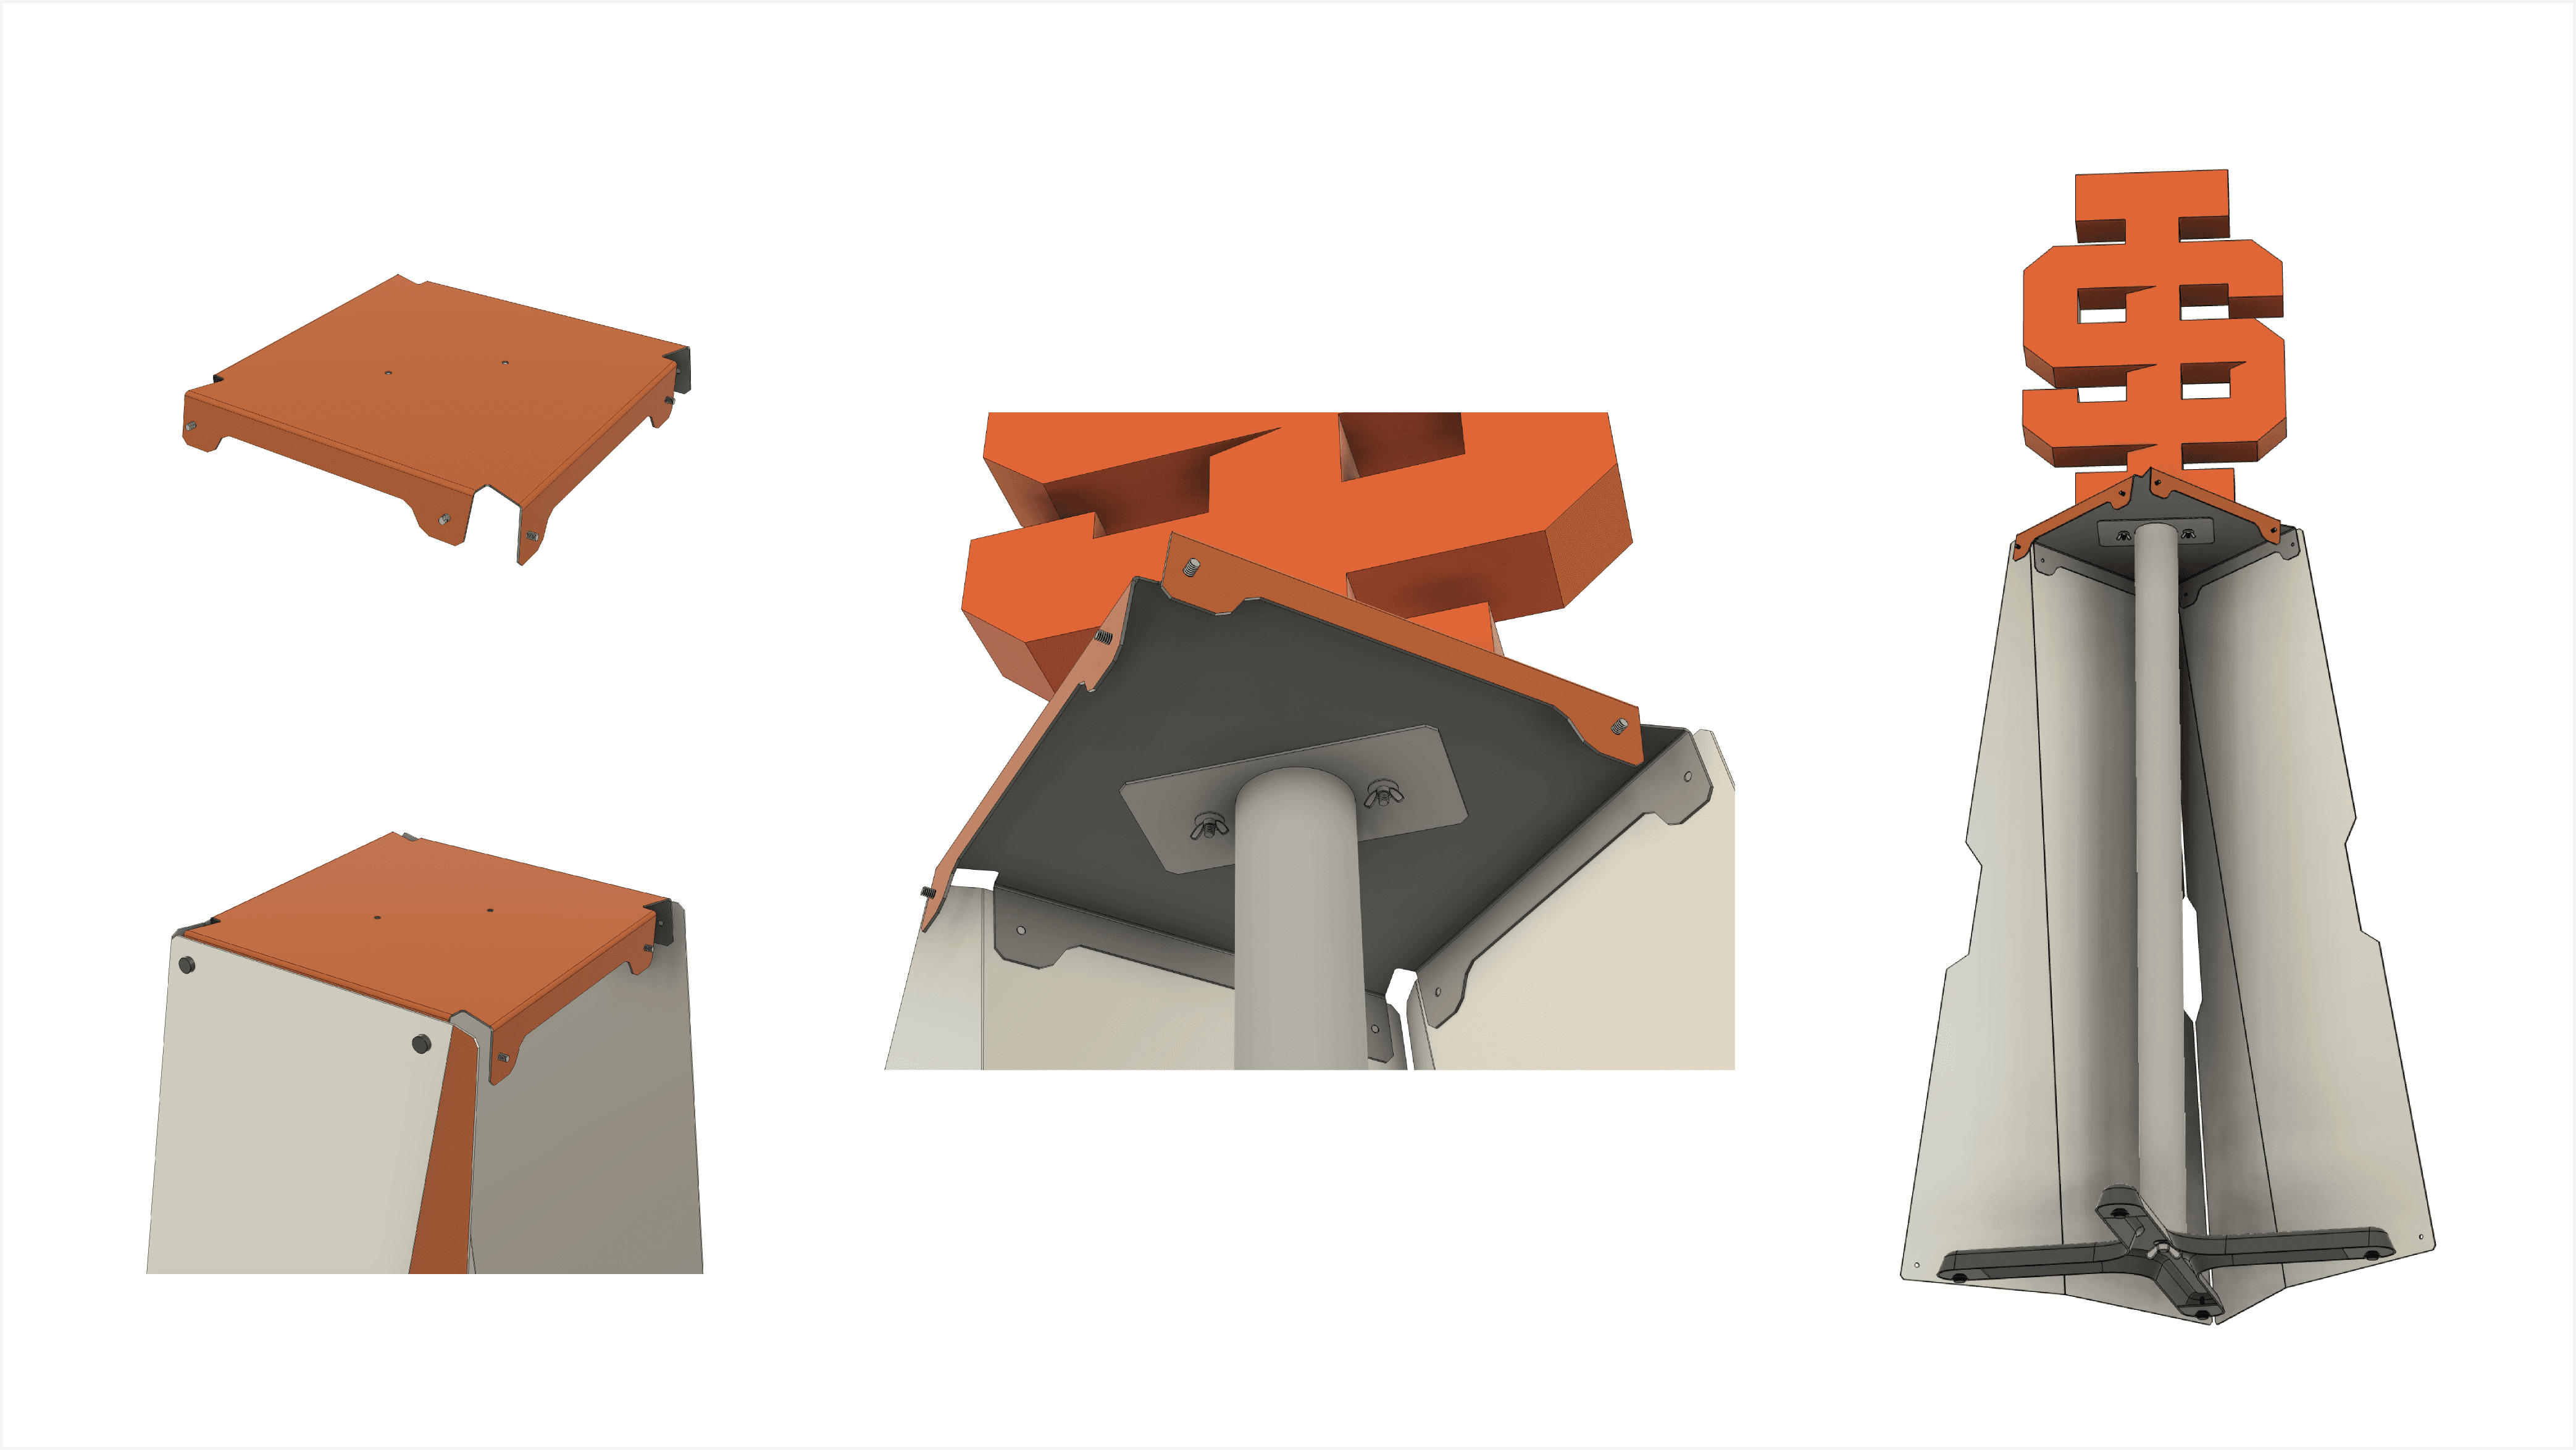
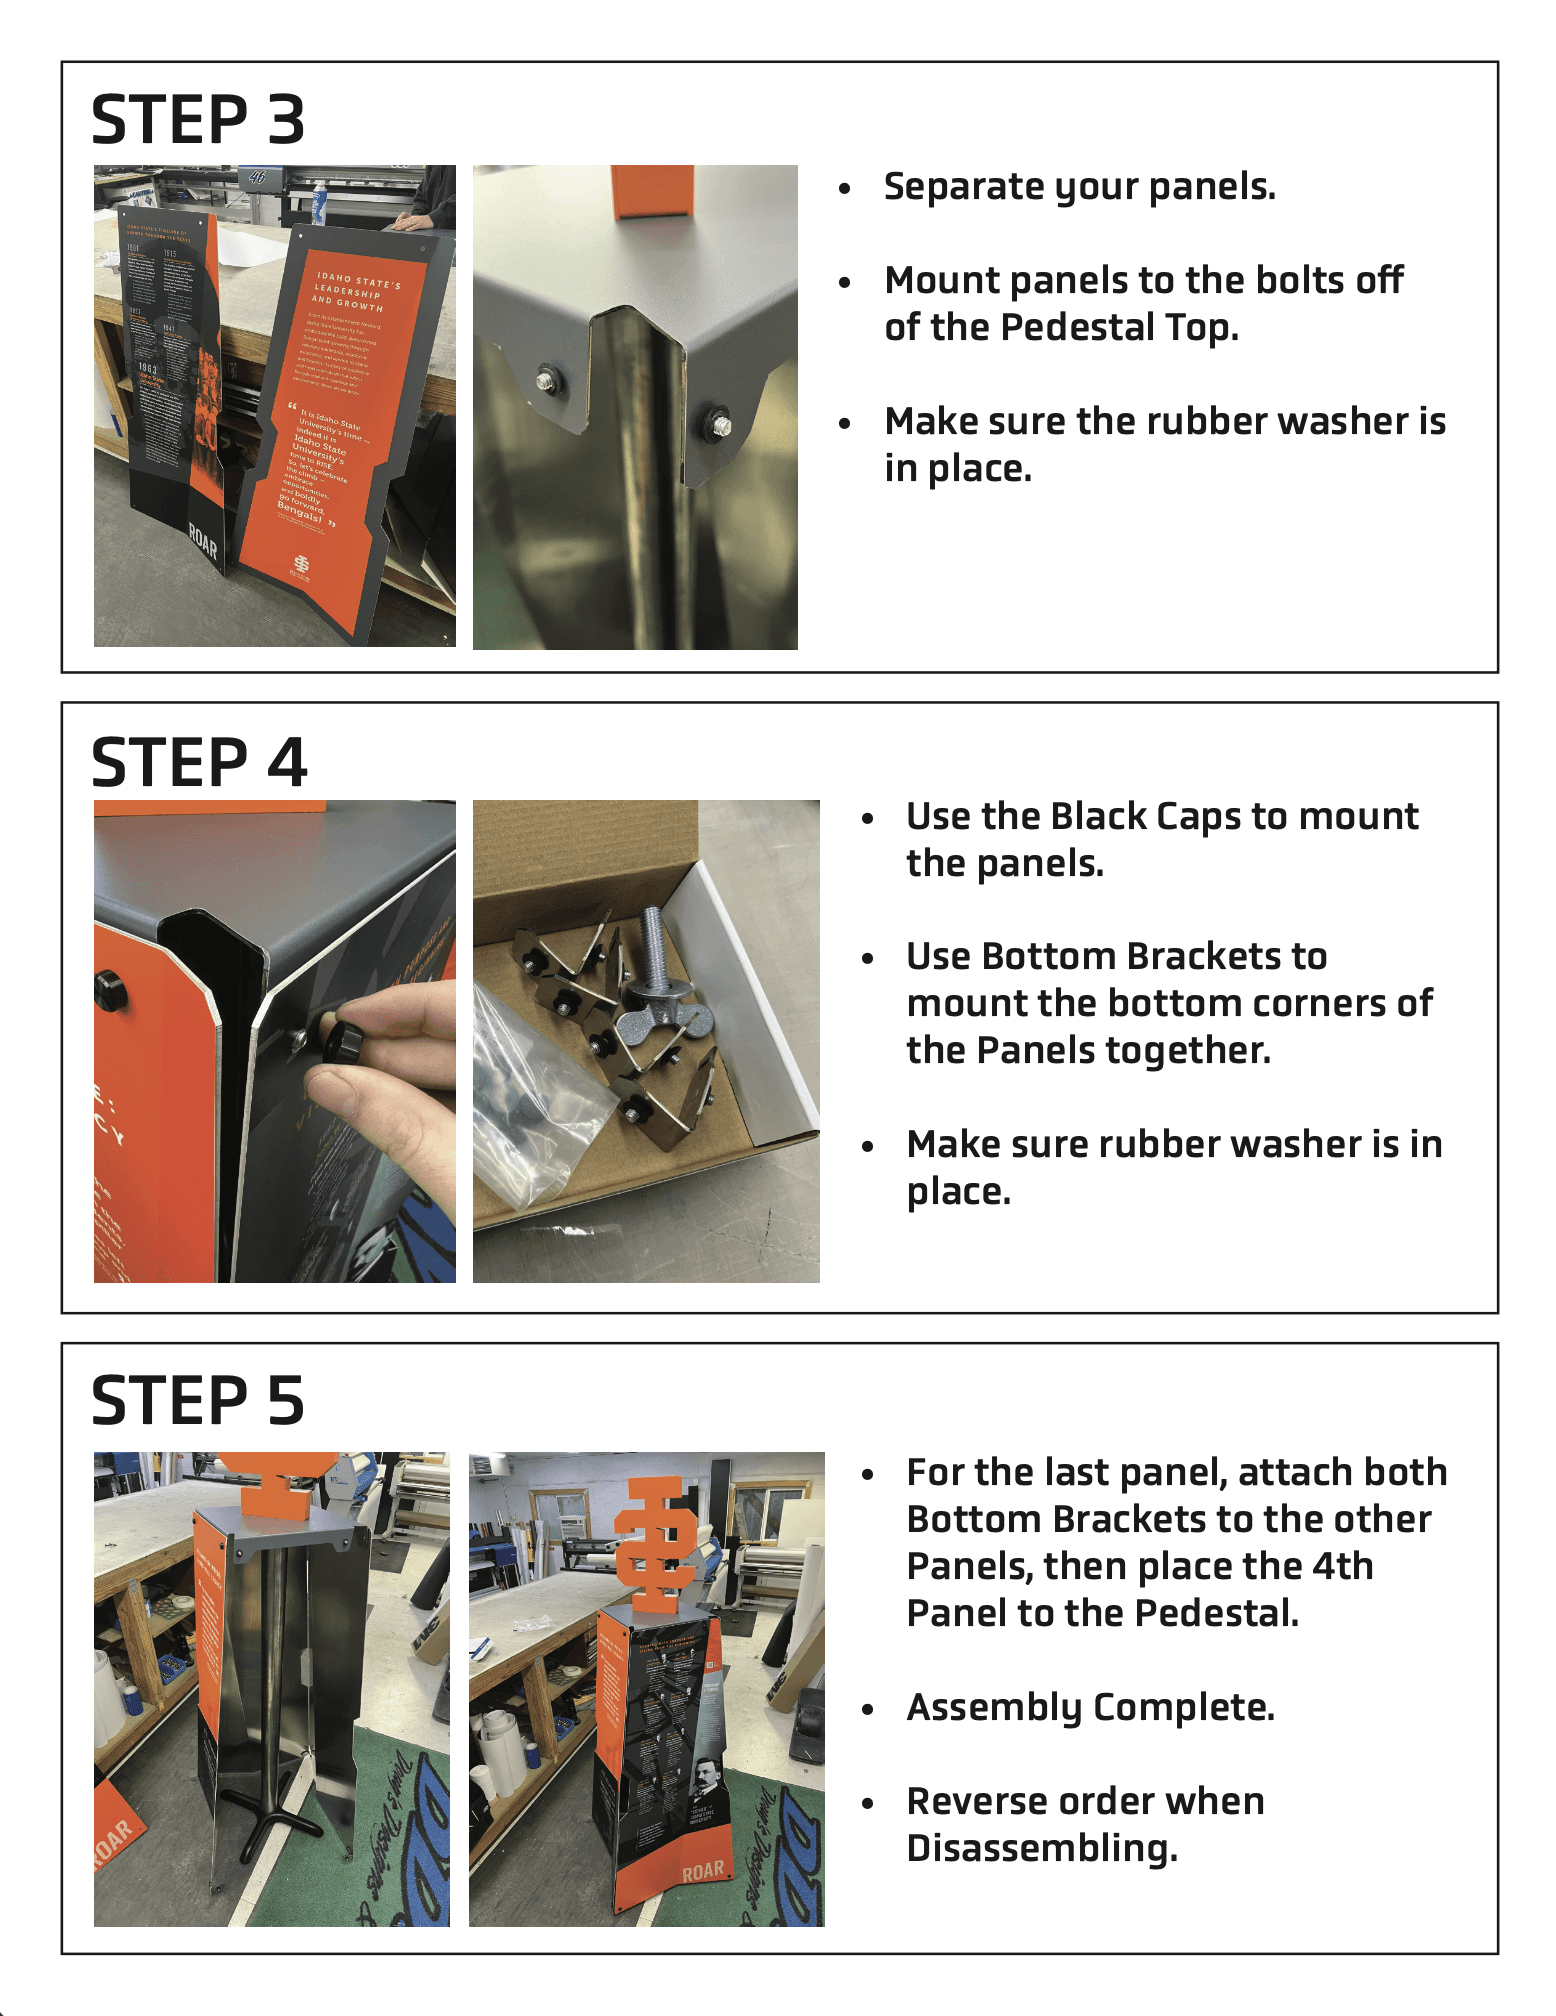
To mount the panels I modified the Top Plate to be sandwiched between the post and the Spirit Mark making the Spirit Mark a required element to lock in the Top Plate to the Post.
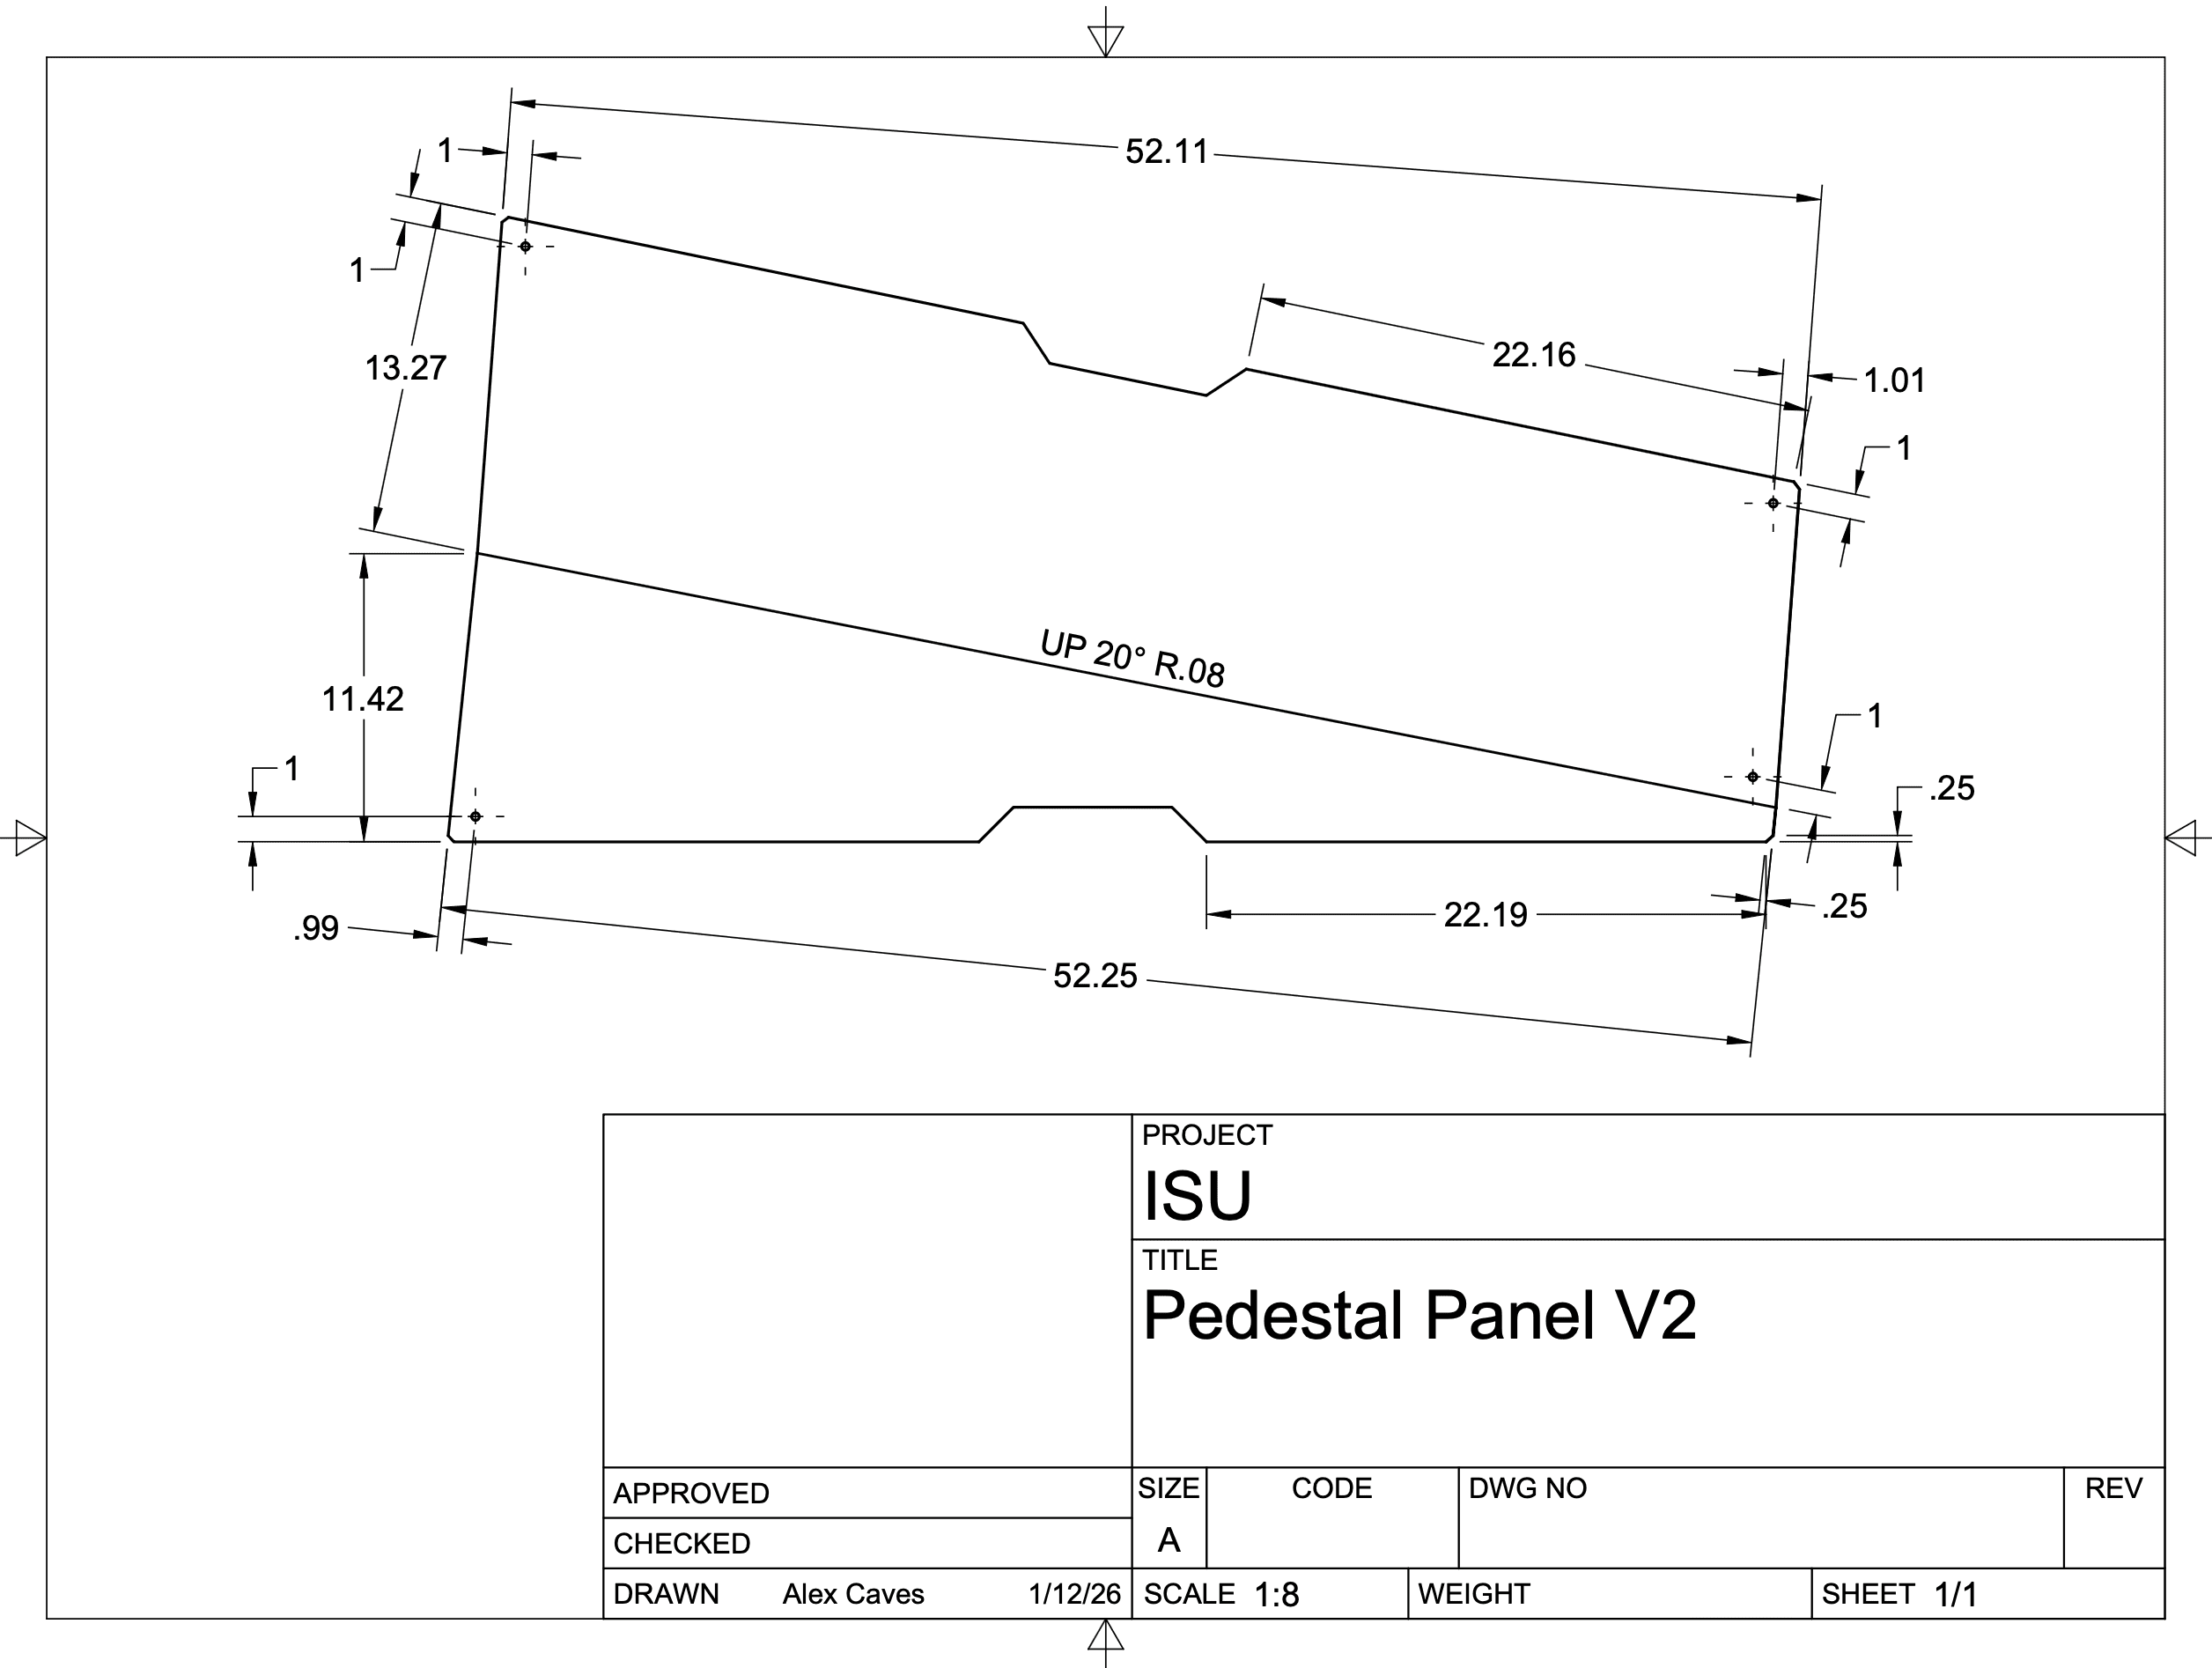
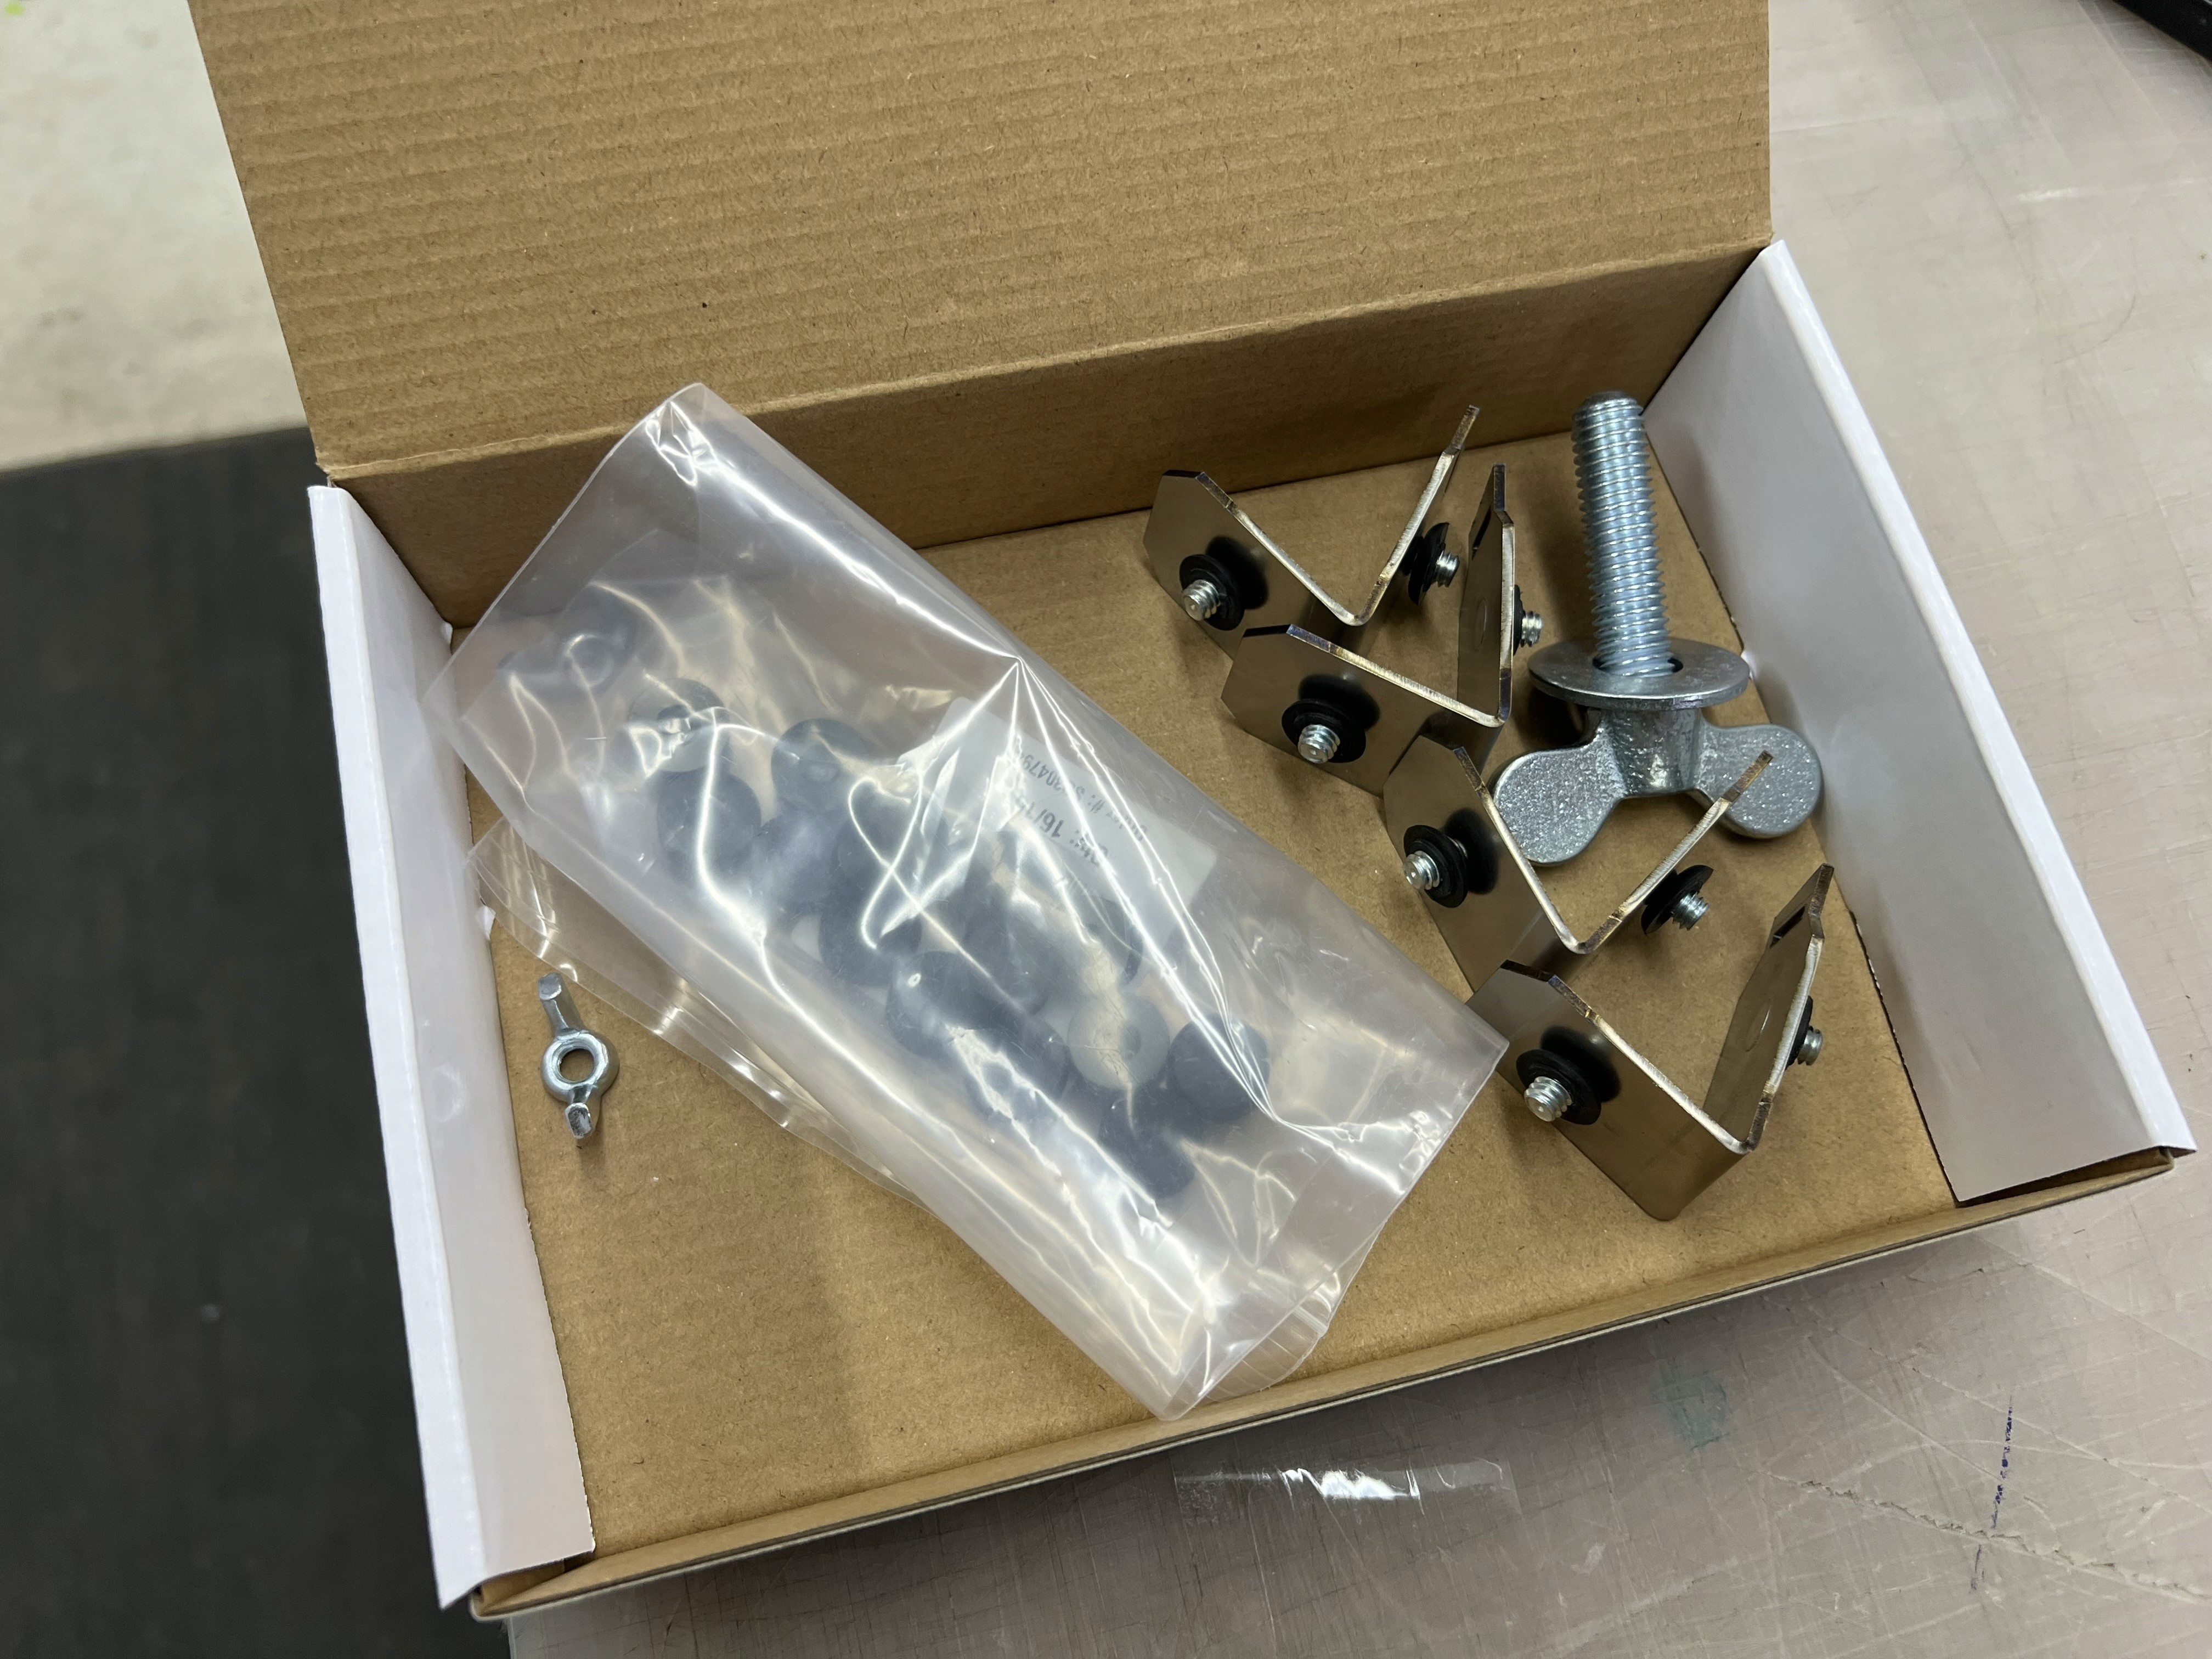
And then to secure the bottoms of the panels I designed a simple threaded tab formed to the same angels as the panels.
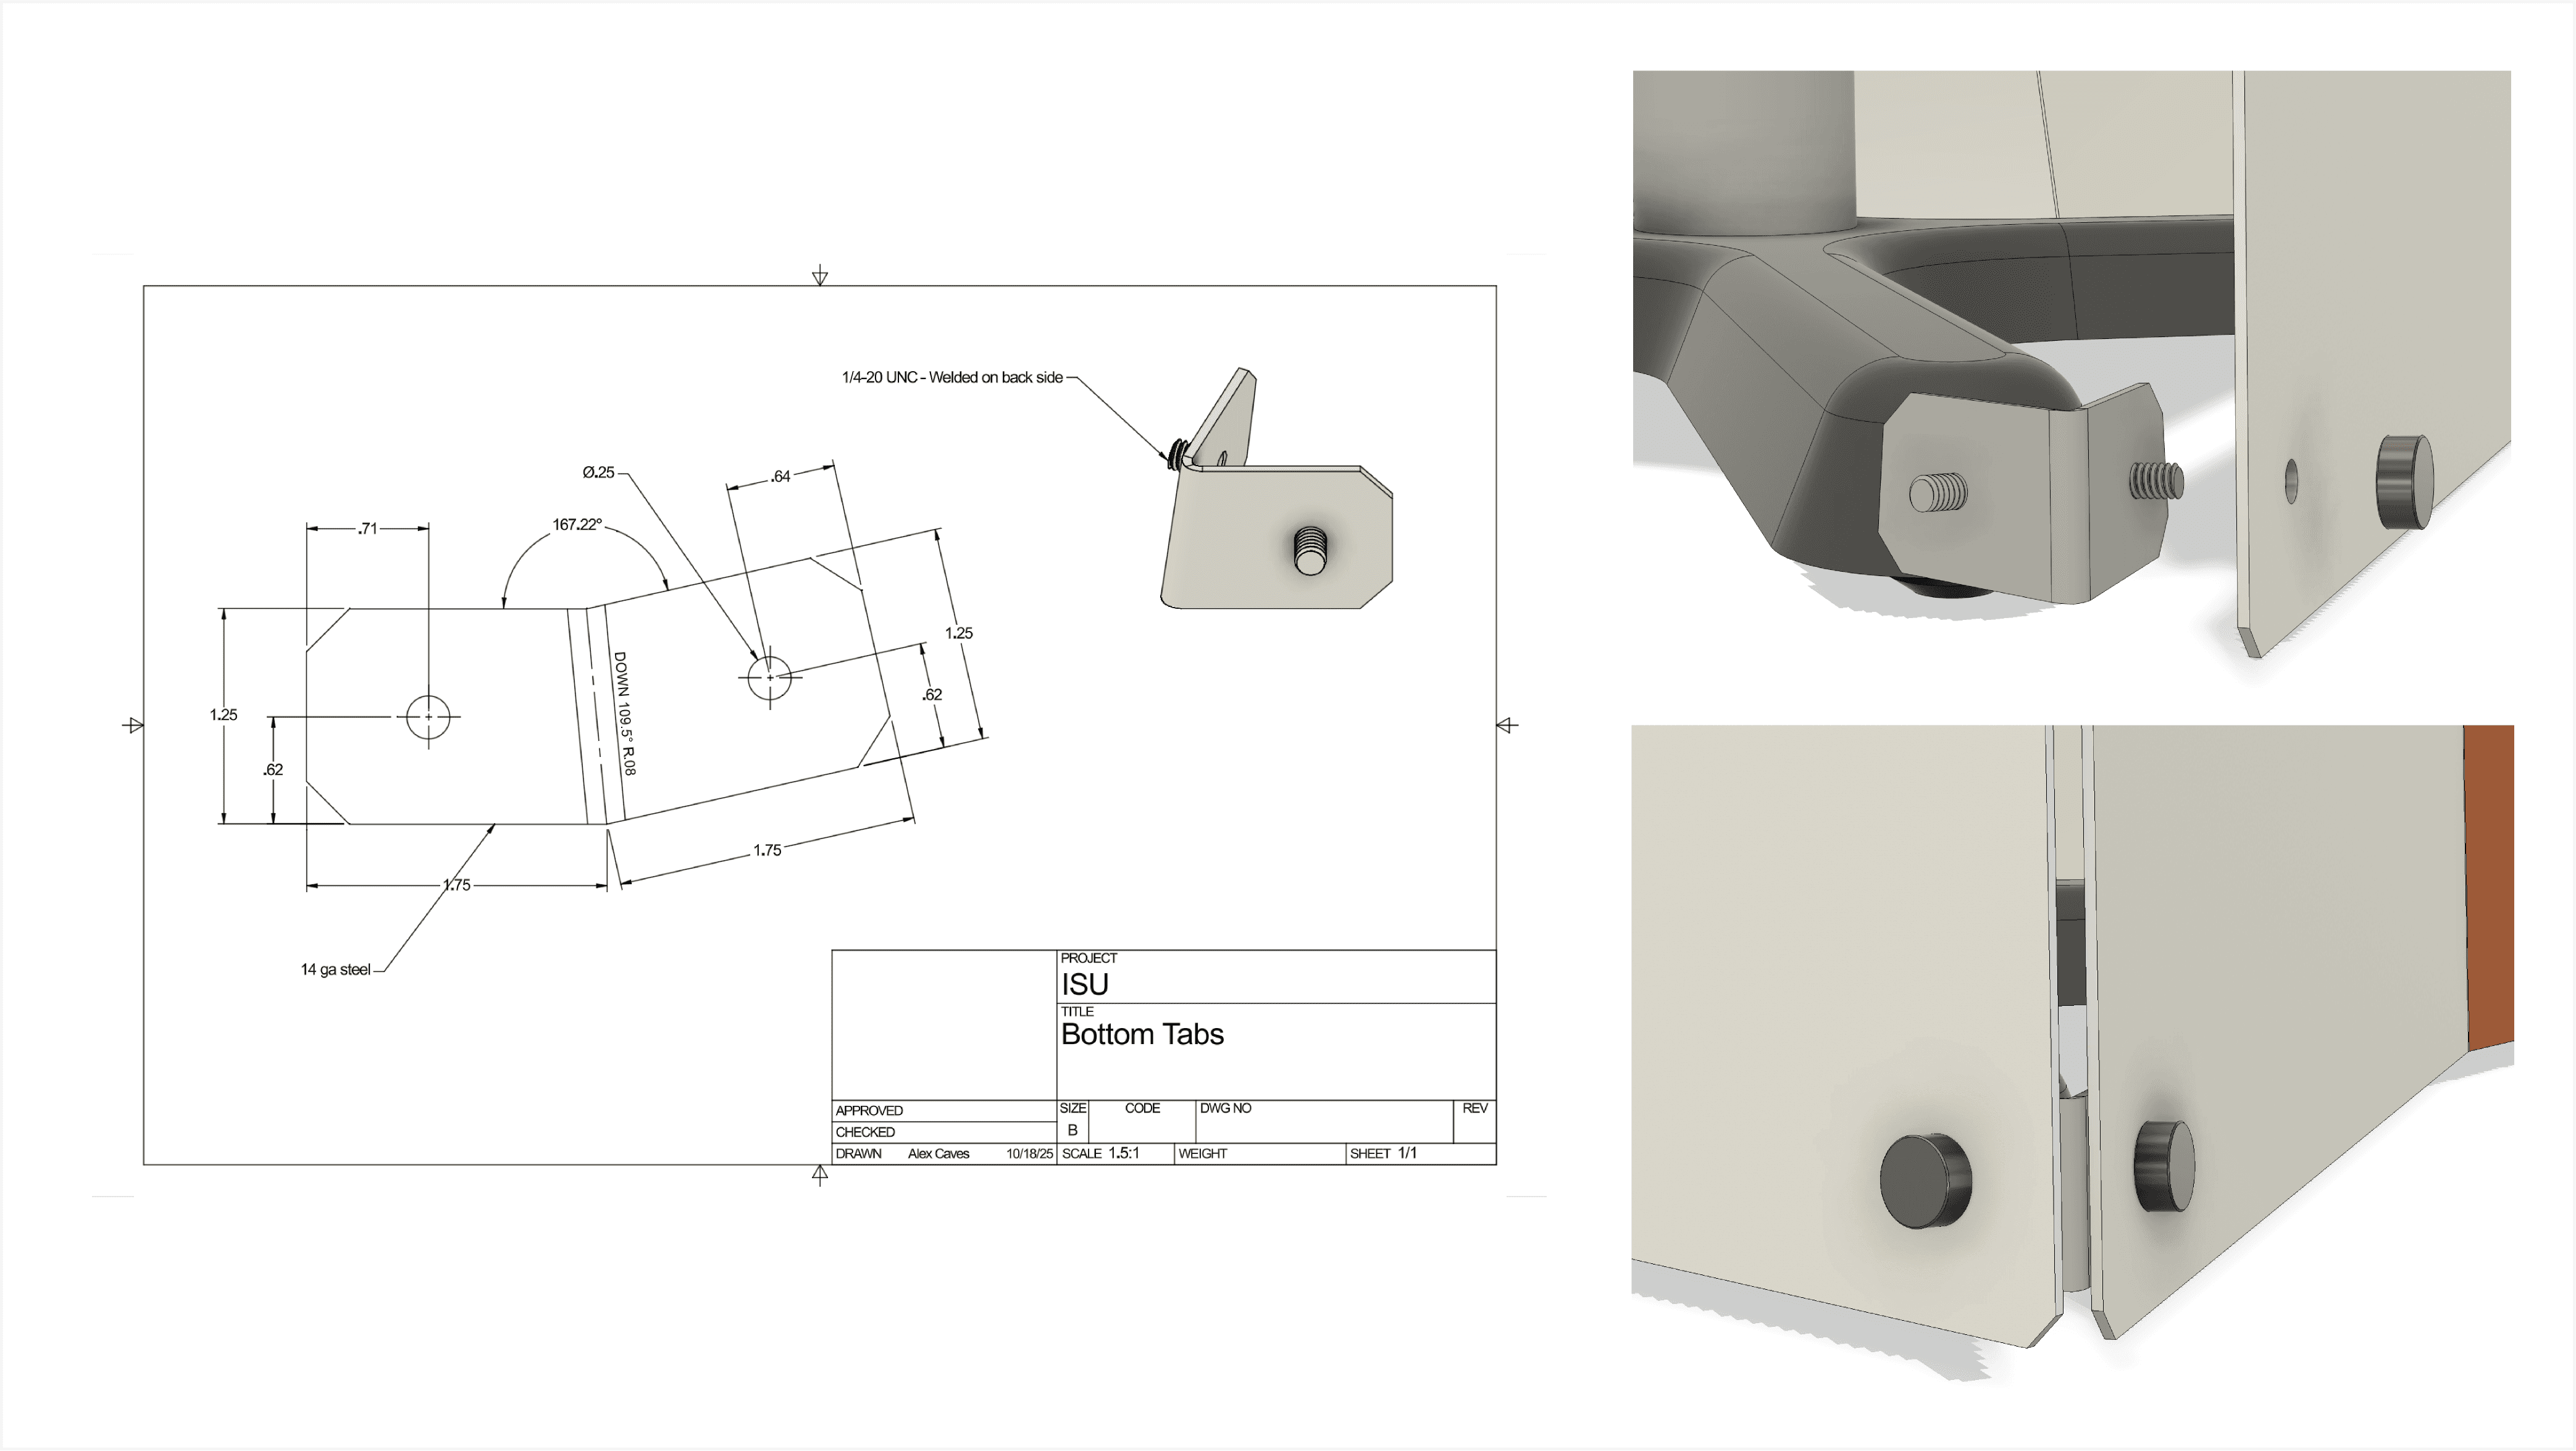
This isn't as rigid as the original framework design but with all the panels secured together, it is rigid enough for a stationary display.
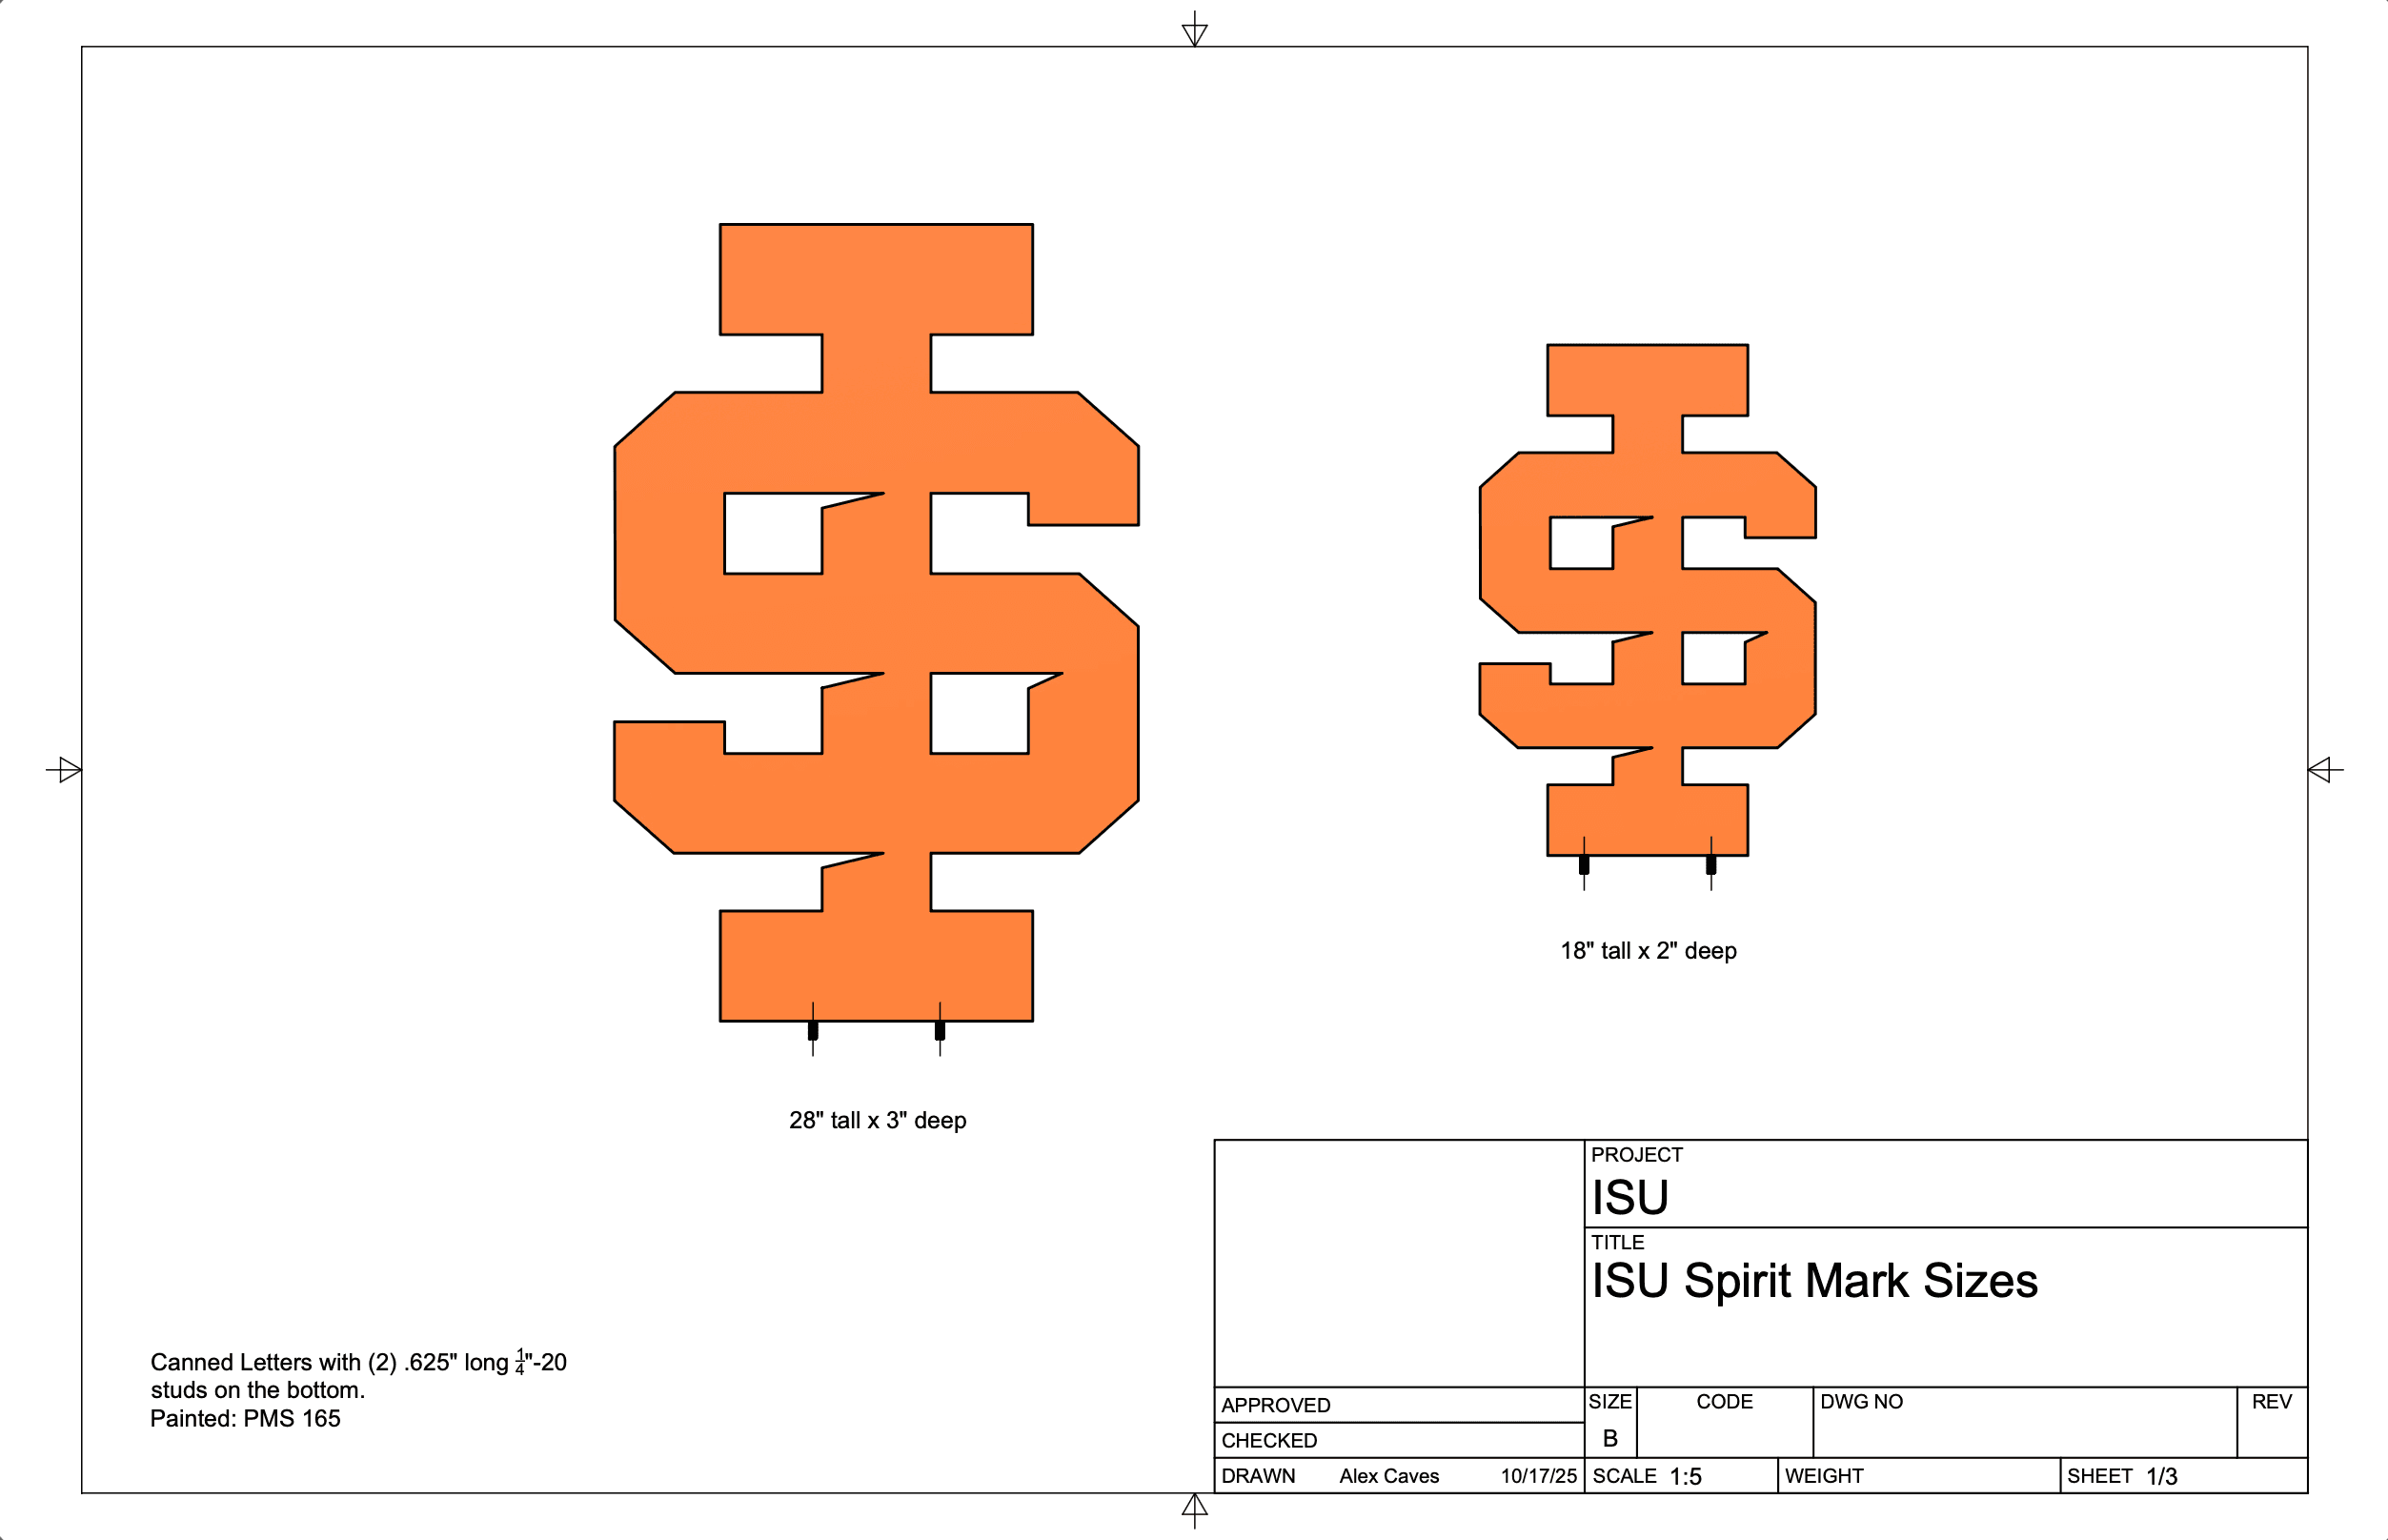
The Spirit Mark was a simple revision. Two sizes, same bolt location.
To showcase the revised finalized design I created a 3D interactive viewer with animations showing the assembly and disassembly process.
The Final Proof
I usually create a PDF presentation to showcase the final details of the project but for this one I wanted to try something new.
A Final Proof that was all digital and Interactive with animations.
Go here >> 125th Anniversary Display << to check out the final proof.
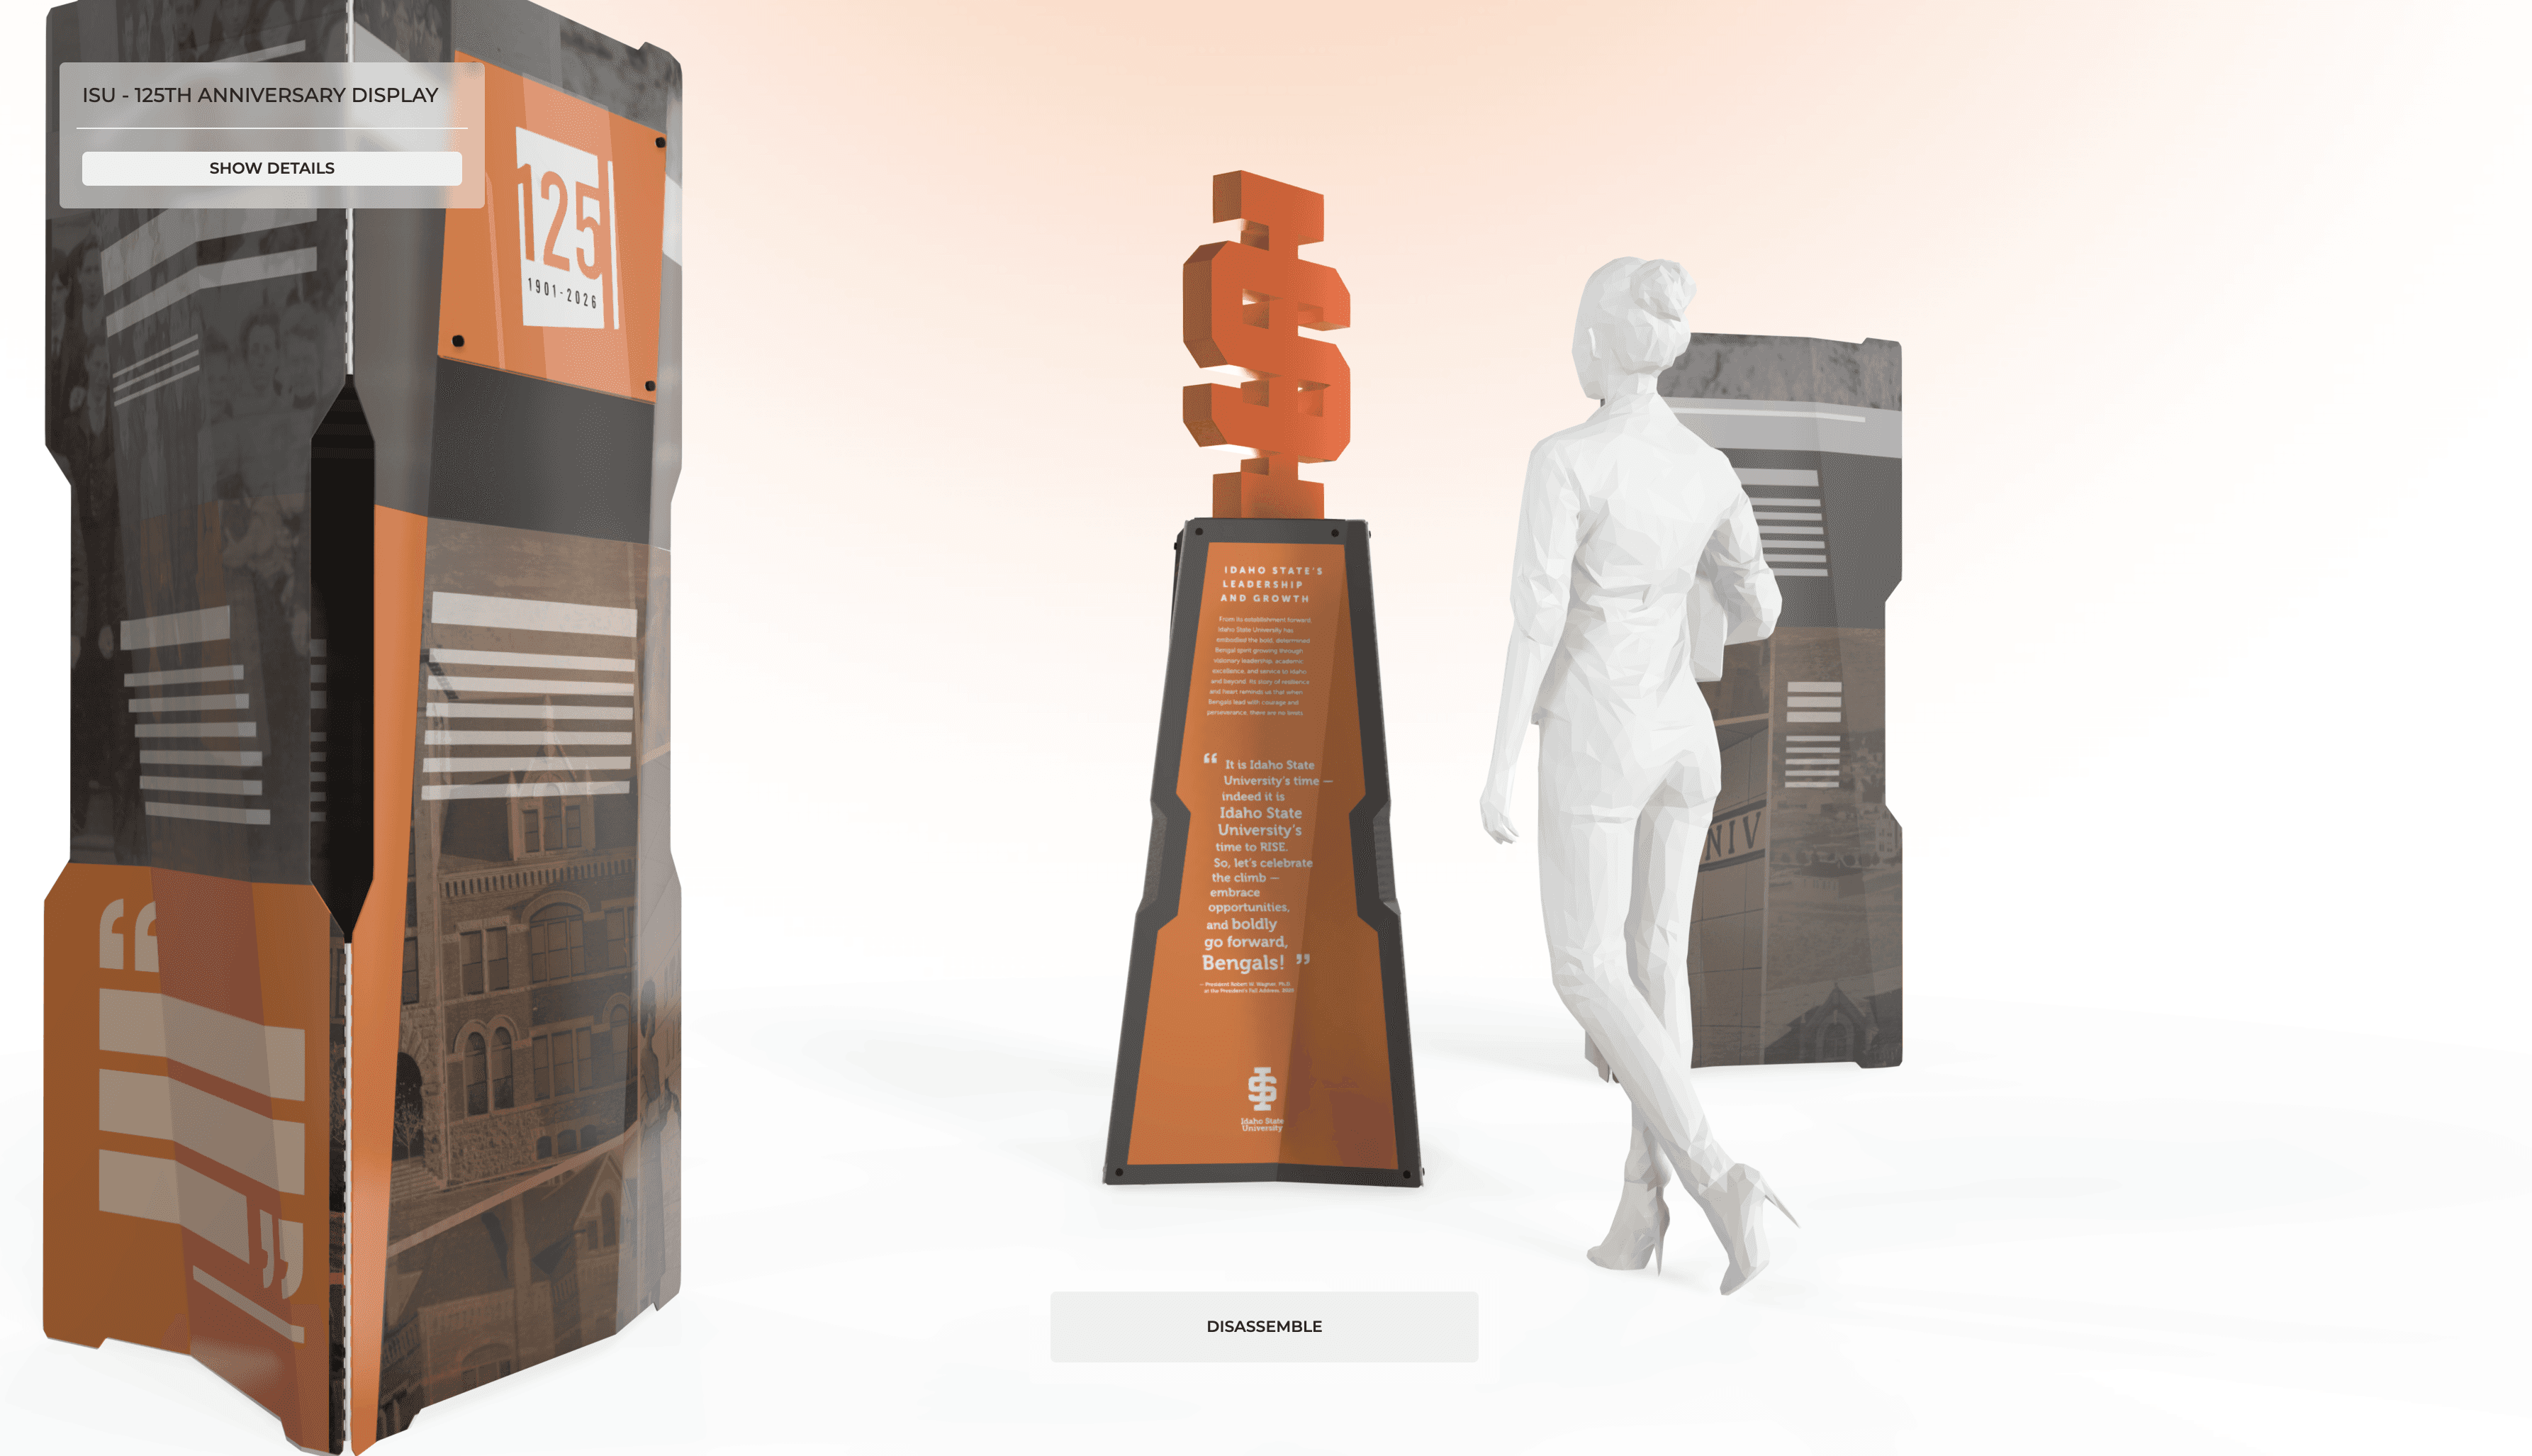
The finalized design was approved!
Revised Fabrication Estimate
THE NUMBERS
3 Panel Display:
Single sided vinyl and no plaque —— $3,150 ($6,300 for two)
Pedestal:
Value Engineered pedestal —— $3,130
Spirit Mark:
28" Non-Illuminated —— $713
18" Non-Illuminated —— $525
Options:
2) single sided 3 Panel Displays, Revised pedestal, and 28" Spirit Mark = $10,143
2) single sided 3 Panel Displays, Revised pedestal, and 18" Spirit Mark = $9,955
1) single sided 3 Panel Display, Revised pedestal, and 18" Spirit Mark = $6,805
We were between a rock and a hard place. They loved the design but we couldn't fit it in the budget, and the budget wasn't moving… We had to make some choices.
I suggested that the Centerpiece was the most significant element of this display and so maybe we go off-the-shelf fabric displays for the 3 Panel Display and execute the ideal Centerpiece with the 28" Spirit Mark. To me the 18" wasn't quite hitting the same as the 28" Spirit Mark…
What they ultimately decided have be execute the Centerpiece with the 18" Spirit Mark, and explore other vendors to produce the 3 Panel Display design.
Not ideal as I can't quality control the execution but perfectly fine. This is one reason is why I split my contracts between phases: To give my clients complete control.
I gave them all the production files I created for the 3 Panel Display; tech drawings, dxf files, illustrator files, a link to the 3D interactive, etc. to produce an accurate quote for my Client. And it's the Client's responsibility to execute the build.
My responsibility moving forward was solely the Centerpiece. Let's Go!
The Build
The build was pretty straight forward since I was already sourcing parts and prices with the vendors.
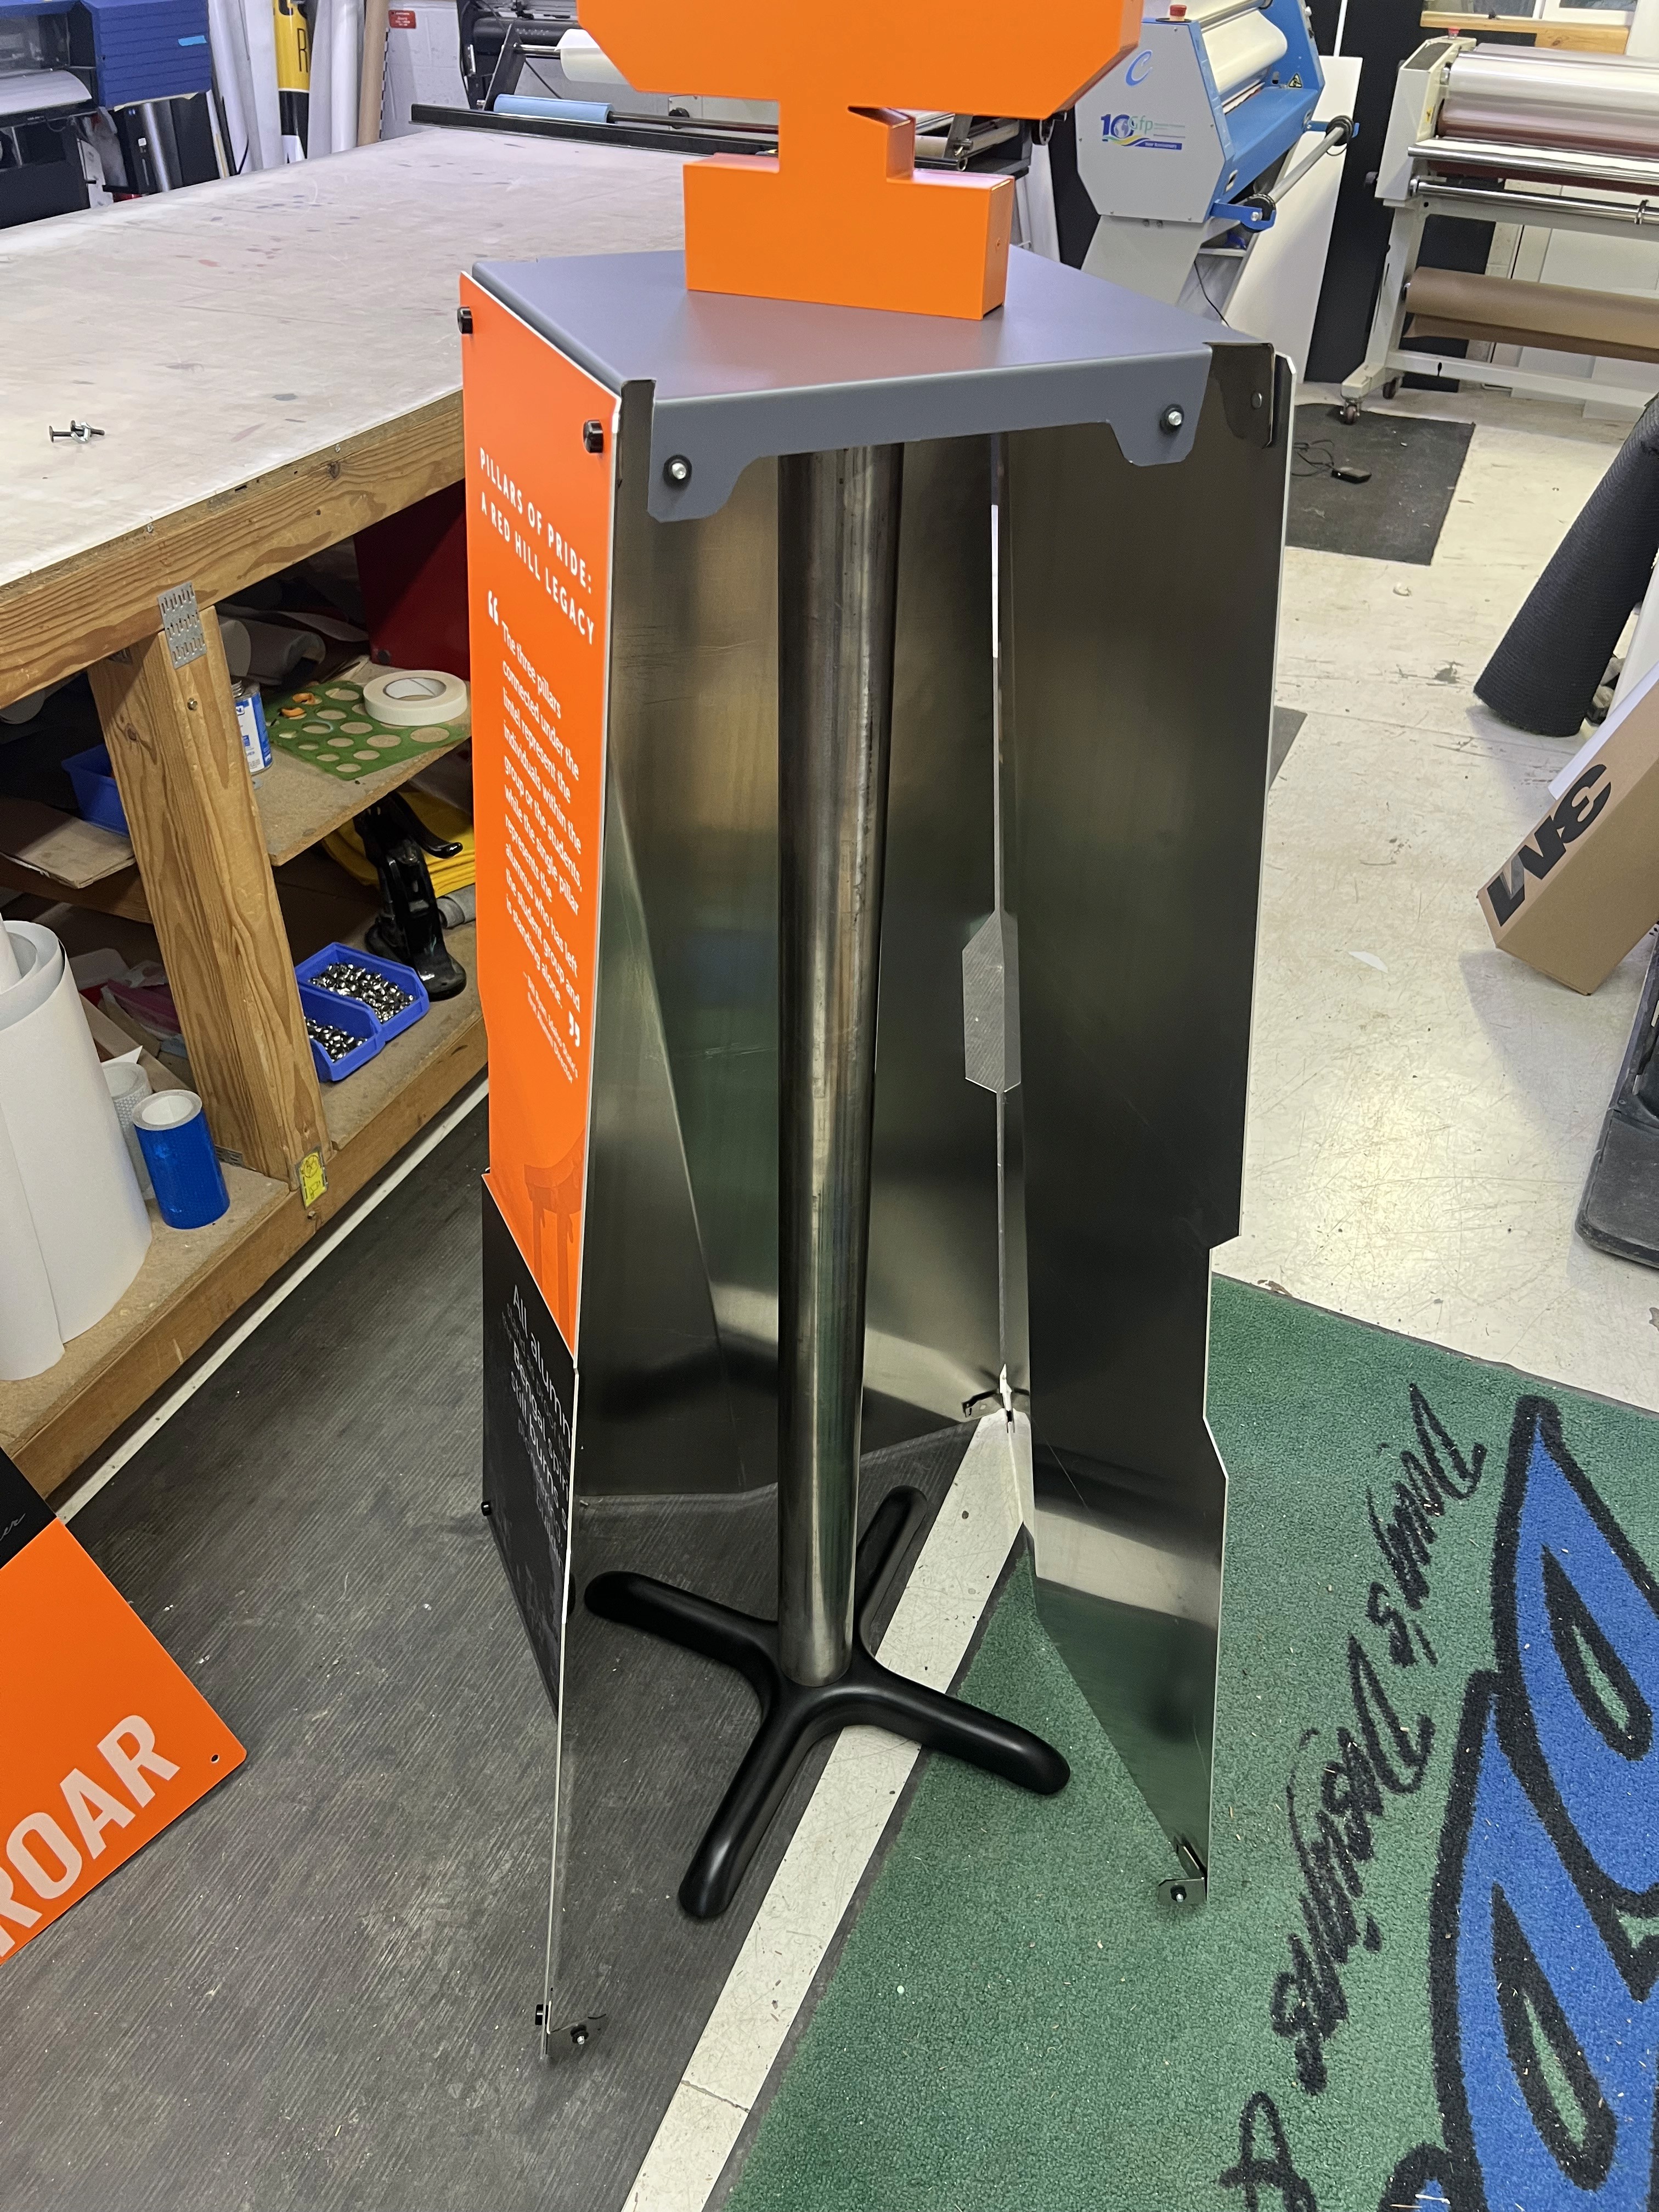
I had a local welding shop, Foster Weld, fabricate the Post.
I had a local metal supplier, Pacific Steel, laser cut and form the aluminum panels.
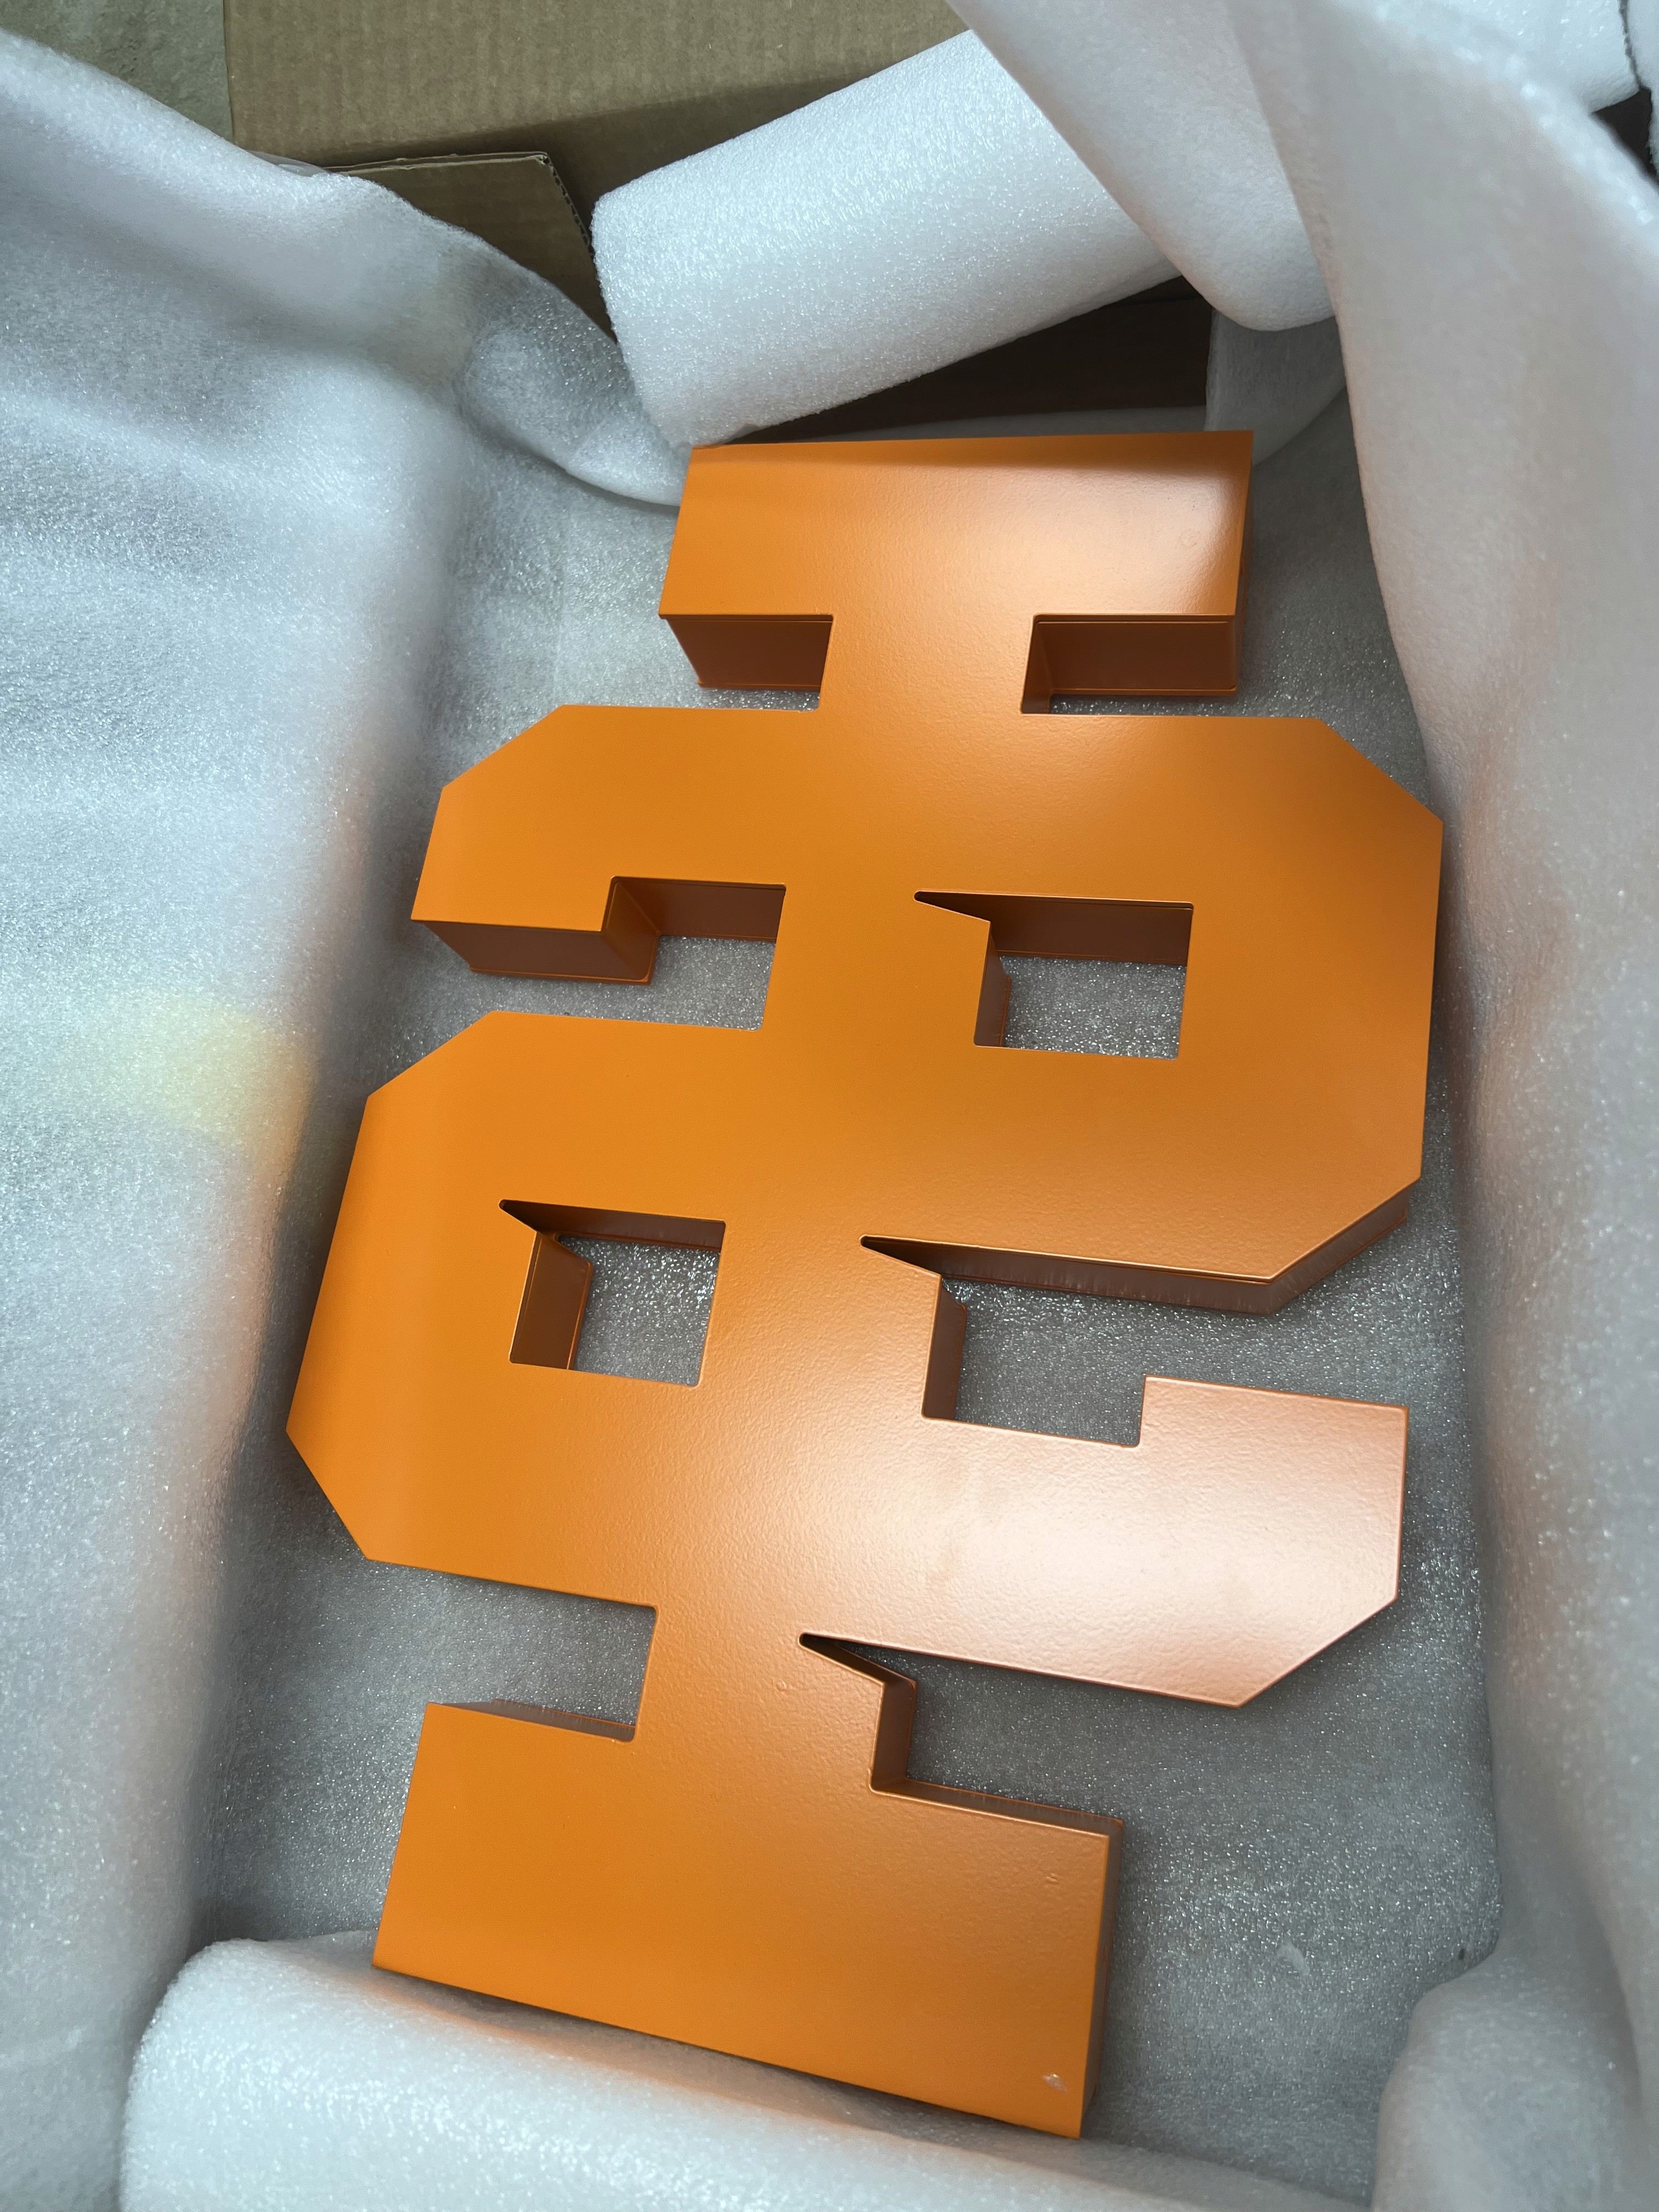
The Spirit Mark by Image National.
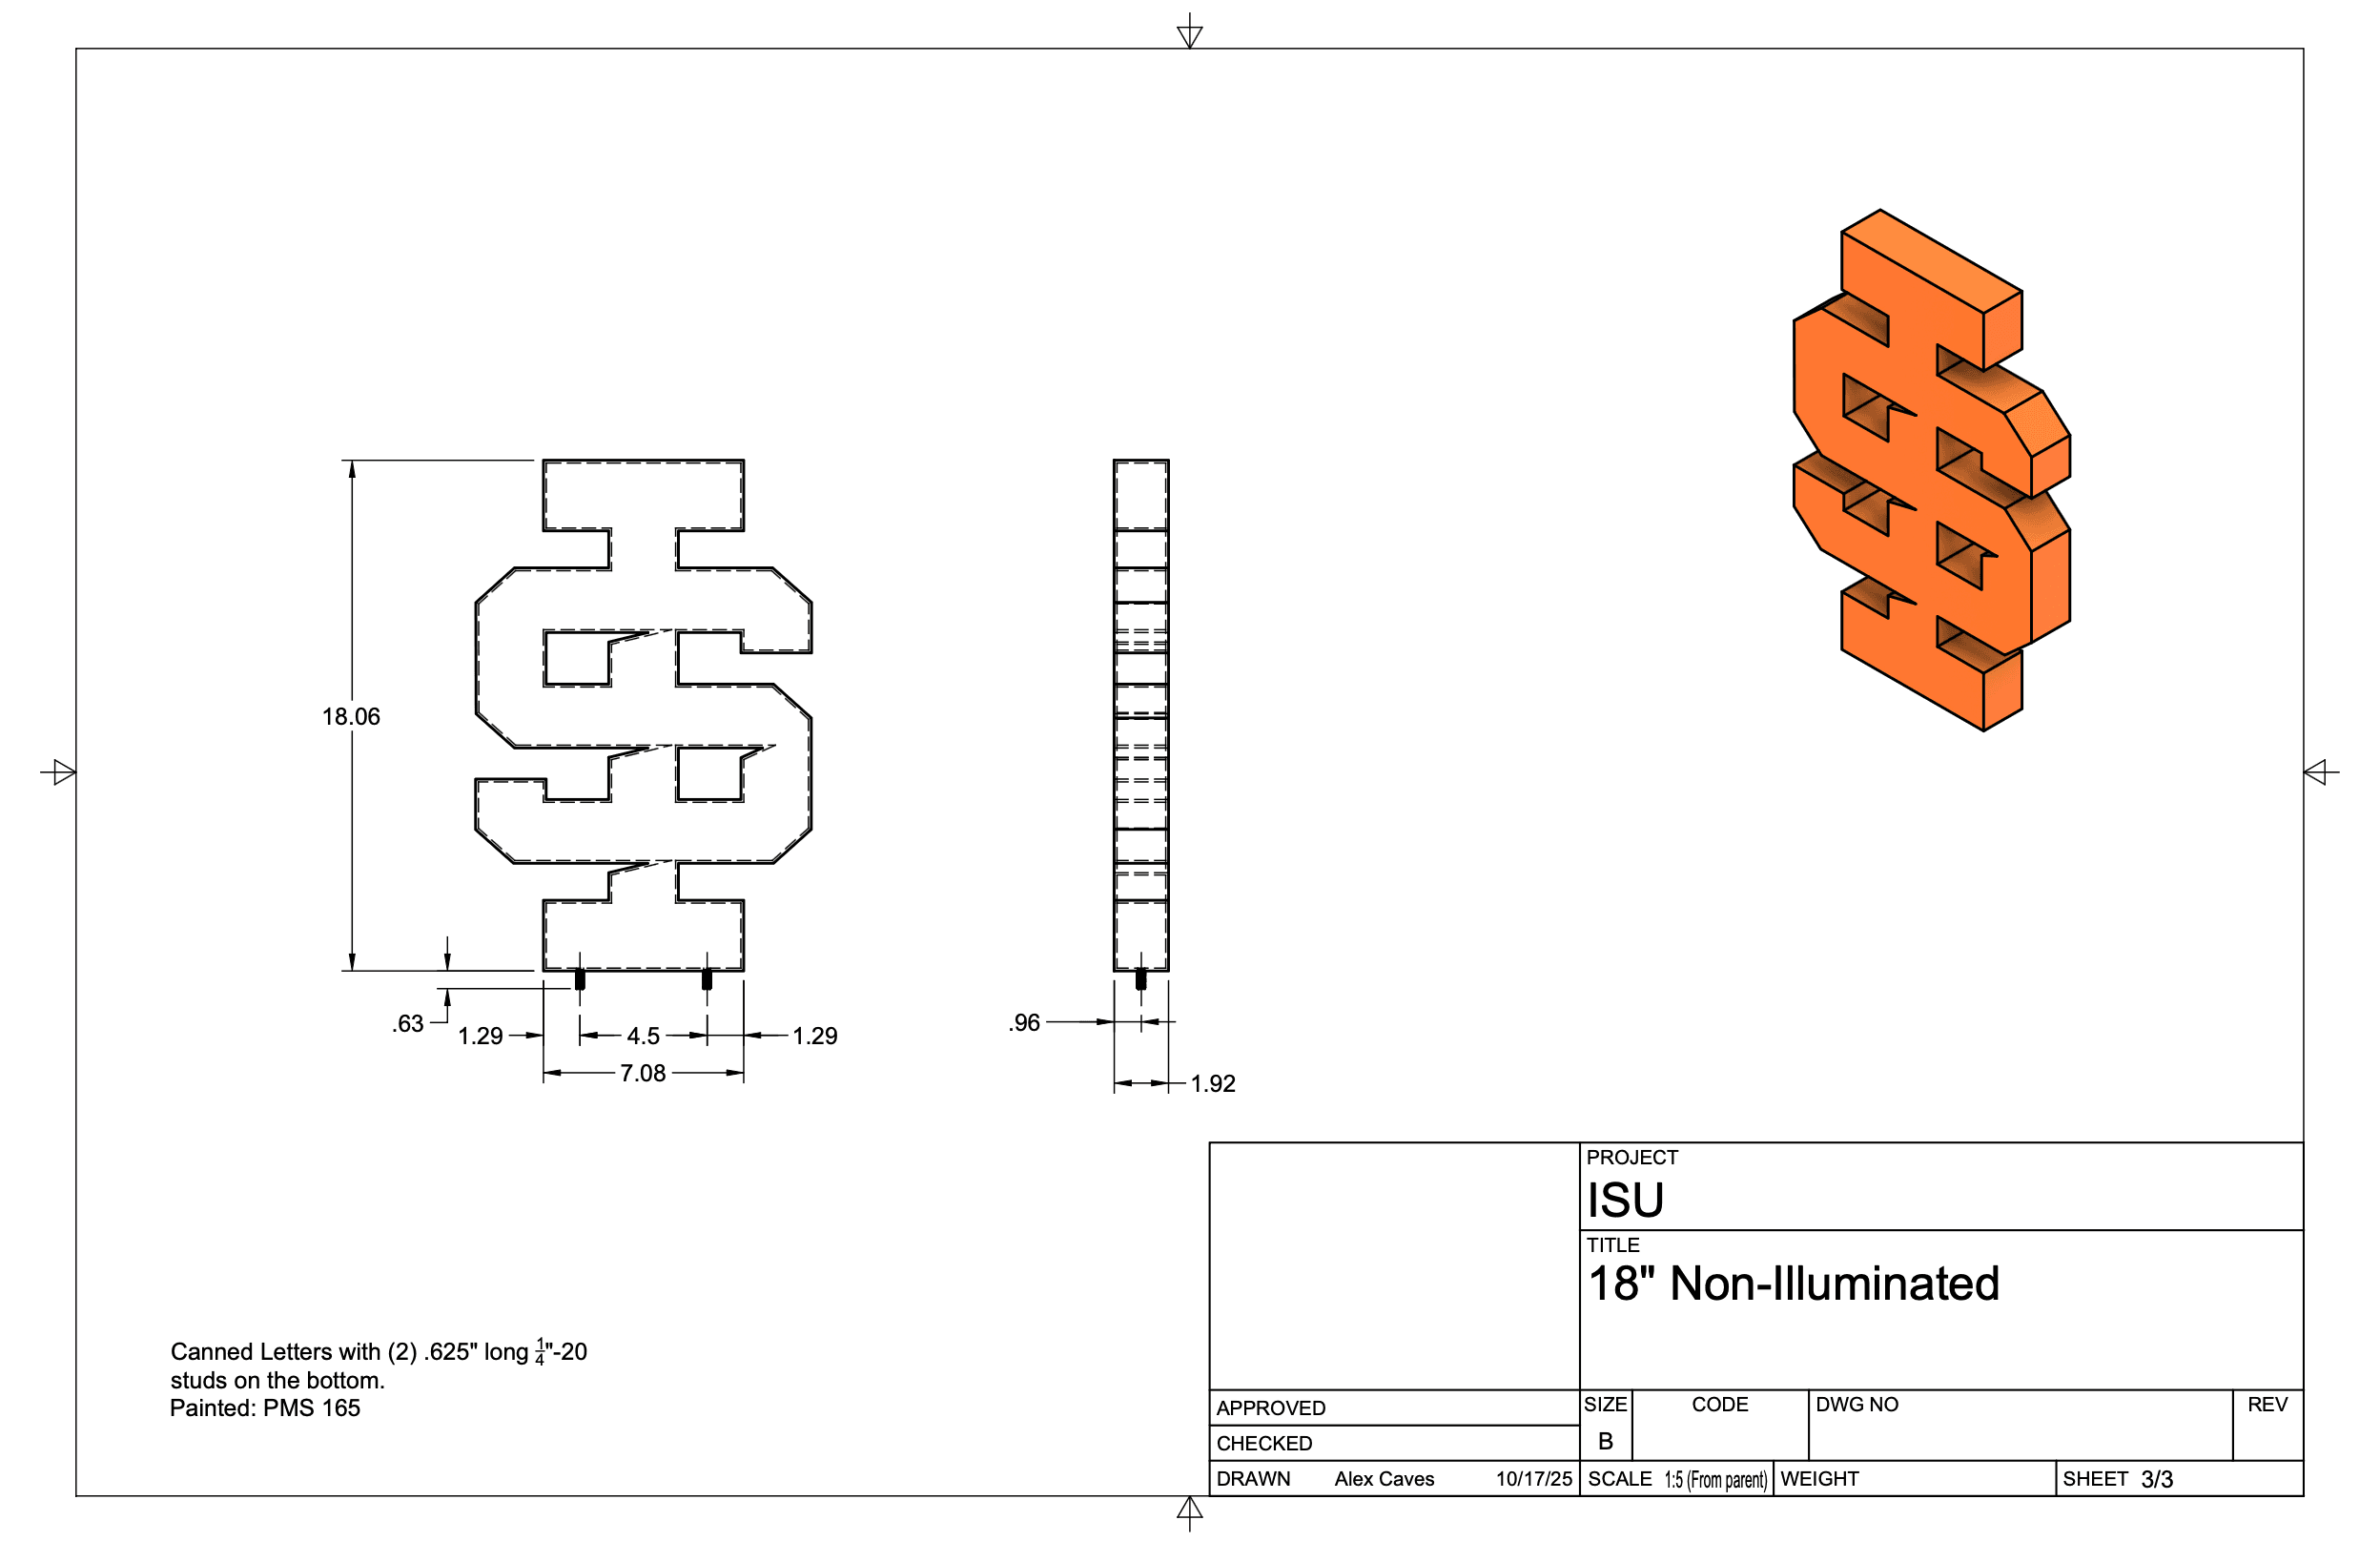
Table base from WebstarantStore.
Hardware from McMaster Carr, MBS Standoffs, and local store.
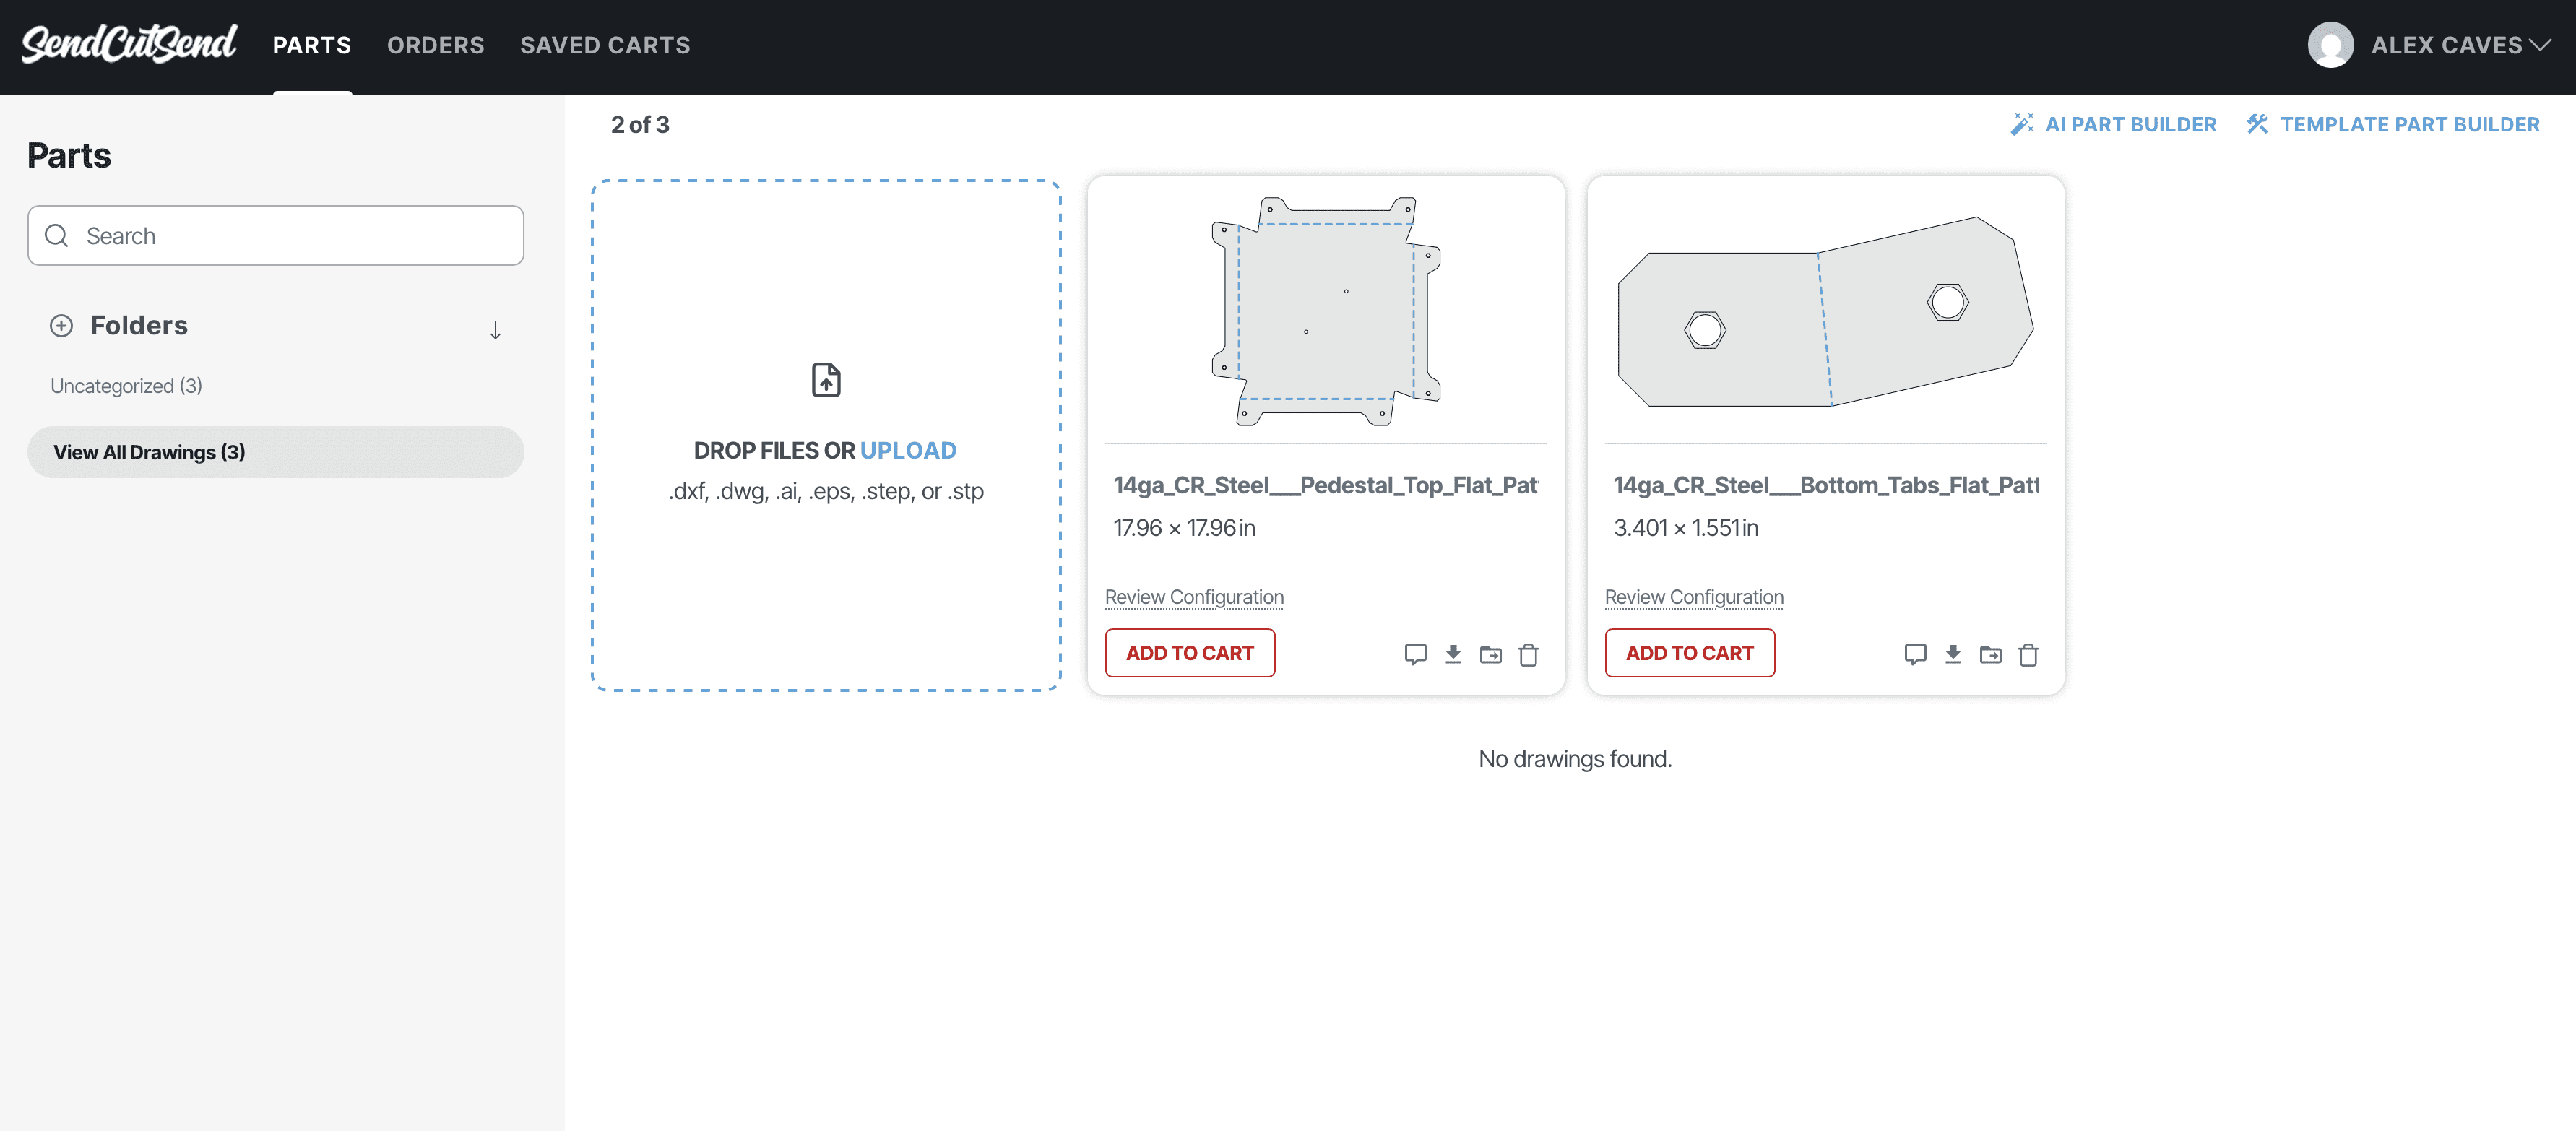
Pedestal Top and the Bottom Tabs by Send Cut Send an online metal fab fulfillment house.
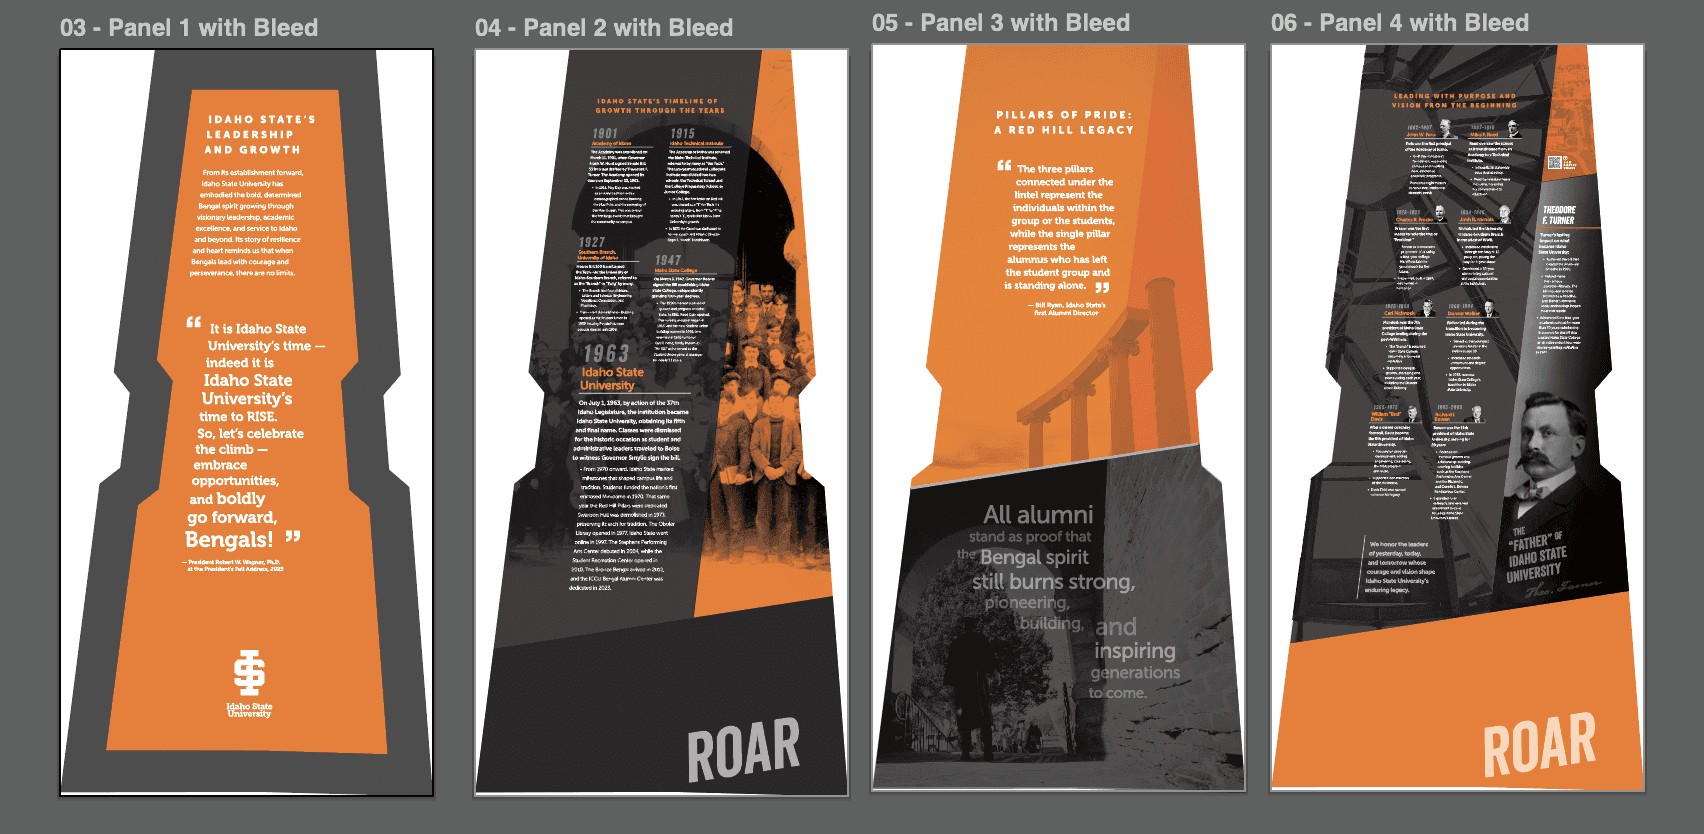
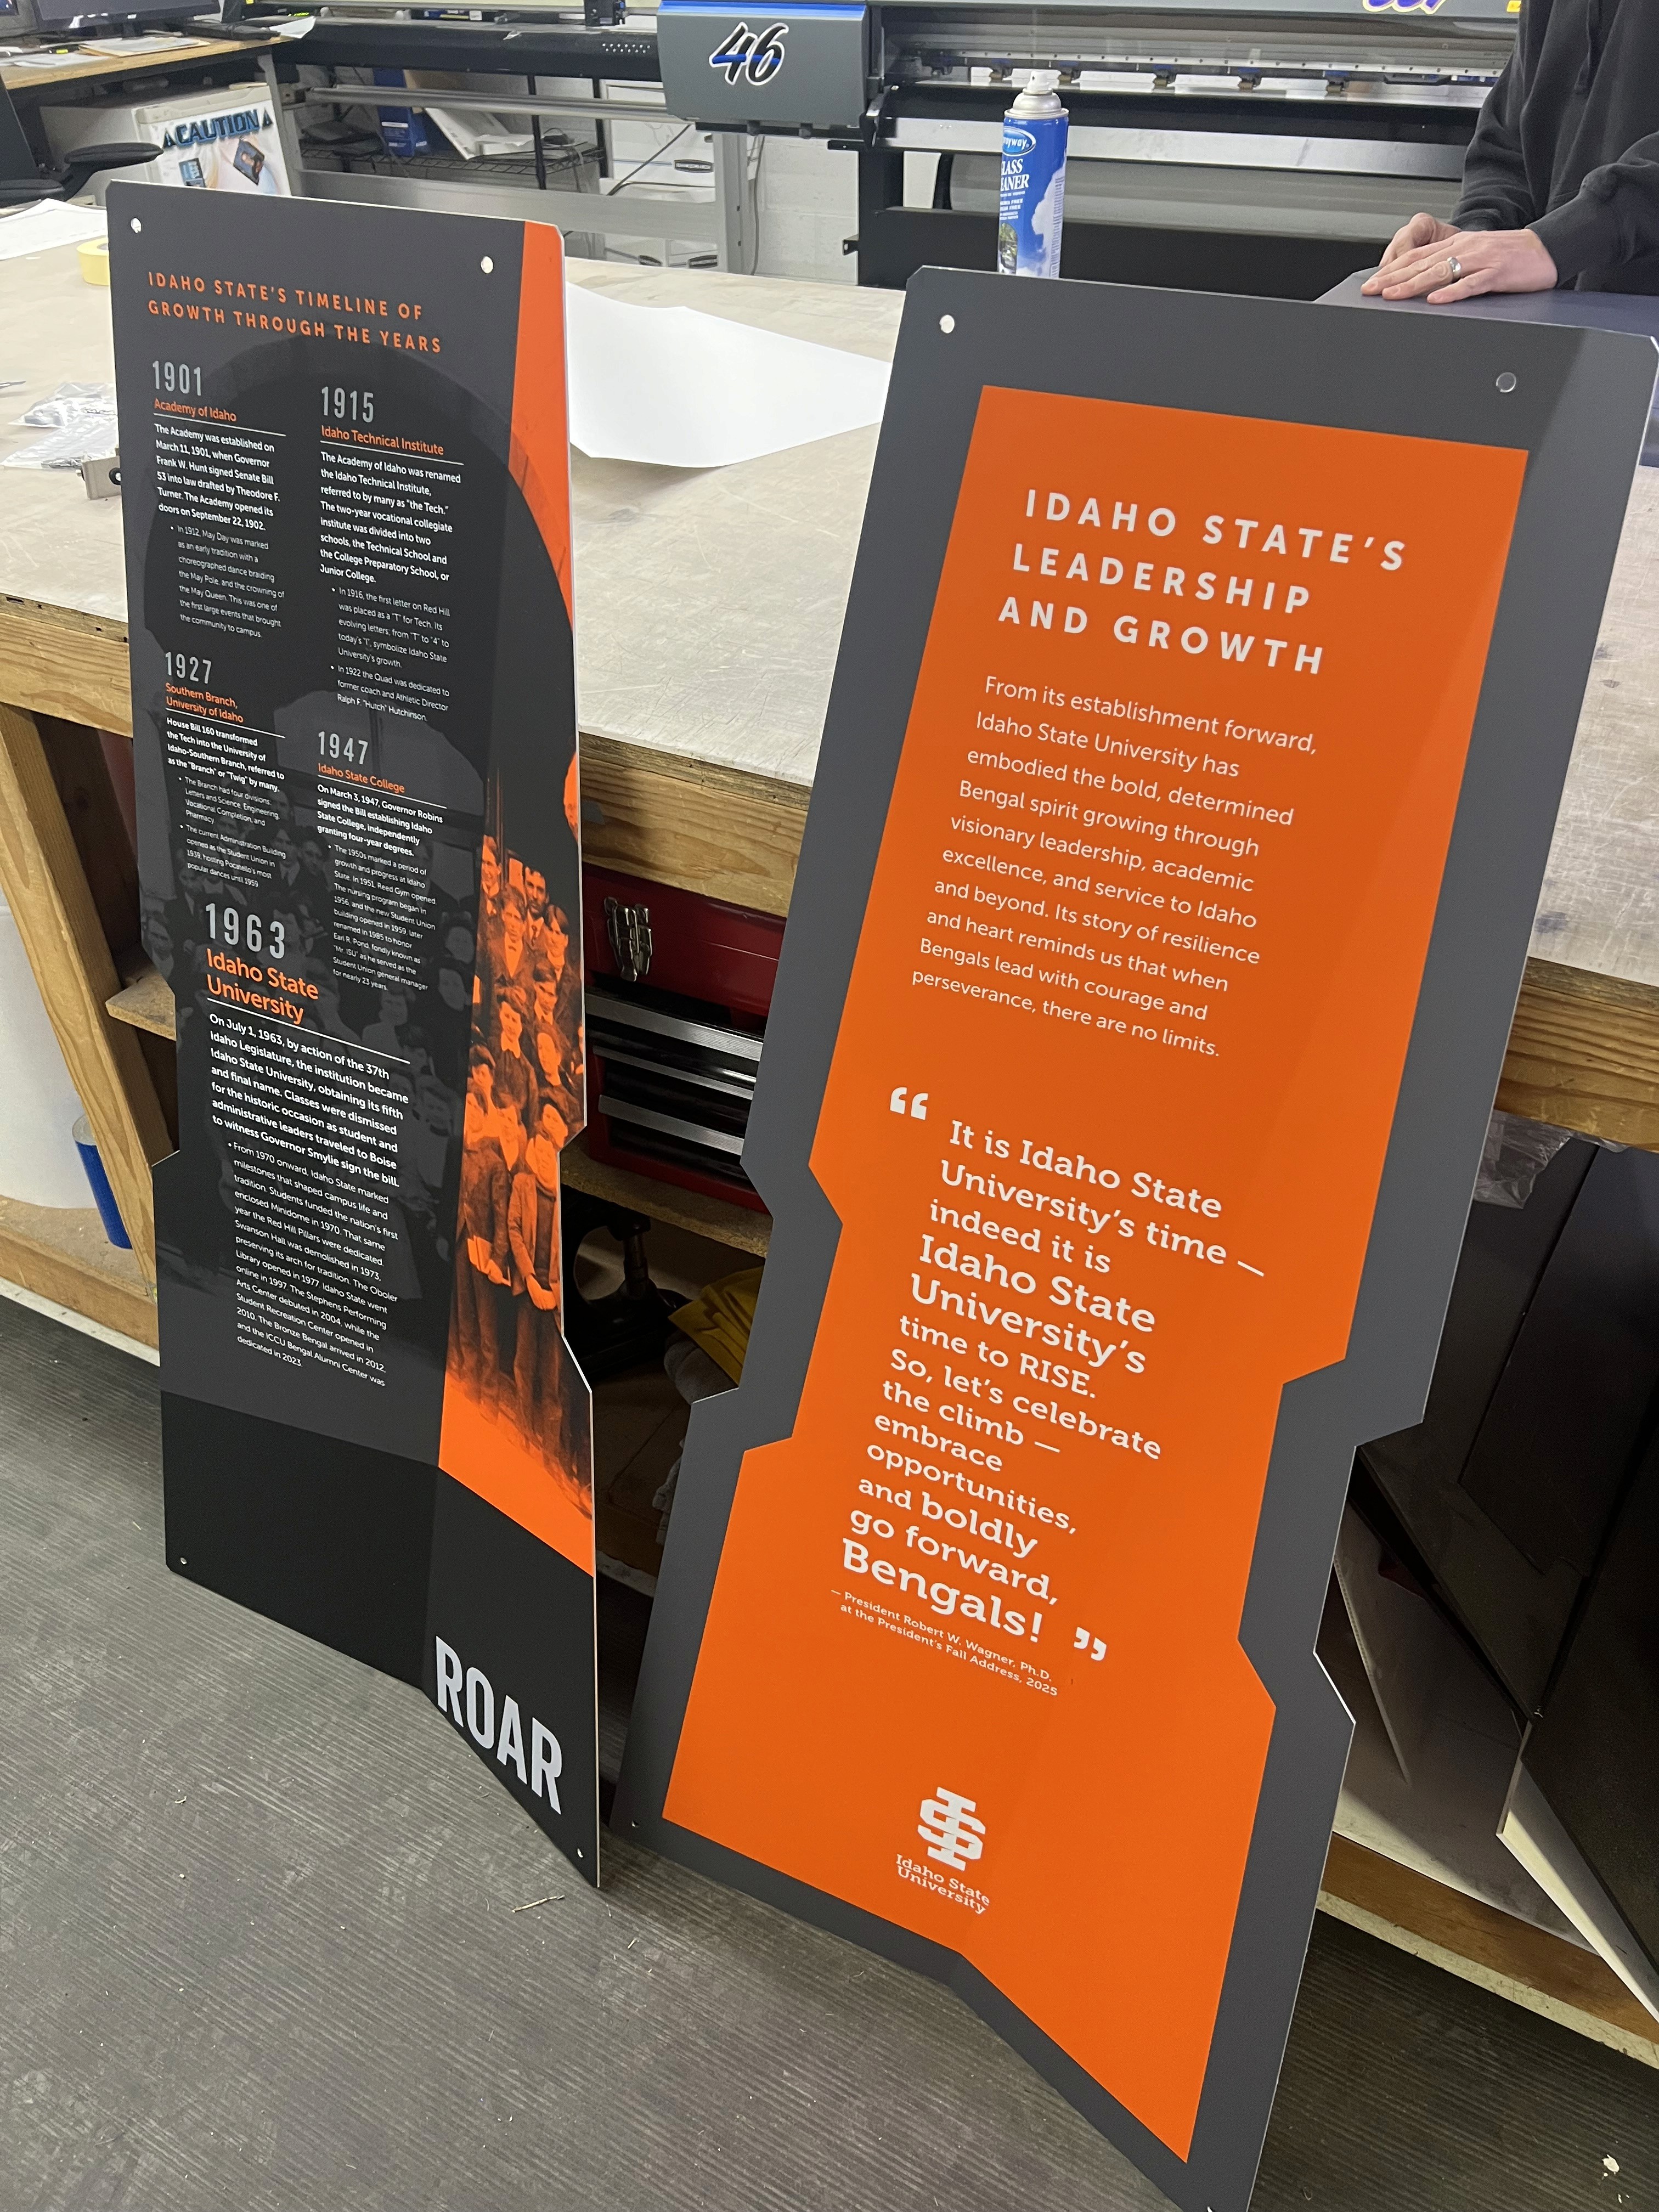
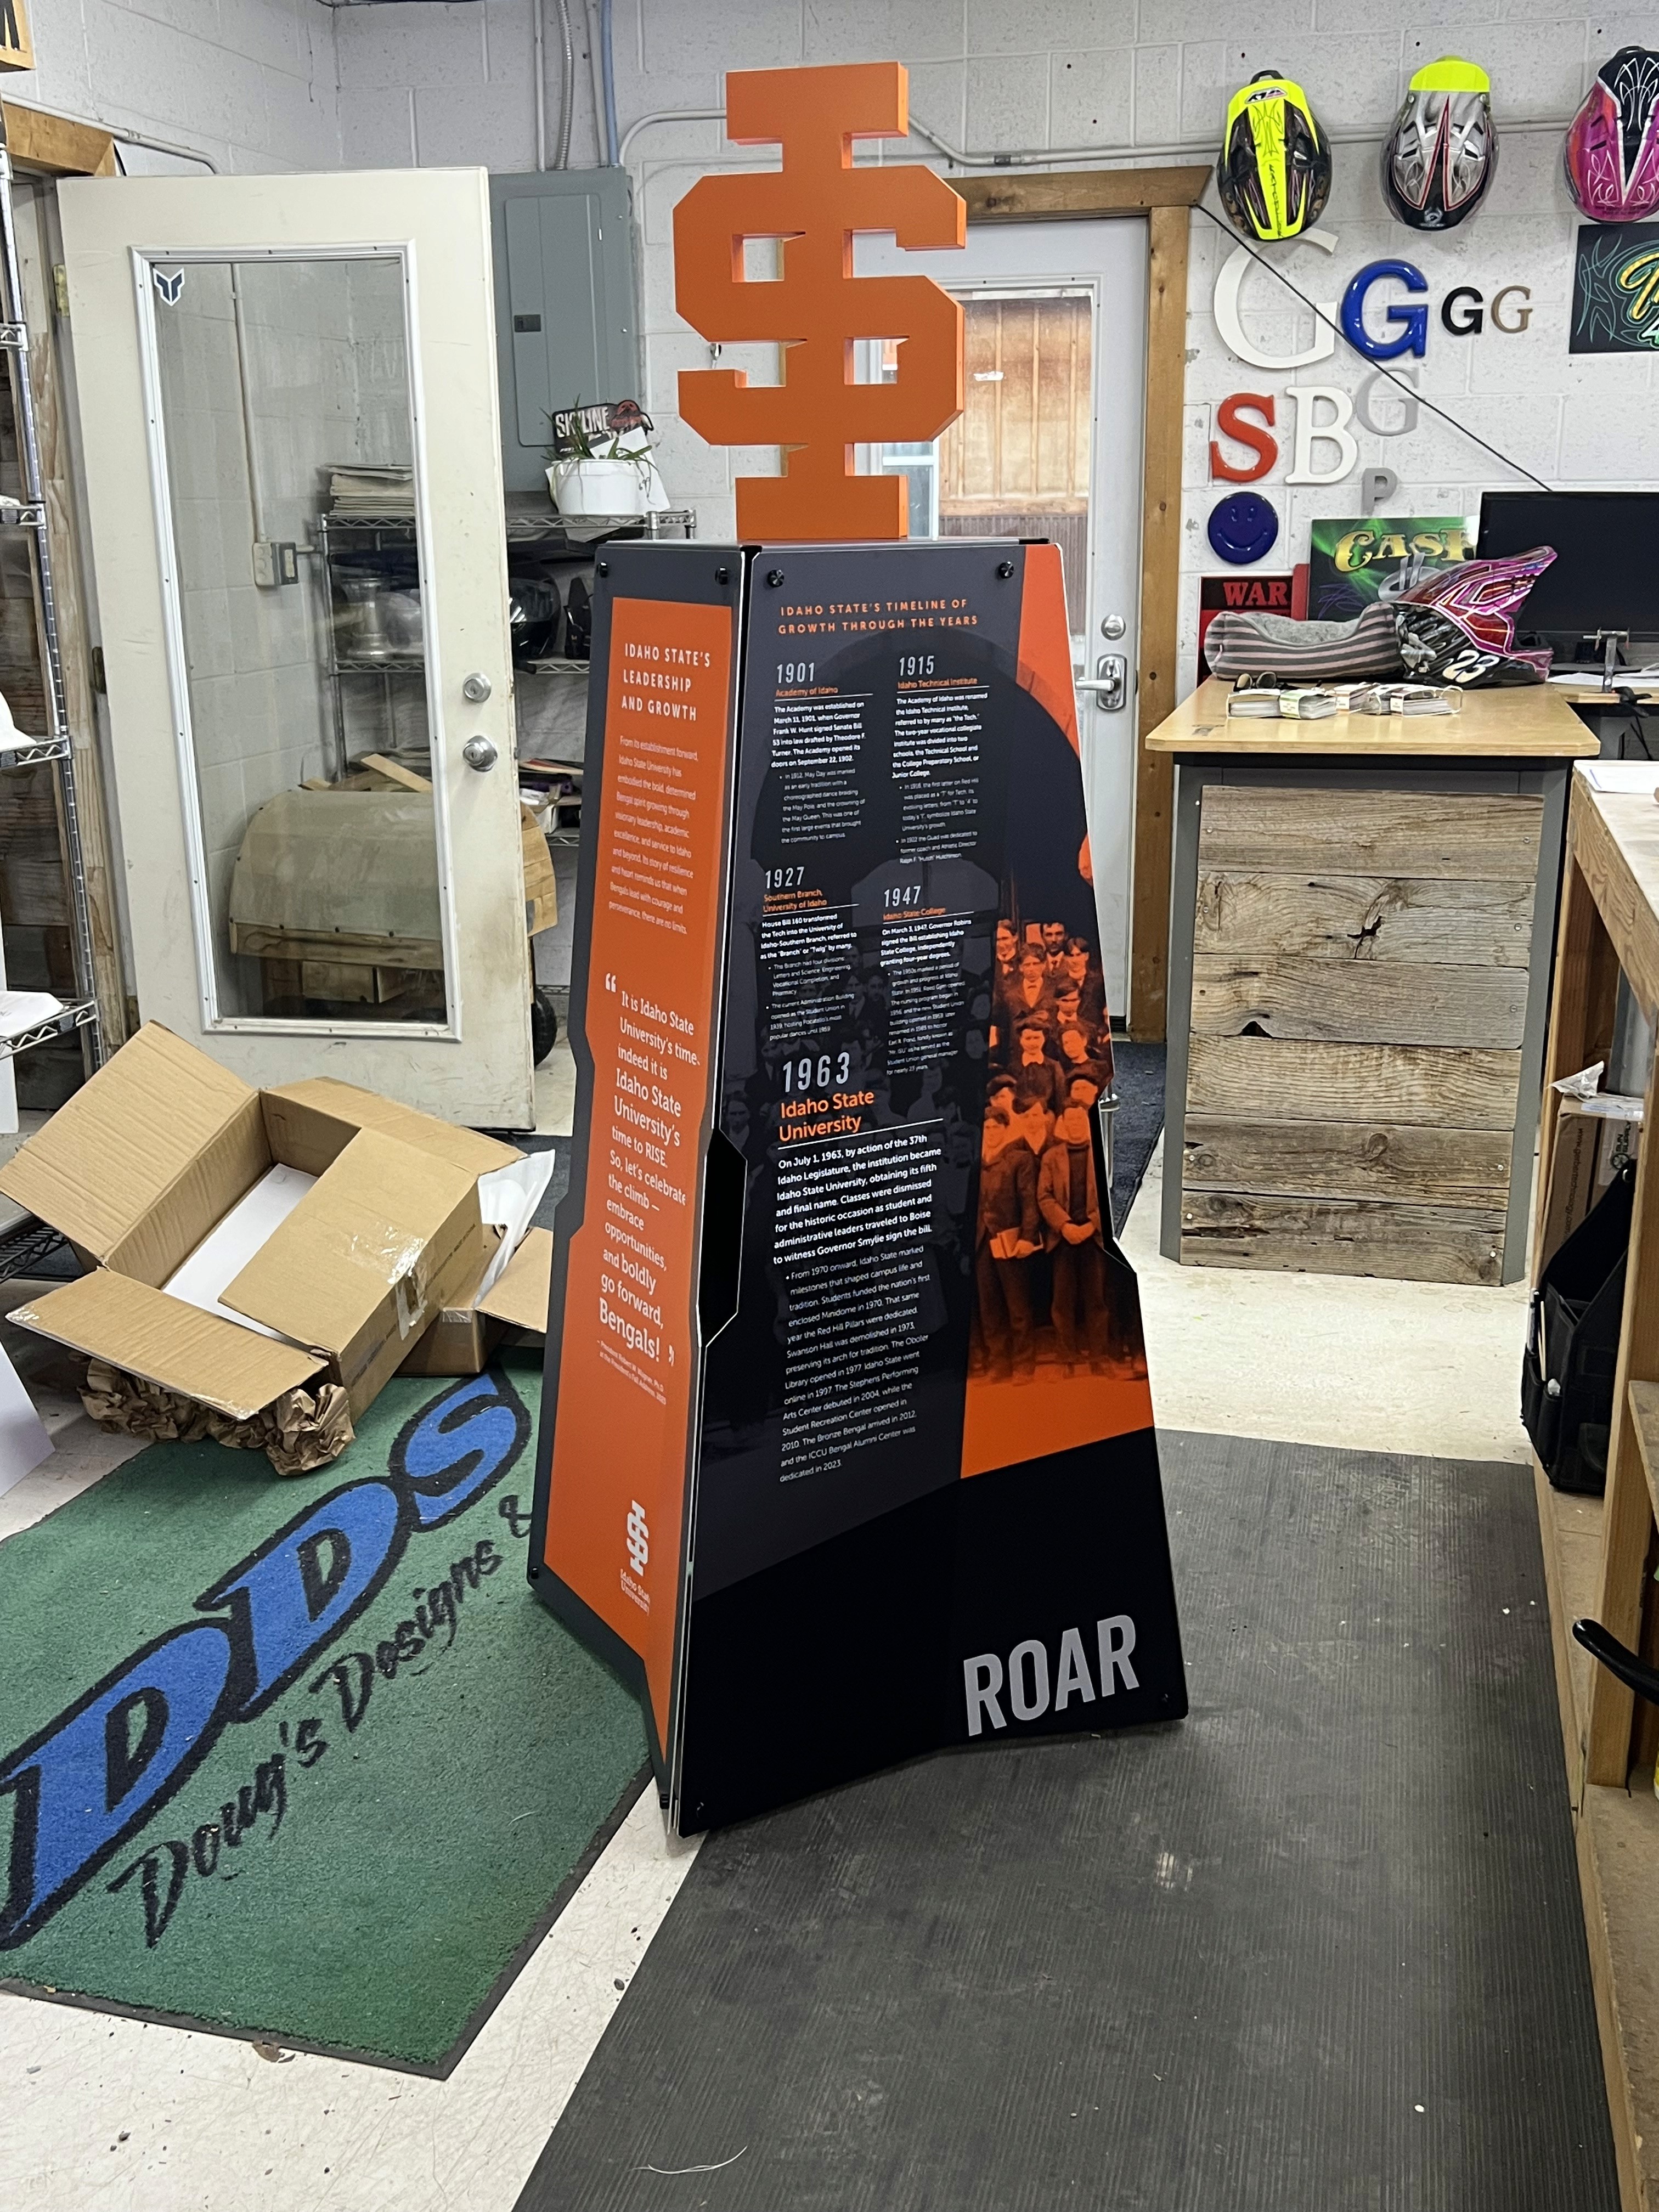
And then once the graphics were made by the Client. We got the panels wrapped by DDS Signs & Graphics.
The Final Result
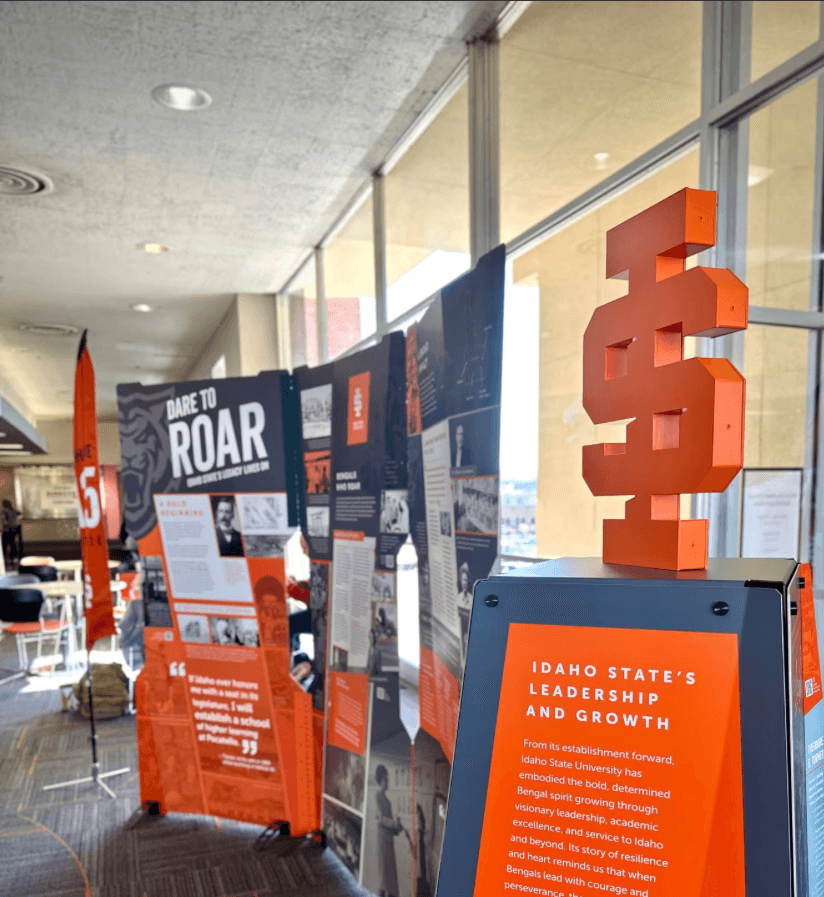
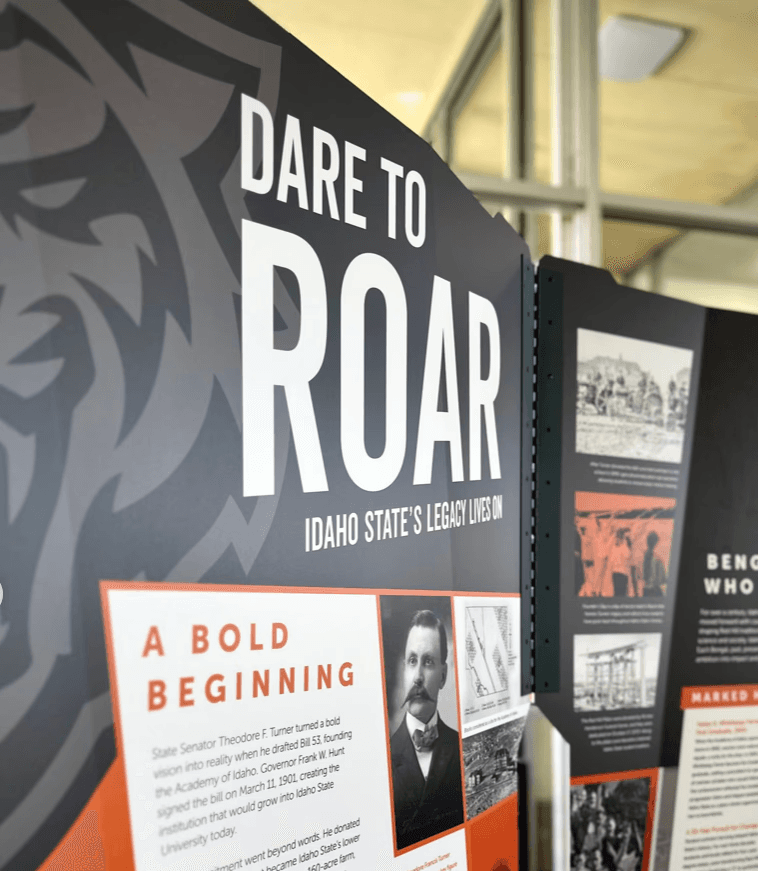
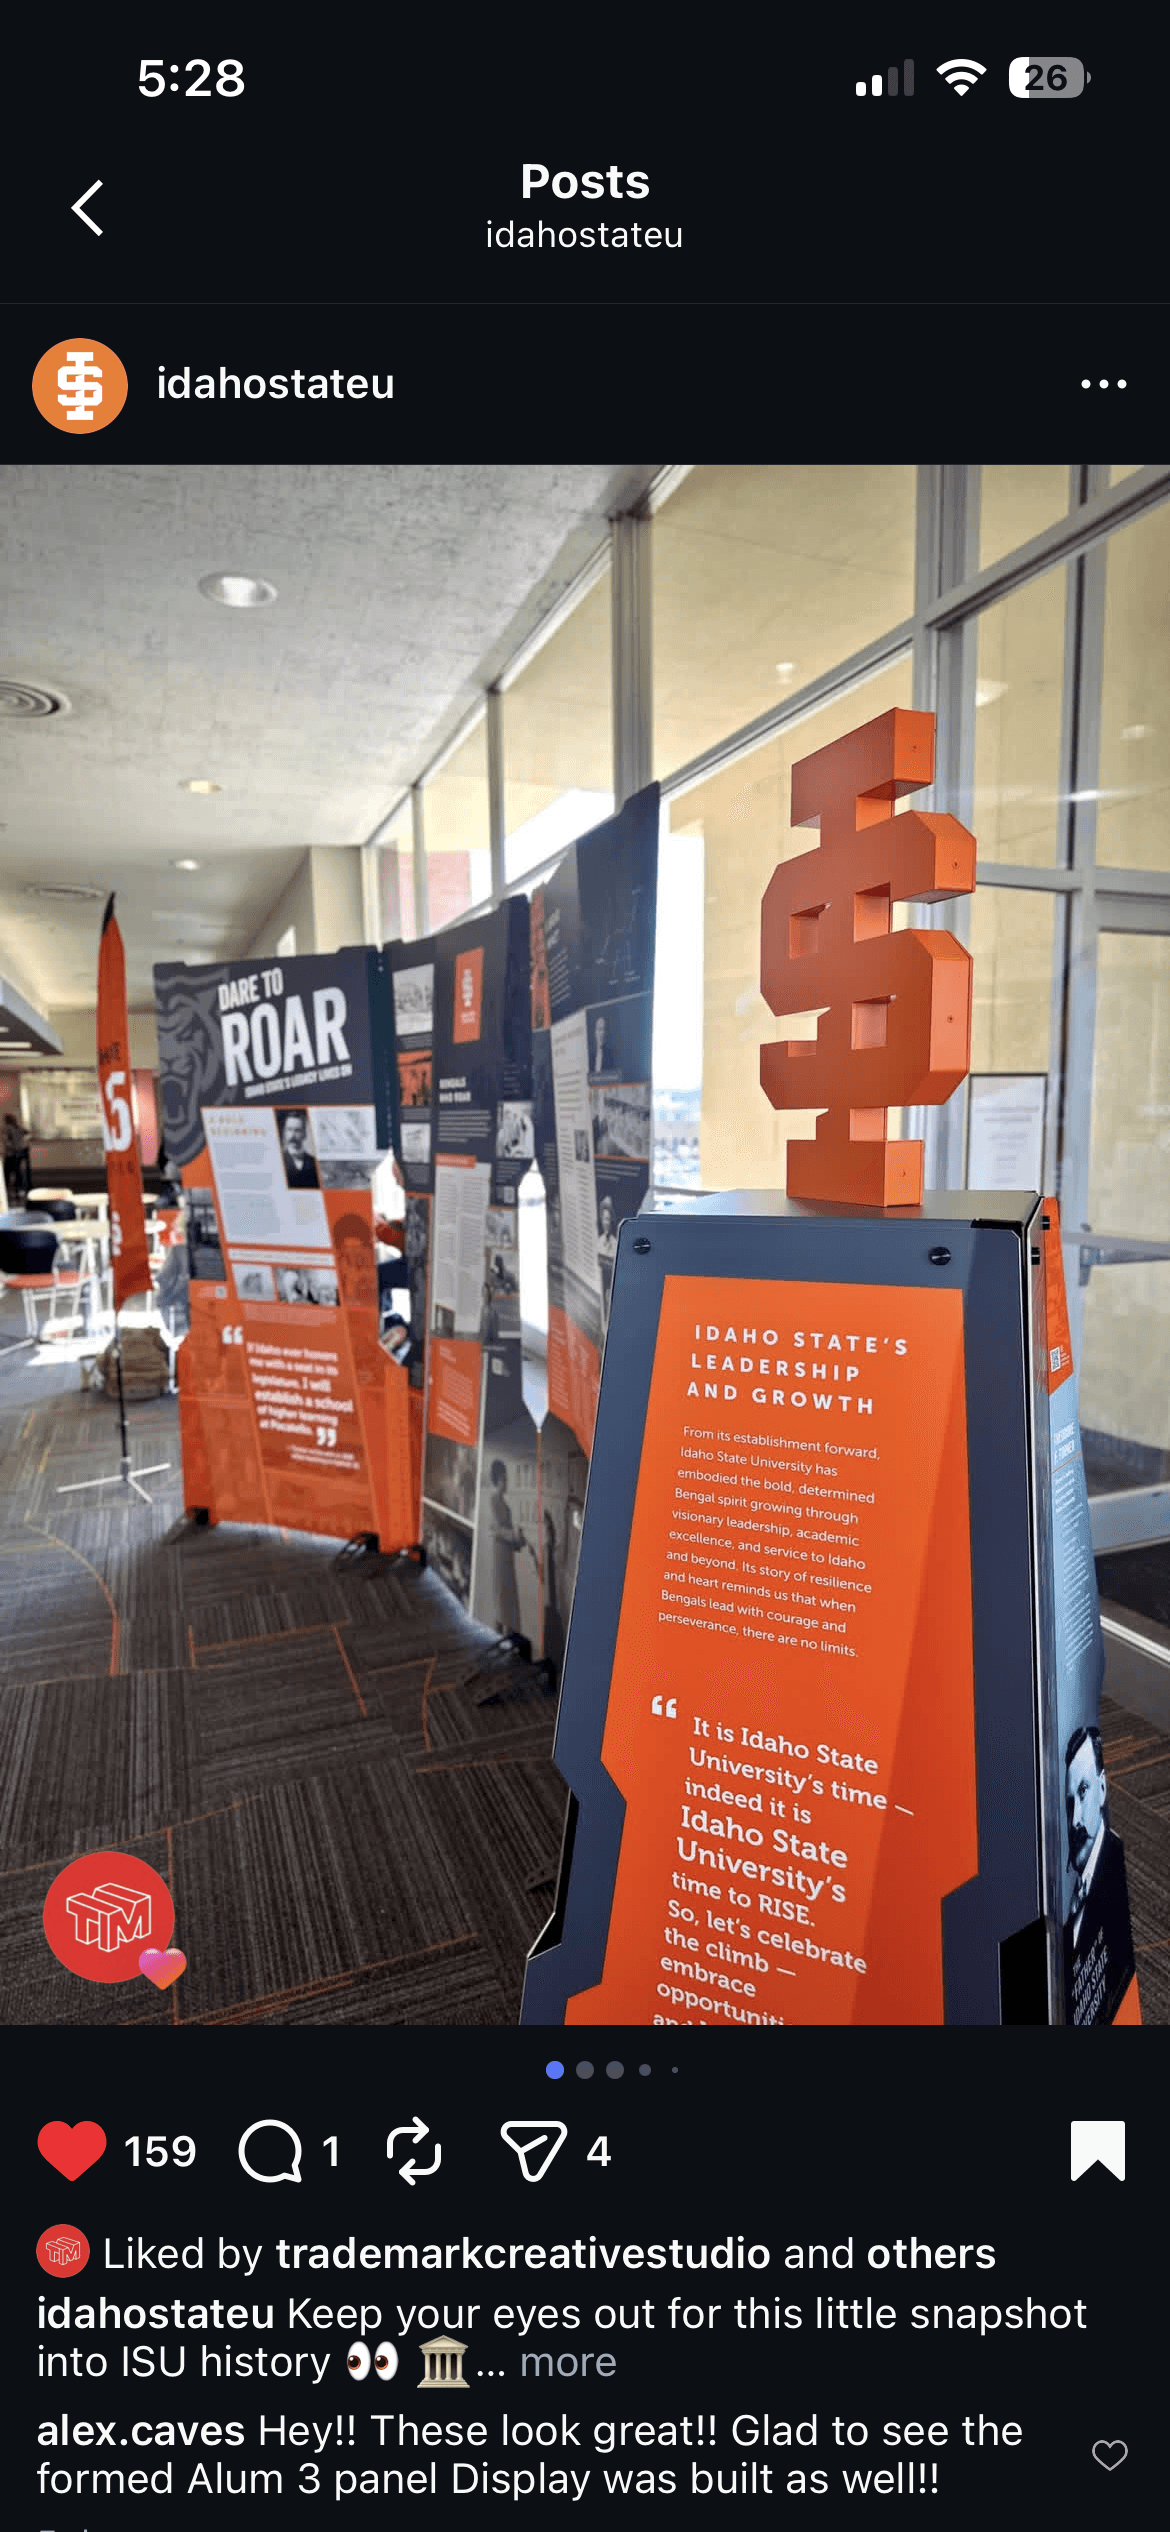
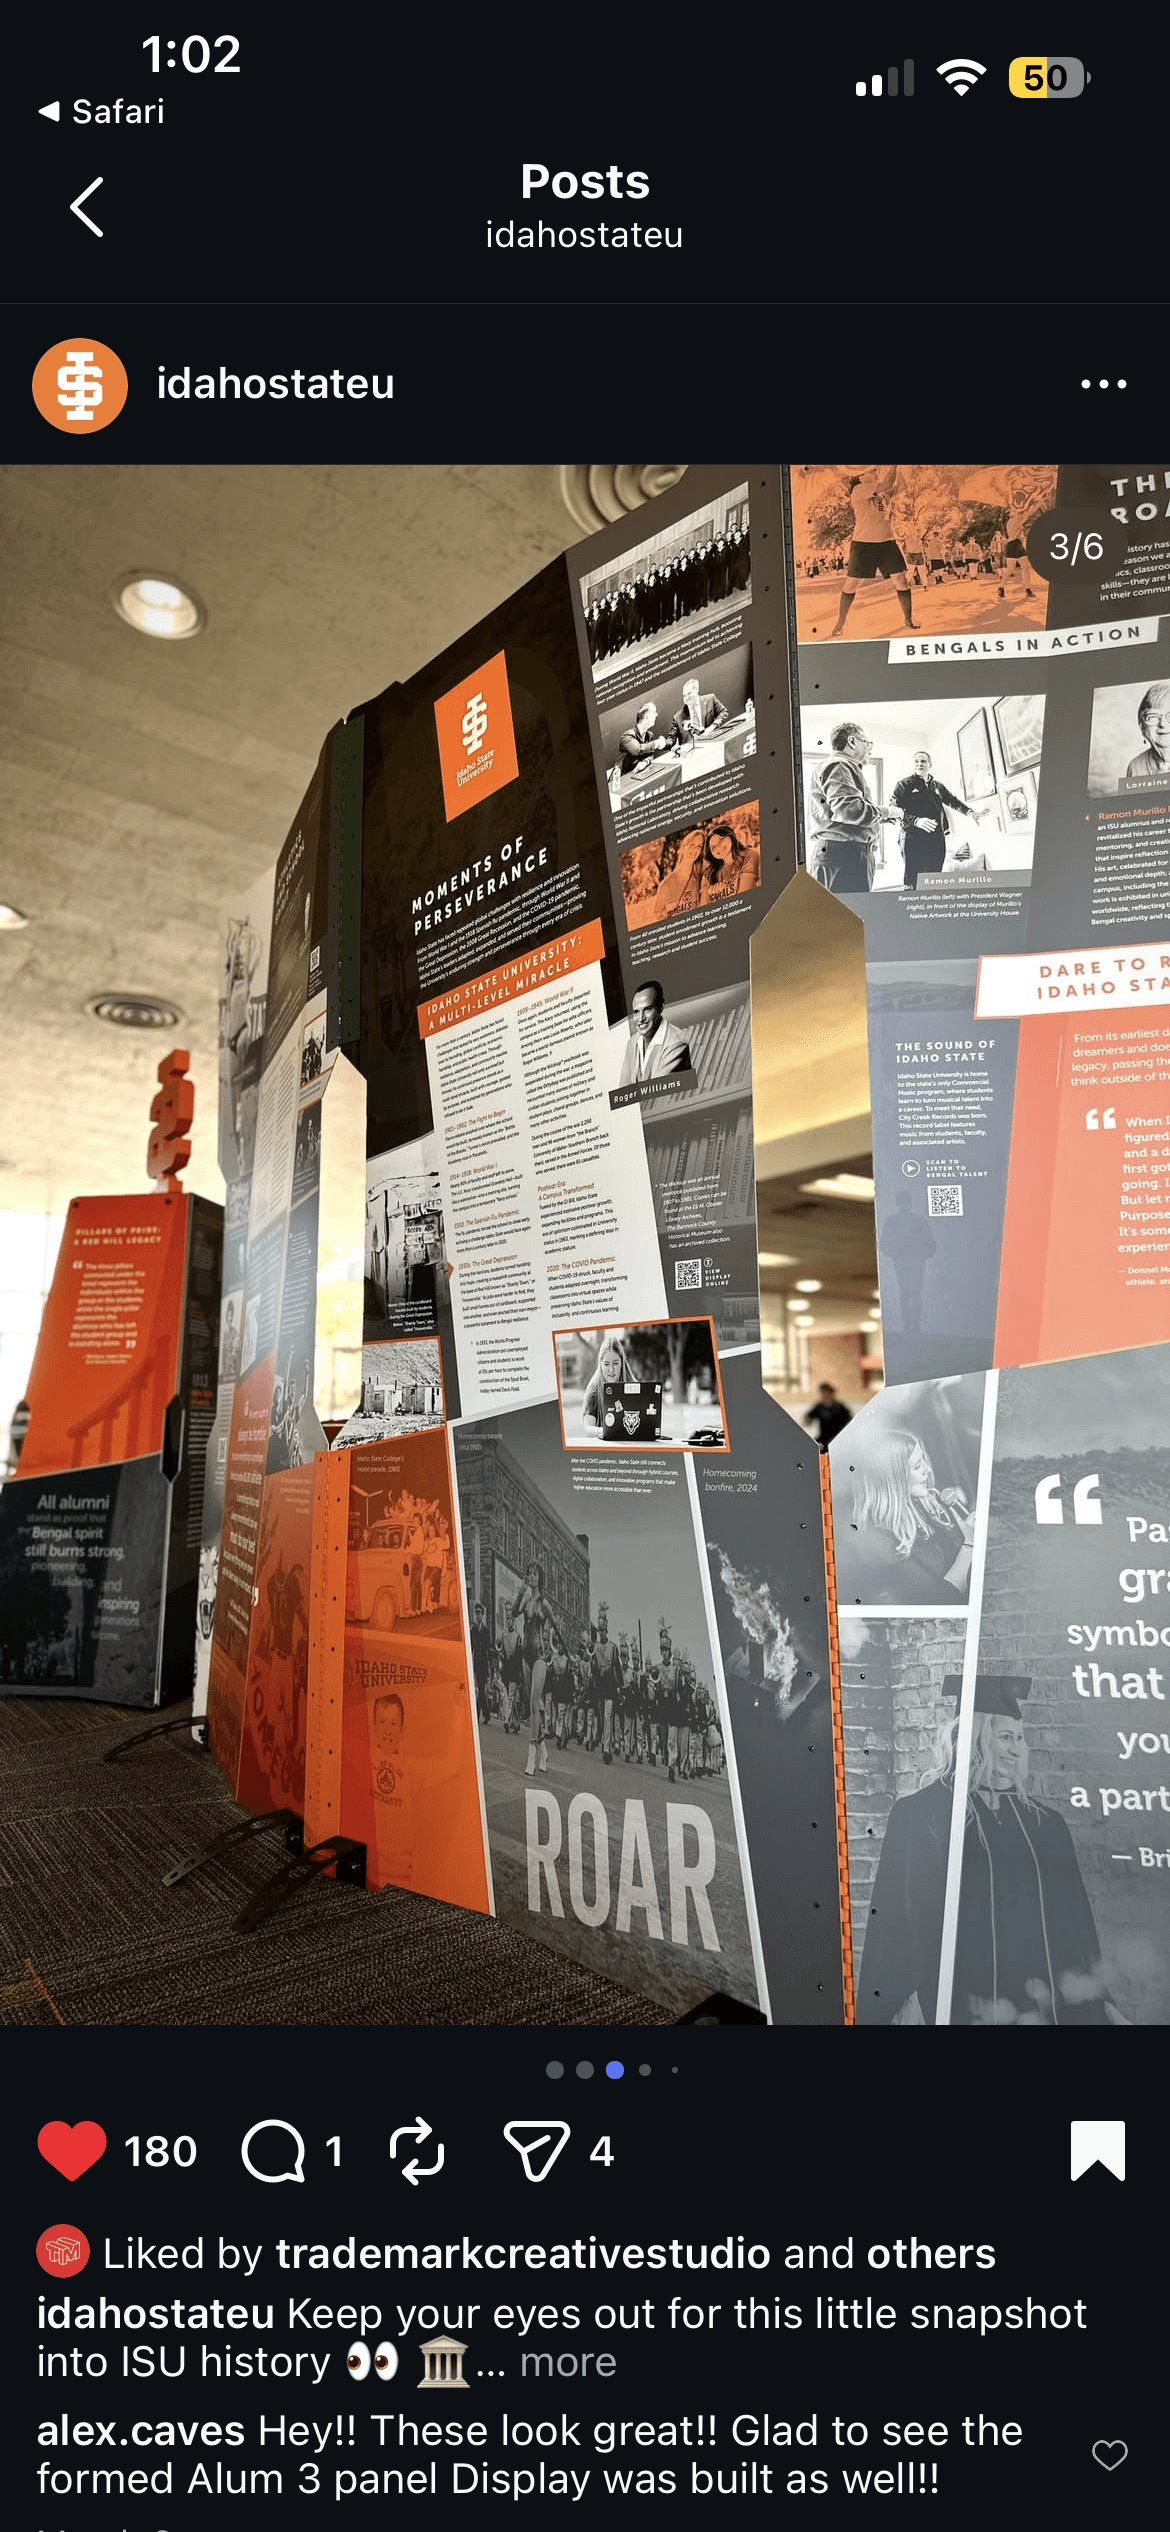
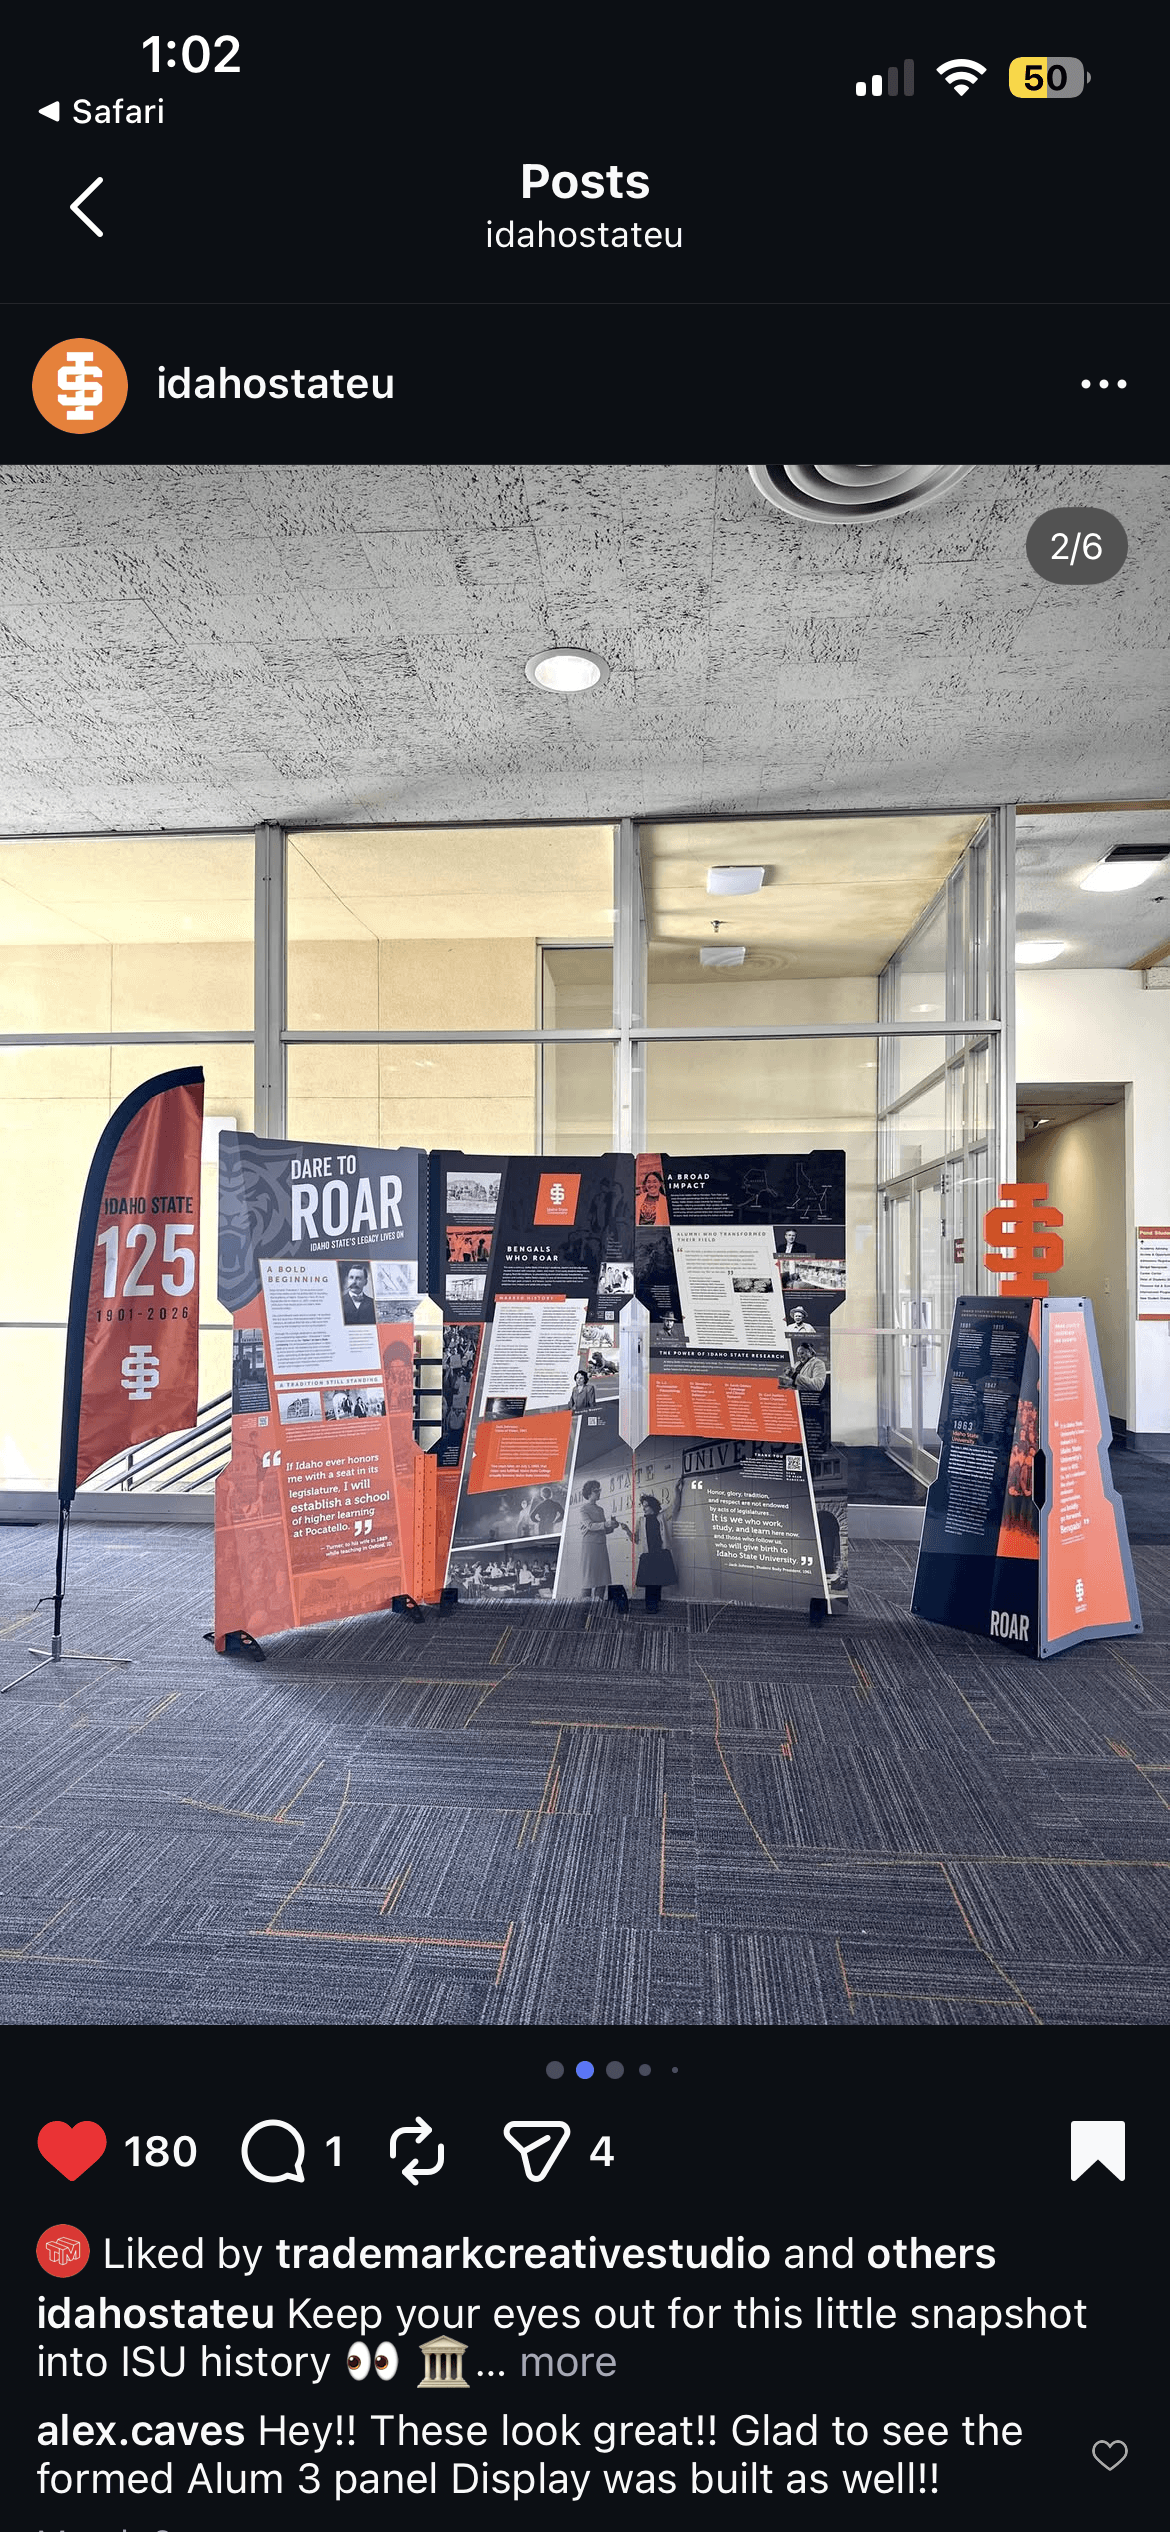
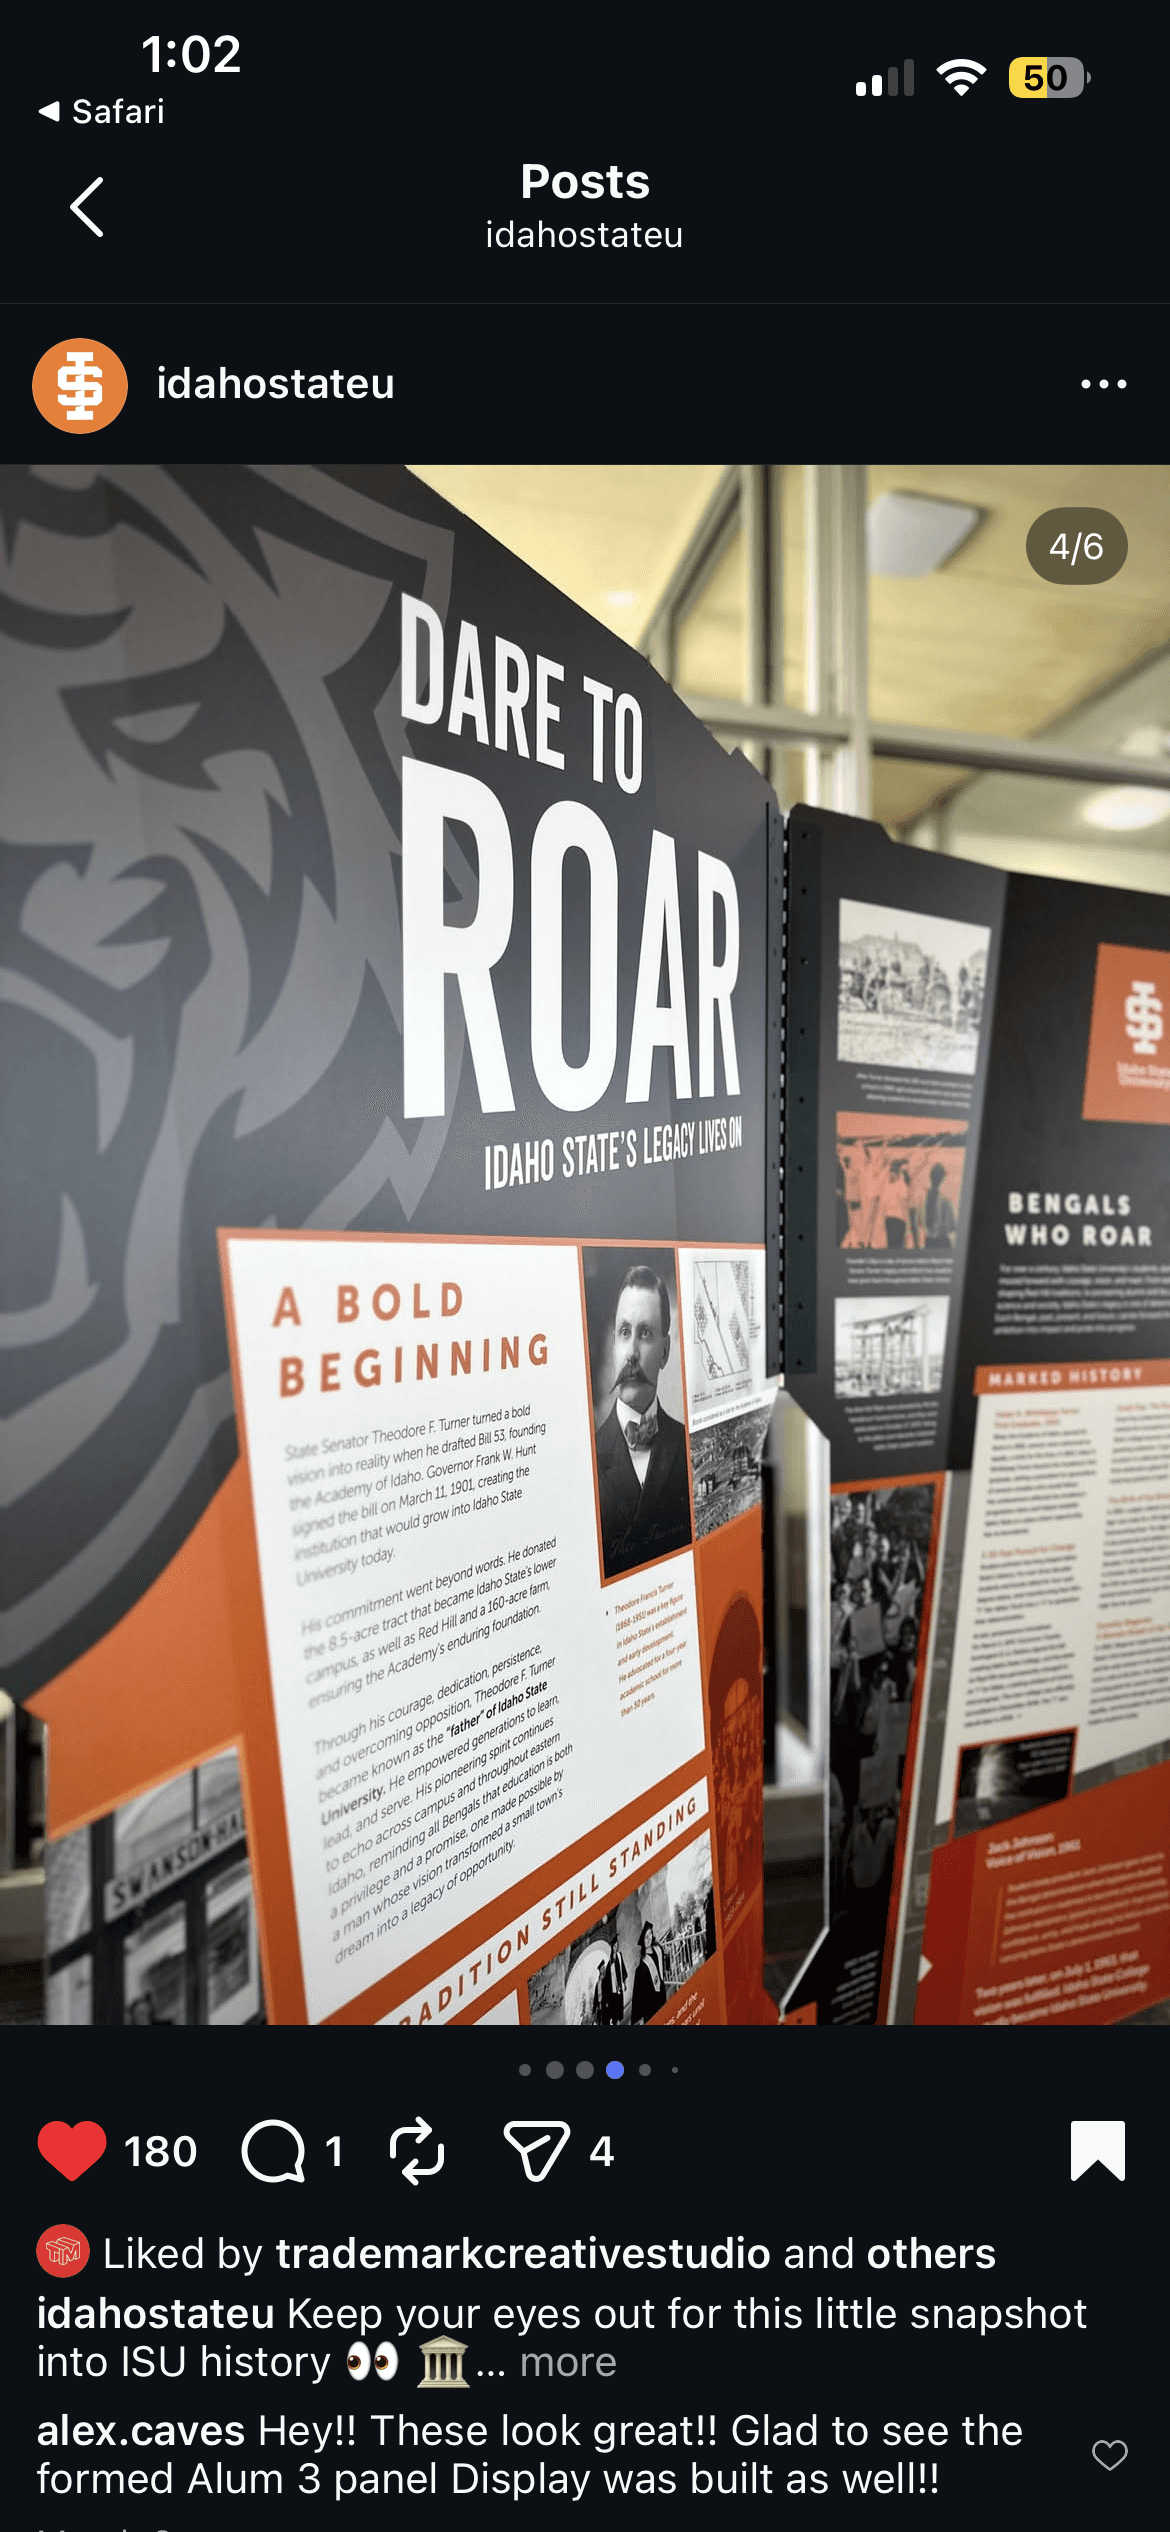
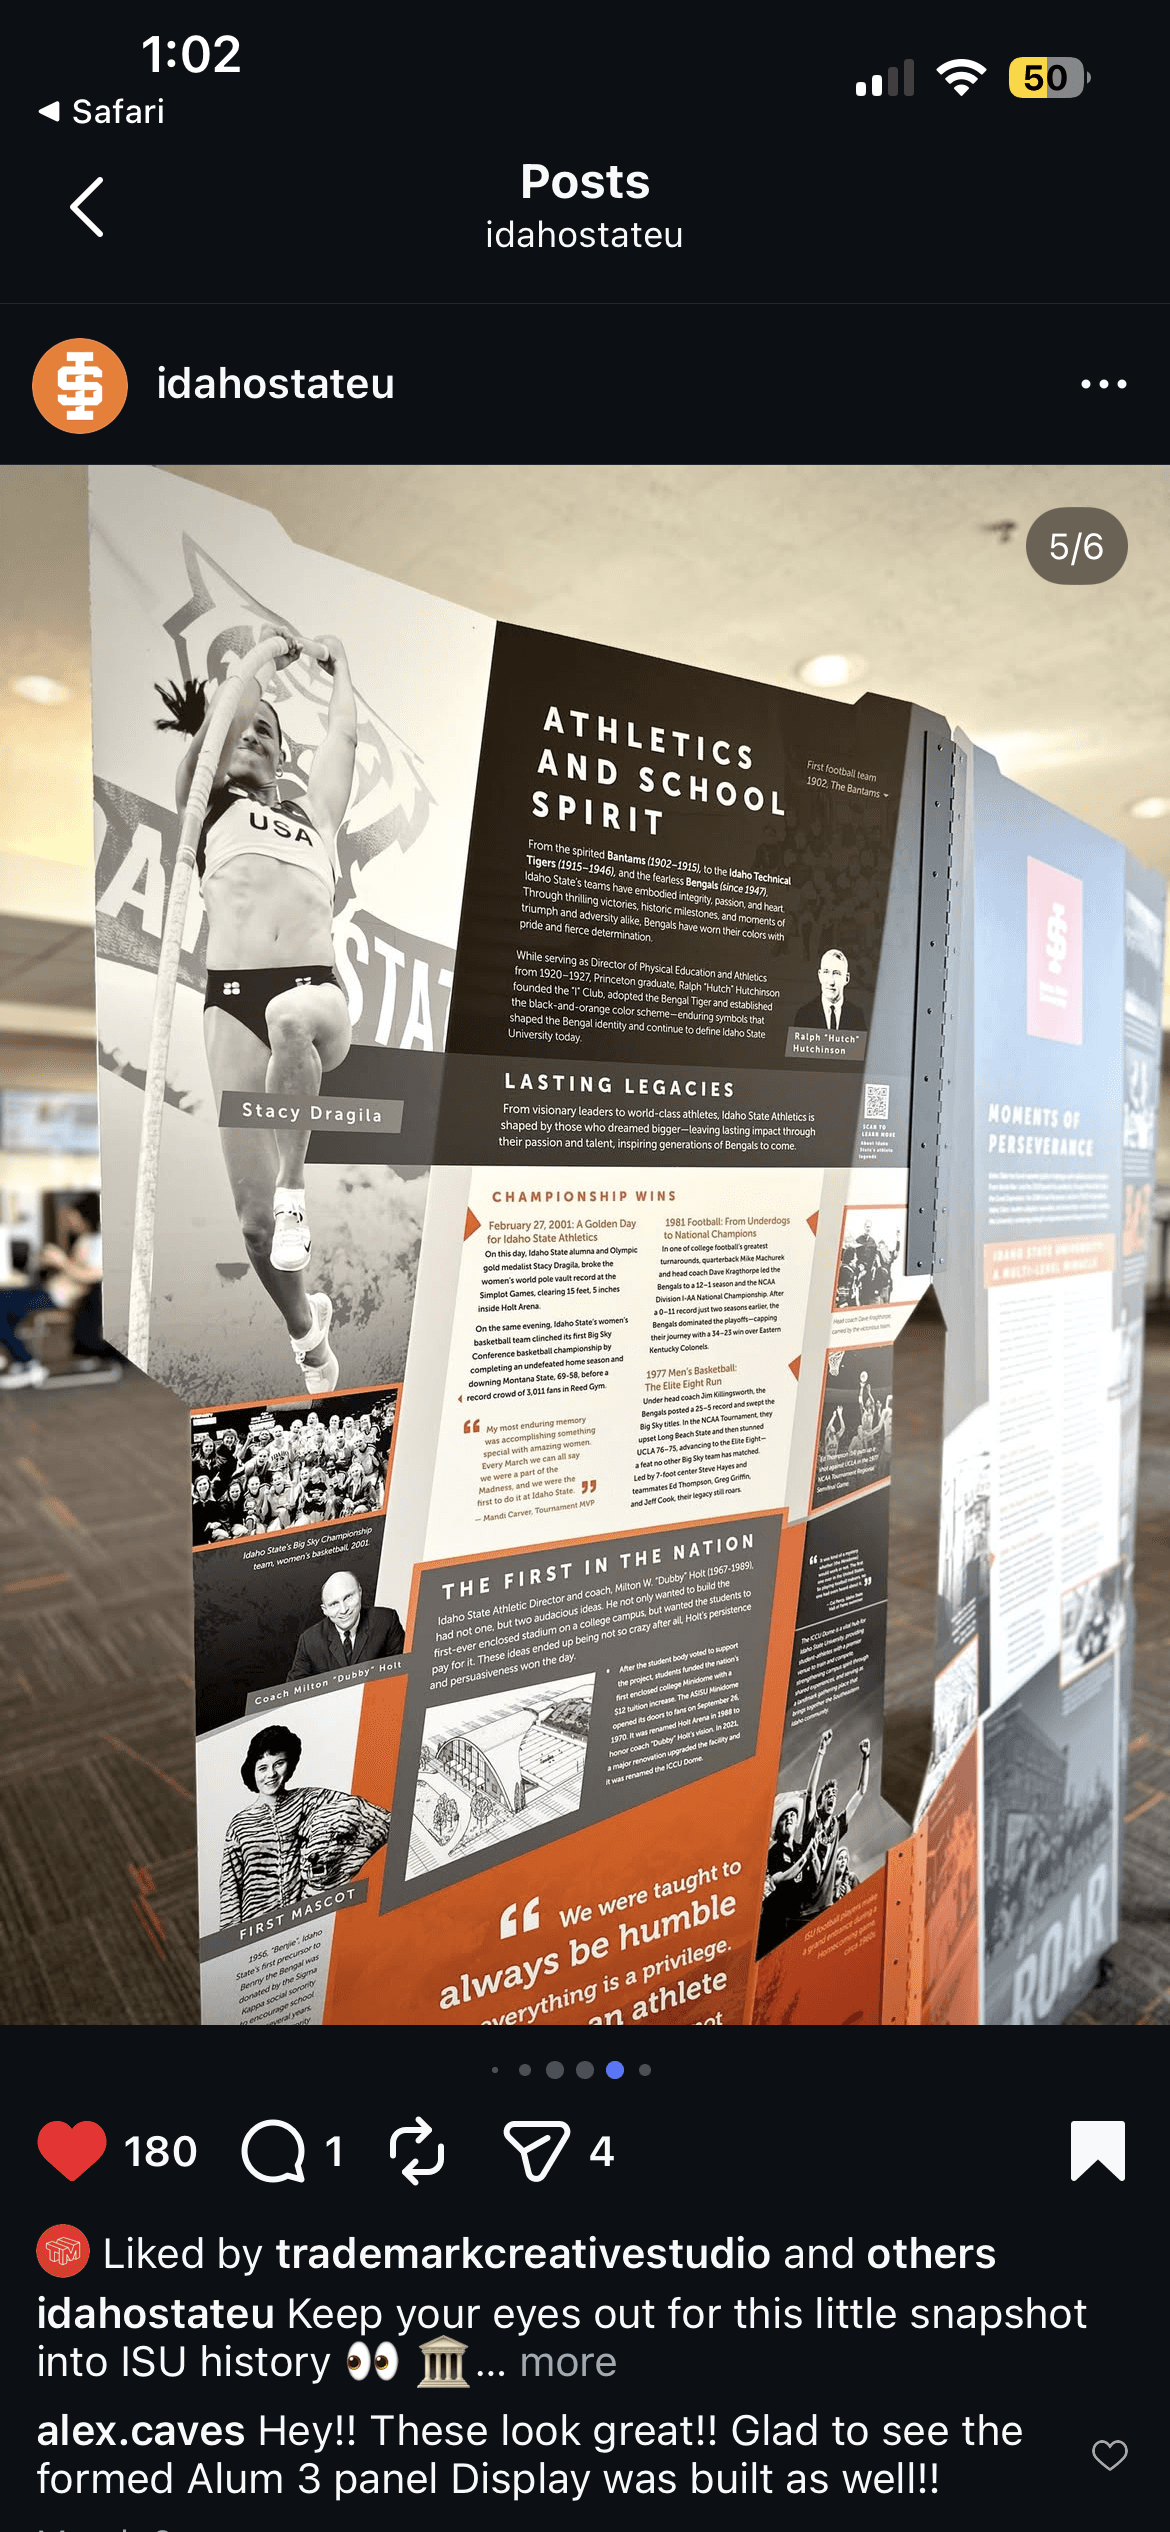
These photos were taken by ISU and posted on their instagram, and I was please to see that they were able to produce 1) Double sided 3 Panel Display with the remaining budget!
They came out fantastic!
Thank you to Iris Evans for the opportunity to build something unique for ISU's Anniversary Year.
"We are so happy with the results, and how everything came together, with both the pedestal, and the metal spirit mark (looks so cool!), plus the 3-panel display engineering. This whole thing wouldn't have been possible without you."
Iris Evans
Graphic Designer | Office of Marketing and Communications